


Models
>
GBRS0FAYARBS
GBRS0FAYARBS General Electric Refrigerator
Jump to:
Find Part by Name
Keep searches simple, eg. "belt" or "pump".
Diagrams for GBRS0FAYARBS
Viewing 8 of 8


Keep searches simple, eg. "belt" or "pump".

$34.97
The light switch in your refrigerator is used to turn the light on and off when the fridge door opens or closes. This is considered a closed switch, which means that when the fridge door depresses the...
In Stock
Order now and your part arrives by Mar 26

$14.65
This genuine OEM replacement part is a bumper for your refrigerator. The bumper is made of orange rubber and measures less than half an inch in diameter. The bumper is used to prevent the fan motor fr...
In Stock
Order now and your part arrives by Mar 26

$56.05
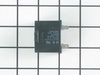
This part helps the compressor kick on and off while maintaining a constant temperature to keep things frozen in your freezer. This part has been updated by the manufacturer and may appear different t...
In Stock
Order now and your part arrives by Mar 26

$71.35
This evaporator fan blade is for your refrigerator, and it circulates air so that the temperature of the fridge is regulated. This model has 3 blades, and is a little more than 4 inches in diameter. I...
In Stock
Order now and your part arrives by Mar 26

$19.90
This part is a replacement light socket for your refrigerator. It connects to the power source, and holds the light bulb. If the light in your refrigerator is not working, you could have a faulty sock...
In Stock
Order now and your part arrives by Mar 26

This is a replacement evaporator fan grommet for your refrigerator. The fan grommet absorbs the vibration from the evaporator fan motor for quiet operation while it runs. If your evaporator fan is unu...
On Order

In Stock
Order now and your part arrives by Mar 26

In Stock
Order now and your part arrives by Mar 26

In Stock
Order now and your part arrives by Mar 26

In Stock
Order now and your part arrives by Mar 26

In Stock
Order now and your part arrives by Mar 26

$14.65
This is a 12-24 TT HX 7/8 S refrigerator or freezer screw. It is a little over 1 inch in total length. This is sourced directly from the original manufacturer.
In Stock
Order now and your part arrives by Mar 26
Questions and Answers
We're sorry, but our Q&A experts are temporarily unavailable.
Please check back later if you still haven't found the answer you need.
Common Problems and Symptoms for GBRS0FAYARBS
Viewing 13 of 13Light not working
Fixed by these parts


How to fix it
Noisy
Fixed by these parts


How to fix it
Will Not Start
Fixed by these parts

How to fix it
Fridge too warm
Fixed by these parts

How to fix it
Freezer section too warm
Fixed by these parts
How to fix it
Fridge and Freezer are too warm
Fixed by these parts
How to fix it
Clicking sound
Fixed by these parts
How to fix it
Freezer not defrosting
Fixed by these parts
How to fix it
Leaking
Fixed by these parts

How to fix it
Fridge runs too long
Fixed by these parts
How to fix it
Too warm
Fixed by these parts
How to fix it
Fridge too cold
Fixed by these parts

How to fix it
Frost buildup
Fixed by these parts
How to fix it


Keep searches simple. Use keywords, e.g. "leaking", "pump", "broken" or "fit".
- Customer:
- Christian from Kearneysville, WV
- Parts Used:
- WR55X24064, WR2X9391
- Difficulty Level:
- Really Easy
- Total Repair Time:
- Less than 15 mins
- Tools:
- Screw drivers
No power to the fan and compressor
I have a fridge in my garage. I have found that a glass of ice water or a cold drink outside is very important to me. When I discovered melting ice dripping onto the garage floor I was very upset. I spun the fridge and found that the compressor and fan weren't starting. I got out my multi-meter and discovered that power was not makin
... Read more
g it to these components. I did some research and found the wiring diagram online. There really isn't too much going on with a fridge and the most likely candidate seemed to be the run capacitor. I ordered the part, replaced it in a few minutes and the fridge began working again.
Read less
Was this instruction helpful to you?
Thank you for voting!
- Customer:
- Jonathan from Lilburn, GA
- Parts Used:
- WR23X37285
- Difficulty Level:
- Really Easy
- Total Repair Time:
- Less than 15 mins
- Tools:
- Pliers, Screw drivers
Sticking Light Switch
I applied some tips learned by reading other reviews. So before I started I grabbed my trusty vise grip pliers and a small screw driver. I locked onto the switch actuator, the part that the refrigerator door pushes in, with the vise grips and pulled on it just hard enough to get the screw driver inserted in the right side to push in the c
... Read more
atch clip so the switch could be pulled out further each time the catch clip was depressed to the next detent. Then I used the screw driver on the left site to encourage the switch past the detents on the left and very quickly the switch was out of the mount. The wires from the refrigerator pulled out with the old switch. I unplugged the old switch from the wires and plugged in the new switch and shoved the new switch back into the mount, wiggled it a couple of times to make sure it was secure and the job was done. Once I applied the vise gripes at first, the whole job took less than a minute.
Read less
Was this instruction helpful to you?
Thank you for voting!
- Customer:
- BENJAMIN from LAKESIDE, CA
- Parts Used:
- WR09X10107
- Difficulty Level:
- Easy
- Total Repair Time:
- 15 - 30 mins
- Tools:
- Nutdriver
Fridge smelled like something electronic was burning
Removed the back cover of the fridge with it still pluged in. The next time the compressor tried to kick on, a small piece of black plastic next to the black tank caught fire, and then went out. I unpluged the fridge, unpluged the two wires feeding the black box. Then the box unpluged from the tank. I searched on the internet for the
... Read more
part using the model #. It ended up being a overload/ptc or relay. There was a smaller black box attached with I think is some sort of an overload. I unplugged the overload and it plugged right into the new relay I had overnighted. Although the new relay was white (not black) and the plug attachments were in different locations, it work great.
Read less
Was this instruction helpful to you?
Thank you for voting!