



Models
>
GNE29GGHEBB
GNE29GGHEBB General Electric Refrigerator
Jump to:
Find Part by Name
Keep searches simple, eg. "belt" or "pump".
Diagrams for GNE29GGHEBB
Viewing 9 of 9


Keep searches simple, eg. "belt" or "pump".
$15.26
This is a door handle fastener to secure the handle to your refrigerator drawer. It is also known and a mounting bolt or screw. It is approximately 1 inch in total length, and is made of metal.
In Stock
Order now and your part arrives by Oct 22
$18.54
This door mounting screw is a genuine OEM part for your appliances. This screw is used to attach the door handles to their studs. If the door handle is loose or falling off, you may need to replace the mounting screw.
In Stock
Order now and your part arrives by Oct 22
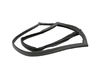
Keep your freezer running efficiently with this replacement door gasket. Made from flexible rubber and plastic in a dark gray finish, it measures about 36 inches wide and 27 inches tall. This gasket f...
In Stock
Order now and your part arrives by Oct 22
This replacement door gasket creates an airtight seal around the fresh food compartment to keep cold air in and warm air out. It helps maintain proper temperatures improves energy efficiency and suppo...
In Stock
Order now and your part arrives by Oct 22
In Stock
Order now and your part arrives by Oct 22
$87.78
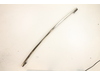
This stainless steel door handle restores a secure grip and clean look to your refrigerator. It’s a simple solution for damaged or loose handles and installs easily.
On Order
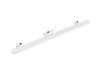
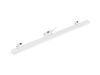
This folding door assembly seals the gap between French-style refrigerator doors to keep cold air in and warm air out. It helps maintain temperature, reduce moisture buildup, and ensure proper door al...
In Stock
Order now and your part arrives by Oct 22
In Stock
Order now and your part arrives by Oct 22
In Stock
Order now and your part arrives by Oct 22
Special Order
$80.25
This front cover assembly provides a finished appearance while protecting internal components. Designed for durability, it helps maintain structural integrity and visual appeal.
In Stock
Order now and your part arrives by Oct 22

Special Order
Common Problems and Symptoms for GNE29GGHEBB
Viewing 7 of 7Frost buildup
Fixed by these parts
How to fix it
Door Sweating
Fixed by these parts
How to fix it
Light not working
Fixed by these parts
How to fix it
Door won’t open or close
Fixed by these parts
How to fix it
Leaking
Fixed by these parts
How to fix it
Freezer not defrosting
Fixed by these parts
How to fix it
Freezer section too warm
Fixed by these parts
How to fix it
Keep searches simple. Use keywords, e.g. "leaking", "pump", "broken" or "fit".
- Customer:
- David from DIAMOND BAR, CA
- Parts Used:
- WR17X13240
- Difficulty Level:
- Very Easy
- Total Repair Time:
- Less than 15 mins
- Tools:
- Screw drivers
Mullion not working. Replaced mullion.
1. Turned power off.
2. Removed 2 screws holding plastid plate which connected electrical wire from mullion to door (requires Torq-tip screwdriver).
3. Unplugged wire plug behind the plate.
4. Lifted up old mullion from 2 slots holding it in place to remove it from door.
5. Inserted new mullion into slots on door. ... Read more
6. Connected electrical wire to plug inside door.
7. Screwed 2 screws to reattached plastic plate to door.
8. Turned power back on.
2. Removed 2 screws holding plastid plate which connected electrical wire from mullion to door (requires Torq-tip screwdriver).
3. Unplugged wire plug behind the plate.
4. Lifted up old mullion from 2 slots holding it in place to remove it from door.
5. Inserted new mullion into slots on door. ... Read more
6. Connected electrical wire to plug inside door.
7. Screwed 2 screws to reattached plastic plate to door.
8. Turned power back on.
Read less
Was this instruction helpful to you?
Thank you for voting!
- Customer:
- brian from CLOQUET, MN
- Parts Used:
- WR23X29170
- Difficulty Level:
- Very Easy
- Total Repair Time:
- 15 - 30 mins
- Tools:
- Screw drivers
Interior light would not come on when right hand door was open
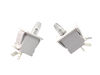
Remove the screws from the two door pivot covers. Remove the covers and set aside. Remove the screws from the control board; disconnect the electrical connections; remove the door light switch, install door light switch then reinstall everything.
Was this instruction helpful to you?
Thank you for voting!