


Models
>
GTK21GBEBS
GTK21GBEBS General Electric Refrigerator
Jump to:
Find Part by Name
Keep searches simple, eg. "belt" or "pump".
Diagrams for GTK21GBEBS
Viewing 6 of 6


Manuals & Guides for GTK21GBEBS
Click to downloadInstall
Installation Instructions
(1.59MB)
Manual
Owner's Manuals
(16.69MB)
Manual
Owner's Manuals
(0.30MB)
Specs
Product Specifications Sheet
(0.1MB)
Keep searches simple, eg. "belt" or "pump".

$21.95
This 40-Watt light bulb is sold individually.
It is specially designed to withstand extreme temperatures, so this bulb is compatible with a variety of appliance types including refrigerators, ranges,...
In Stock
Order now and your part arrives by Aug 4

In Stock
Order now and your part arrives by Aug 4

The evaporator fan blade circulates air through the interior compartment of the refrigerator to improve the cooling efficiency. If your refrigerator is too warm, or too cold check to ensure the fan bl...
No Longer Available


$115.59
This vegetable case cover is a replacement storage component designed to sit above a drawer, helping support items and maintain organized storage. It is commonly replaced when cracked, warped, or unab...
Special Order


Common Problems and Symptoms for GTK21GBEBS
Viewing 2 of 2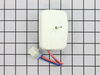

Keep searches simple. Use keywords, e.g. "leaking", "pump", "broken" or "fit".
- Customer:
- Leo from TWIN FALLS, ID
- Parts Used:
- 40A15
- Difficulty Level:
- Really Easy
- Total Repair Time:
- Less than 15 mins
- Tools:
- Nutdriver
Interior light needed replaced
Unplugged the appliance for safety. Removed two 1/4" screws that held the assembly in place. Carefully removed the wire guard that retains the glass shield. Unscrewed old light bulb and replaced with new part. Reversed the steps after cleaning glass cover.
Was this instruction helpful to you?
Thank you for voting!
- Customer:
- Thomas from BROOKFIELD, CT
- Parts Used:
- WR60X26085
- Difficulty Level:
- Easy
- Total Repair Time:
- 30 - 60 mins
- Tools:
- Nutdriver, Screw drivers
Very noisy freezer motor.
I placed the freezer contents temporarily in the refrigerator section. Unplugged the refrigerator. Removed the shelf, removed four Philips screws and the cap in the upper left corner. Disconnected the Molex plug from the refrigerator wall. Placed the panel containing the evaporator motor on the workbench.Removed the plastic panel. Using
... Read more
a 1/4" nutdriver removed the bracket holding the evaporator fan motor. Saved the rubber insulators holding the motor in place. Disconnected the in-line Molex connector. Mounted the new motor using the rubber insulators, reassembled the brackets, replaced the plastic air dissipation panel, reconnected the Molex connector into the refrigerator wall, remounted the panel in the freezer, reloaded the freezer and the noise was no longer and there was the cold air again.
Read less
Was this instruction helpful to you?
Thank you for voting!
- Customer:
- Barbara from BELLEVUE, WA
- Parts Used:
- 40A15
- Difficulty Level:
- Very Difficult
- Total Repair Time:
- Less than 15 mins
Twice I ordered the oven light bulb & each time the light bulb was defected
I had to call for a appointment for repair with GE Appliance because I thought then it . .was something electrical. The technician came out & checked everything out, turned out it was not electrical, The technician went out to his truck got a light bulb from his truck, put it in & it worked. It cost me $121.00 for trip charge from GE appl
... Read more
iance for a light bulb that worked, your light bulbs were defective twice. Very disappointed with your products, cost me alot of money for a good light bulb thru GE appliance
Read less
Was this instruction helpful to you?
Thank you for voting!