


Models
>
GBS18KBPBCC
GBS18KBPBCC General Electric Refrigerator
Jump to:
Find Part by Name
Keep searches simple, eg. "belt" or "pump".
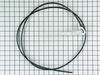
Diagrams for GBS18KBPBCC
Viewing 5 of 5


Keep searches simple, eg. "belt" or "pump".

$41.25
This is a replacement fill tube and grommet assembly for your refrigerator. This part acts your water line to your ice maker. If you’re noticing water in the back of the refrigerator or any kind of le...
In Stock
Order now and your part arrives by Apr 2

In Stock
Order now and your part arrives by Apr 2

$39.63
This refrigerator defrost timer will cycle for thirty minutes after every ten hours of run time.
In Stock
Order now and your part arrives by Apr 2

In Stock
Order now and your part arrives by Apr 2

In Stock
Order now and your part arrives by Apr 2

The ice maker fill cup directs the water into the ice maker cube mold during the fill cycle.
In Stock
Order now and your part arrives by Apr 2

In Stock
Order now and your part arrives by Apr 2

$126.99
This evaporator fan motor is located in the back of the freezer, and circulates air over the refrigerator coils. These coils will convert the heat into cool air, which is then circulated.
In Stock
Order now and your part arrives by Apr 2

$15.26
Size: 10-16 ab. * Part may differ in appearance, but functions same as original. Sold Individually.
Special Order


Questions and Answers
We're sorry, but our Q&A experts are temporarily unavailable.
Please check back later if you still haven't found the answer you need.
Common Problems and Symptoms for GBS18KBPBCC
Viewing 7 of 7Leaking
Fixed by these parts
How to fix it
Fridge too warm
Fixed by these parts


How to fix it
Noisy
Fixed by these parts

How to fix it
Ice maker not making ice
Fixed by these parts

How to fix it
Will Not Start
Fixed by these parts

How to fix it
Freezer not defrosting
Fixed by these parts
How to fix it
Not dispensing water
Fixed by these parts
How to fix it
Keep searches simple. Use keywords, e.g. "leaking", "pump", "broken" or "fit".
- Customer:
- BENJAMIN from LAKESIDE, CA
- Parts Used:
- WR09X10107
- Difficulty Level:
- Easy
- Total Repair Time:
- 15 - 30 mins
- Tools:
- Nutdriver
Fridge smelled like something electronic was burning
Removed the back cover of the fridge with it still pluged in. The next time the compressor tried to kick on, a small piece of black plastic next to the black tank caught fire, and then went out. I unpluged the fridge, unpluged the two wires feeding the black box. Then the box unpluged from the tank. I searched on the internet for the
... Read more
part using the model #. It ended up being a overload/ptc or relay. There was a smaller black box attached with I think is some sort of an overload. I unplugged the overload and it plugged right into the new relay I had overnighted. Although the new relay was white (not black) and the plug attachments were in different locations, it work great.
Read less
Was this instruction helpful to you?
Thank you for voting!
- Customer:
- Joe from Hallsville, TX
- Parts Used:
- WR60X10300
- Difficulty Level:
- A Bit Difficult
- Total Repair Time:
- 30 - 60 mins
- Tools:
- Screw drivers, Wrench set
Refrigerator wasn't cooling.
I checked the compressor and it was running. Next I removed the doors amd screws that held the divider strip. Next removed the bottom of the freezer to expose the evaporator fan. Removed the fan and checked it out with volt ohm meter. Discovered the fan motor was out. Ordered new one on line and received thenext delivery day. Insatlled in
... Read more
reverse of disassembly. When I plugged it in everything worked fine. Thanks for the quick delivery. You provided fine service.
Sincerely,
Joe Sutphen
Sincerely,
Joe Sutphen
Read less
Was this instruction helpful to you?
Thank you for voting!
- Customer:
- Richard from The Villages, FL
- Parts Used:
- WR17X11168
- Difficulty Level:
- Easy
- Total Repair Time:
- 30 - 60 mins
- Tools:
- Screw drivers, Socket set
Tube feeding ice maker leaking.
Moved refrigerator out from wall. On the back of the refrigerator at the bottom there is a metal plate. Removed this plate with a socket wrench to expose where the end of the tube pluged in. The grommet securing the tube, white on my unit, had to be pushed up to release the old tube. I pushed the new tube into where the old one was and it
... Read more
self secured the tube. The other end of the grommet I pushed through the hole feeding the ice maker,first pushing out the broked part with a screwdriver,and securing that end with the attached sticky tape already attached to the grommet. I cleaned the area around the hole with alcohol before attaching the grommet.Replaced metal plate and done. No leaks.
Read less
Was this instruction helpful to you?
Thank you for voting!