


Models
>
TPX21BRXDBB
TPX21BRXDBB General Electric Refrigerator
Jump to:
Find Part by Name
Keep searches simple, eg. "belt" or "pump".
Diagrams for TPX21BRXDBB
Viewing 6 of 6


Keep searches simple, eg. "belt" or "pump".

This is a genuine OEM replacement door flap for the ice maker in your refrigerator. This part goes by many different names, including door recess assembly, ice door assembly, dispenser door, ice chute...
In Stock
Order now and your part arrives by Aug 1

$21.95
This 40-Watt light bulb is sold individually.
It is specially designed to withstand extreme temperatures, so this bulb is compatible with a variety of appliance types including refrigerators, ranges,...
In Stock
Order now and your part arrives by Aug 1

$41.26
This part is the replacement water line for your refrigerator. It is a long plastic tube, which is 5/16 of an inch in diameter. If your refrigerator is leaking, or will not dispense water or ice, you ...
In Stock
Order now and your part arrives by Aug 1

$320.10
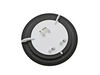
This auger and bucket assembly is used on 25 cubic feet and 27 cubic feet side by side models.
In Stock
Order now and your part arrives by Aug 1

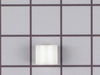
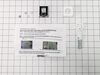
This kit includes 1 cube solenoid, 1 armature, 2 tooth washers and 2 1/4 hex head screws.
In Stock
Order now and your part arrives by Aug 1

In Stock
Order now and your part arrives by Aug 1

When activated, the auger rotates and pushes ice out of the bin through the chute to the user.
No Longer Available

On Order

In Stock
Order now and your part arrives by Aug 1


Special Order

Special Order
Common Problems and Symptoms for TPX21BRXDBB
Viewing 12 of 12Leaking
Fixed by these parts
How to fix it
Ice maker won’t dispense ice
Fixed by these parts
How to fix it
Door Sweating
Fixed by these parts
How to fix it
Not dispensing water
Fixed by these parts
How to fix it
Frost buildup
Fixed by these parts
How to fix it
Door won’t open or close
Fixed by these parts
How to fix it
Freezer section too warm
Fixed by these parts
How to fix it
Ice maker not making ice
Fixed by these parts
How to fix it
Freezer not defrosting
Fixed by these parts
How to fix it
Ice maker dispenses too little ice
Fixed by these parts
How to fix it
Fridge too warm
Fixed by these parts
How to fix it
Ice maker dispenses too much ice
Fixed by these parts
How to fix it


Keep searches simple. Use keywords, e.g. "leaking", "pump", "broken" or "fit".
- Customer:
- Michael from Antioch, CA
- Parts Used:
- WR17X4312
- Difficulty Level:
- Really Easy
- Total Repair Time:
- Less than 15 mins
- Tools:
- Screw drivers
The oiginal Ice Bucket auger became rusty and discoloered the ice.
I went on line to find the part. Luckily I found PartSelect.com. All I had to do was enter the model number into the search box and scroll through the list of parts.
I ordered the part over the weekend and recieved it on Tuesday!
All I had to do was remove 4 screws from the original Ice Bucket and attach the new one.
Perfec ... Read more t fit in under 15 minutes!
Awesome place to do business with! I hope I never have to do another repair, but if I do I will go to PartSelect first!
Read less
Was this instruction helpful to you?
Thank you for voting!
- Customer:
- James from Greenville, NC
- Parts Used:
- WR62X23154
- Difficulty Level:
- Difficult
- Total Repair Time:
- More than 2 hours
- Tools:
- Nutdriver, Screw drivers
Ice maker dispensed crushed ice but not cubes
Removed the ice bin and maker, then removed cover from the rear that covered the solenoid that controls the dispensing mechanism. Replace solenoid. The tricky part here is that there is a styrofoam cover around the solenoid pin that needs to be superglued into place and oriented properly during replacement. All electrical feeds snap ou
... Read more
t neatly and are easily replaced. Reassemble ice dispenser and bin, and viola, your back in business.
Read less
Was this instruction helpful to you?
Thank you for voting!
- Customer:
- Michael from Alto, MI
- Parts Used:
- WR17X4341
- Difficulty Level:
- Easy
- Total Repair Time:
- 30 - 60 mins
- Tools:
- Nutdriver, Pliers, Screw drivers
Ice auger rusted
The OEM auger pitted and rusted. My ice was coming out brown. I had cleaned it before, but in no time is was back to 'spiced' ice cubes. I cleaned the entire ice bucket and disassembled, ordered the part and re-assembled. Now the disassembly was a different day than the assembly. It's a good thing the parts diagram was on the web, I
... Read more
am no Thomas Edison when putting things back together. It is pretty general though. I sand blasted the tin cover and re-painted before buying a new one. That had rusted too. Before that expense, I thought I would try it. Be careful of the bucket as it can crack. I am not sure when mine was cracked, but I noticed it this time. If you are contemplating the purchase of a new auger - don't. The new one is stainless and the old steel and chrome is a joke. The inside of the freezer where the bracket spins the auger is rusty too and the old auger will rust again in no time. Buy a new one for under $50 shipped to your door. Another note, be sure to remember what screws came from what hole. It will eliminate the guess work when assembling. Also, the spring on the arm that controls the crushed ice function, note the position before tearing apart.
Read less
Was this instruction helpful to you?
Thank you for voting!