



Models
>
GTS18QBSARWW
GTS18QBSARWW General Electric Refrigerator
Jump to:
Find Part by Name
Keep searches simple, eg. "belt" or "pump".
Diagrams for GTS18QBSARWW
Viewing 1 of 1
Keep searches simple, eg. "belt" or "pump".

$36.42
The light switch in your refrigerator is used to turn the light on and off when the fridge door opens or closes. This is considered a closed switch, which means that when the fridge door depresses the...
In Stock
Order now and your part arrives by Oct 23
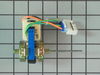
$69.95
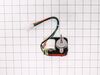
This evaporator fan motor is located in the back of the freezer, and circulates air over the refrigerator coils. These coils will convert the heat into cool air, which is then circulated.
In Stock
Order now and your part arrives by Oct 23
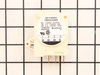
$39.95
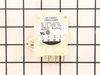
This refrigerator defrost timer will cycle for thirty minutes after every ten hours of run time.
In Stock
Order now and your part arrives by Oct 23
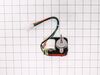
$59.43
If your refrigerator isn’t cooling as well as it should, the condenser fan motor might be the issue. This part powers the fan that moves air over the condenser coils, helping to release heat and keep ...
In Stock
Order now and your part arrives by Oct 23

Special Order
Special Order
Special Order
Common Problems and Symptoms for GTS18QBSARWW
Viewing 5 of 5Light not working
Fixed by these parts

How to fix it
Fridge too warm
Fixed by these parts
How to fix it
Noisy
Fixed by these parts
How to fix it
Freezer section too warm
Fixed by these parts
How to fix it
Freezer not defrosting
Fixed by these parts
How to fix it

Keep searches simple. Use keywords, e.g. "leaking", "pump", "broken" or "fit".
- Customer:
- Jonathan from Lilburn, GA
- Parts Used:
- WR23X37285
- Difficulty Level:
- Really Easy
- Total Repair Time:
- Less than 15 mins
- Tools:
- Pliers, Screw drivers
Sticking Light Switch
I applied some tips learned by reading other reviews. So before I started I grabbed my trusty vise grip pliers and a small screw driver. I locked onto the switch actuator, the part that the refrigerator door pushes in, with the vise grips and pulled on it just hard enough to get the screw driver inserted in the right side to push in the c
... Read more
atch clip so the switch could be pulled out further each time the catch clip was depressed to the next detent. Then I used the screw driver on the left site to encourage the switch past the detents on the left and very quickly the switch was out of the mount. The wires from the refrigerator pulled out with the old switch. I unplugged the old switch from the wires and plugged in the new switch and shoved the new switch back into the mount, wiggled it a couple of times to make sure it was secure and the job was done. Once I applied the vise gripes at first, the whole job took less than a minute.
Read less
Was this instruction helpful to you?
Thank you for voting!
- Customer:
- Marcus from SLC, UT
- Parts Used:
- WR60X10172
- Difficulty Level:
- Really Easy
- Total Repair Time:
- 15 - 30 mins
- Tools:
- Nutdriver
My fridge and freezer were not getting cold enough.
The Fridge and freezer were not very cold except for in the very back of the freezer (where the coils are). So I opened up the back of the freezer by first removing the dome light cover and removing all the visible screws. I then lifted up and pulled out the vent in the center of the back panel and removed the two remaining screws on the
... Read more
back panel. At that point I removed the back panel exposing the coils and fan. I saw that the fan was not spinning so I used a screw driver to manually turn the defrost timer found on the top of the inside of the fridge. Once I had turned the defrost timer once complete rotation, and the fan didn't turn on, I was pretty sure that it was the fan. I still wasn't sure that the fan was the only problem, but I couldnt see anything else that wasn't working properly. I decided to take a chance and order the fan motor (not the entire assembly. it is easy to replace the moter only leaving the original fan blades and housing). Once I got the part, I unplugged the old fan motor, put in the new fan motor, and pugged it in and it started spinning right away. I put everything back together the same way I took it apart and it has worked great ever since.
Read less
Was this instruction helpful to you?
Thank you for voting!
- Customer:
- HAE-YOUNG from Douglaston, NY
- Parts Used:
- WR9X483
- Difficulty Level:
- Easy
- Total Repair Time:
- 1- 2 hours
- Tools:
- Screw drivers
This refrigerator had pawer( lite was on) but nothing turning--motor or fan. Turned control temperature min-max - no cange.
Found burned Defrost timer contacts.
Was this instruction helpful to you?
Thank you for voting!