


Models
>
FRFC2323AS3
FRFC2323AS3 Frigidaire Refrigerator
Jump to:
Find Part by Name
Keep searches simple, eg. "belt" or "pump".
Diagrams for FRFC2323AS3
Viewing 8 of 8


Keep searches simple, eg. "belt" or "pump".

$17.47
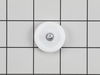
This screw is used to secure the handle to your refrigerator and comes in a pack of four. This genuinely sourced part can be loosened and tightened with a Phillips-head or square-head screwdriver. Wit...
In Stock
Order now and your part arrives by Aug 1

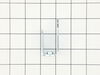
$13.97
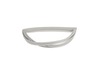
Designed for smooth drawer operation, this crisper pan roller attaches to the sides of the refrigerator’s crisper drawer, allowing it to slide in and out effortlessly. Over time, rollers can wear down...
In Stock
Order now and your part arrives by Aug 1

In Stock
Order now and your part arrives by Aug 1

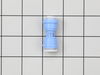
$81.36
The PurePour water filter (FPPWFU01) is a genuine Frigidaire replacement, compatible with select Frigidaire, Frigidaire Gallery, and Frigidaire Professional side-by-side and French door refrigerators....
In Stock
Order now and your part arrives by Aug 1

$25.25
Sold individually.
This is a genuine part. The handle mounting shoulder screw (no.10 ab) is made for use with many refrigerators. The metal screw helps to fasten the handle assembly to the outer do...
In Stock
Order now and your part arrives by Aug 1

Designed for 36-inch French-door refrigerators, this GREY magnetic door gasket ensures a secure seal to prevent air leaks and maintain optimal cooling conditions. It plays a critical role in regulatin...
In Stock
Order now and your part arrives by Aug 1

$71.45
If your freezer drawer isn’t sealing like it used to, this gray gasket might be the fix. It helps keep cold air inside and warm air out, so your food stays fresh and your appliance doesn’t have to wor...
In Stock
Order now and your part arrives by Aug 1

In Stock
Order now and your part arrives by Aug 1

In Stock
Order now and your part arrives by Aug 1

This genuine OEM hinge mounting screw is designed for use in Frigidaire and Electrolux refrigerators, providing a secure and reliable way to fasten door hinges to the cabinet. Built with a durable hex...
In Stock
Order now and your part arrives by Aug 1

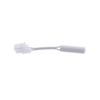
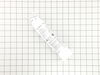
This temperature sensor, also known as a thermistor, is responsible for preventing the evaporator within your refrigerator from overheating during its defrosting cycle. This sensor is compatible with ...
In Stock
Order now and your part arrives by Aug 1

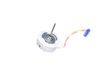
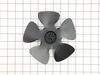
$31.27
This is a genuine condenser fan blade, which works with refrigerators, freezers and wines and beverage coolers.
In Stock
Order now and your part arrives by Aug 1
Common Problems and Symptoms for FRFC2323AS3
Viewing 13 of 13Door won’t open or close
Fixed by these parts


How to fix it
Door Sweating
Fixed by these parts
How to fix it
Fridge too warm
Fixed by these parts
How to fix it
Frost buildup
Fixed by these parts
How to fix it
Leaking
Fixed by these parts
How to fix it
Noisy
Fixed by these parts
How to fix it
Freezer section too warm
Fixed by these parts
How to fix it
Freezer not defrosting
Fixed by these parts
How to fix it
Fridge and Freezer are too warm
Fixed by these parts
How to fix it
Fridge too cold
Fixed by these parts
How to fix it
Too warm
Fixed by these parts
How to fix it
Ice maker won’t dispense ice
Fixed by these parts
How to fix it
Ice maker not making ice
Fixed by these parts
How to fix it

Keep searches simple. Use keywords, e.g. "leaking", "pump", "broken" or "fit".
- Customer:
- Cindy from AMARILLO, TX
- Parts Used:
- 240597220
- Difficulty Level:
- Really Easy
- Total Repair Time:
- Less than 15 mins
- Tools:
- Screw drivers
My fridge temp was warm. Freezer temp was ok, but fluctuated some.
I checked the dampener, it worked. The compressor and fan worked. I knew because my freezer was still hovering around 10 degrees. Coils were clean. Thermistor was the only thing it could be. Took all my shelves out. Removed four screws. Took the back panel off. The thermistor sits tucked in on the side. I piped it out, in clipped it. Used
... Read more
my multimeter to test the numbers. Numbers were off just a bit. Ordered the part. Crossed my fingers.,took less then 5 minutes to put the part in. Plugged in the fridge. It was sitting at 33 degrees in about an hour and a half. I can’t believe I fixed it. I knew NOTHING about refrigerators. For how big my fridge is, it would have cost 3,000 and up to get a new one with the same cu ft size. Instead, it cost me $44. That includes shipping. Thank you Parts Select!! Made it so easy to pick the correct part for my model fridge!
Read less
Was this instruction helpful to you?
Thank you for voting!
- Customer:
- hellen from SPRINGFIELD, MO
- Parts Used:
- 5304508016
- Difficulty Level:
- Very Difficult
- Total Repair Time:
- More than 2 hours
- Tools:
- Screw drivers
Roller screw recipients broke out. Can't be repaired.
Was not able to repair. Wasn't rollers I needed. Plastic screw recipients in front on frame had broken out so rollers weren't the problem. Tried gluing back pieces to no avail. Crisper frames are poorly designed.
Was this instruction helpful to you?
Thank you for voting!
- Customer:
- Marlene from SCOTTSDALE, AZ
- Parts Used:
- FPPWFU01
- Difficulty Level:
- Really Easy
- Total Repair Time:
- Less than 15 mins
I had a light come on and tell me I needed a new water filter
Pushed the old filter in and it came out then I pushed in the new one.
Was this instruction helpful to you?
Thank you for voting!