



Models
>
ERMC2295AS
ERMC2295AS Frigidaire Refrigerator
Jump to:
Find Part by Name
Keep searches simple, eg. "belt" or "pump".
Diagrams for ERMC2295AS
Viewing 9 of 9


Keep searches simple, eg. "belt" or "pump".
$98.95
If your fridge isn’t making ice or is leaking, this replacement ice maker can help. It includes everything needed to freeze and dispense ice automatically. It’s easy to install and works with many bra...
In Stock
Order now and your part arrives by Sep 17
In Stock
Order now and your part arrives by Sep 17
In Stock
Order now and your part arrives by Sep 17
$89.79
This air handler housing ensures proper airflow within your appliance, helping maintain consistent cooling performance. Its sturdy design supports efficient operation and prevents overheating.
In Stock
Order now and your part arrives by Sep 17
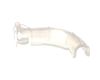
This refrigerator tubing retainer clip is designed to securely hold and guide water lines or wiring within the appliance, helping keep components properly aligned and in place. Featuring a 90-degree e...
On Order
On Order
Special Order
$60.35
This genuine OEM drive bar is designed to support the operation of your refrigerator’s ice dispensing system by engaging the crusher mechanism. It connects with the drive shaft to help rotate the crus...
On Order
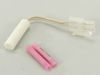
$32.07
This refrigerator thermistor kit monitors internal temperatures and sends signals to the control system to maintain proper cooling and defrost operation. Designed for accurate sensing and reliable per...
In Stock
Order now and your part arrives by Sep 17
In Stock
Order now and your part arrives by Sep 17
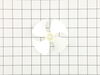
$9.85
Support proper airflow inside your appliance with this evaporator fan blade, designed to circulate cold air evenly throughout the refrigerator and freezer compartments. Attaching directly to the fan m...
In Stock
Order now and your part arrives by Sep 17
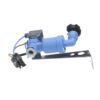
$75.85
This refrigerator water inlet valve controls the flow of water to the ice maker and water dispenser, ensuring proper operation and consistent performance. A genuine OEM replacement, it helps resolve i...
In Stock
Order now and your part arrives by Sep 17
Common Problems and Symptoms for ERMC2295AS
Viewing 4 of 4Ice maker not making ice
Fixed by these parts
How to fix it
Ice maker won’t dispense ice
Fixed by these parts
How to fix it
Leaking
Fixed by these parts
How to fix it
Not dispensing water
Fixed by these parts
How to fix it
Keep searches simple. Use keywords, e.g. "leaking", "pump", "broken" or "fit".
- Customer:
- Richard from N CALDWELL, NJ
- Parts Used:
- 243297613
- Difficulty Level:
- Really Easy
- Total Repair Time:
- Less than 15 mins
- Tools:
- Nutdriver, Screw drivers
Ice maker was not working
Simple three steps... 1) There's an front section to the ice-maker to take off. One Phillips screw is on the side, one screw is underneath near the inside of the refrigerator wall. Just unscrew and store. 2) There's a small plastic unit just inside the ice maker to take out. It's held in by a small nut that requires about a 4" extension
... Read more
to reach. (You may be able to unscrew the nut with small needle-nose pliers). Just unscrew and take out the unit - the unit functions just to keep the ice maker wiring in place. 3) The wiring looks a mess, but there's just one wiring connector to the ice maker assembly. Unsnap it. The ice maker is not screwed in, it just slides in -- reach in and pull the assembly straight out; when it stops, lower it a bit and it will come free. Reverse the instructions to install the new unit.
Read less
Was this instruction helpful to you?
Thank you for voting!
- Customer:
- David from VISALIA, CA
- Parts Used:
- 243297613
- Difficulty Level:
- A Bit Difficult
- Total Repair Time:
- 30 - 60 mins
- Tools:
- Screw drivers
It just stopped making ice.
First: I could not watch any videos. Big downer. Read the reviews and read a post about “three screws”.
Opened the freezer and emptied everything in it.
Remove the bin.
Two screws are on the left side. They go into the side wall.
Here’s where things get weird. The plastic “box” holds the “ice making assembly”. That box ... Read more is attached by FOUR slots. You will need to remove the wire rack below the frame. There’s a plastic spacer on the left side with a slot on it. You can pull it of with your fingers when you rotate it. Slide the rack to the left and pull down the rack from the RIGHT side holes. You have move the box toward you about a inch, then it drops down.
Now, there is a electrical connection from the box to the rear of the refrigerator wall. You need a small screwdriver to lift the tab on the TOP of the connector to release it. Once that is done, slide the box forward and put it in the sink.
While all this is happening, the freezer is thawing out.
Once you remove the box, you will get error codes on the digital display. This is a good thing.
There are two “square head’” screws that you have to remove to separate the TWO parts that make the box. Slide the outer trim towards you.
The icemaker assembly slides into four slots. You put the new wires in the same place as the one you removed.
Put everything back together the opposite of the removal.
Now for the secret.
All that food you removed? Put it back in until you can slide the box into place.
Then you plug the connector in. The box should be sitting on the food.
THIS IS THE SECRET.
The ice maker has two options. Cubed or Crushed.
There are two components that make them happen. On the left side there is a slot with a gray lever the moves up an down. There is an piece of aluminum on the right side the drives the screw in the box.
Rotate the screw drive to 45 degrees.
THIS IS THE SECRET.
On the left side of the box is a rod that is spring loaded and has a bent end.
It’s about “timing”.
Find a piece of “kite string”. I used the string from the yellow energy tag that came with the fridge.
The box is sitting on the frozen food. The wire in the back is connected.
Loop the string around the lever AND PULL UP.
Slide the whole thing into place using the slots.
When it’s in place, let go of the string.
Put the two screws back in.
FINAL.
You have to PRESS AND HOLD the IceMaker button to reset. You’ll get ice cubes in a couple of hours. Through the first 24 hrs away.
You’re welcom.
Opened the freezer and emptied everything in it.
Remove the bin.
Two screws are on the left side. They go into the side wall.
Here’s where things get weird. The plastic “box” holds the “ice making assembly”. That box ... Read more is attached by FOUR slots. You will need to remove the wire rack below the frame. There’s a plastic spacer on the left side with a slot on it. You can pull it of with your fingers when you rotate it. Slide the rack to the left and pull down the rack from the RIGHT side holes. You have move the box toward you about a inch, then it drops down.
Now, there is a electrical connection from the box to the rear of the refrigerator wall. You need a small screwdriver to lift the tab on the TOP of the connector to release it. Once that is done, slide the box forward and put it in the sink.
While all this is happening, the freezer is thawing out.
Once you remove the box, you will get error codes on the digital display. This is a good thing.
There are two “square head’” screws that you have to remove to separate the TWO parts that make the box. Slide the outer trim towards you.
The icemaker assembly slides into four slots. You put the new wires in the same place as the one you removed.
Put everything back together the opposite of the removal.
Now for the secret.
All that food you removed? Put it back in until you can slide the box into place.
Then you plug the connector in. The box should be sitting on the food.
THIS IS THE SECRET.
The ice maker has two options. Cubed or Crushed.
There are two components that make them happen. On the left side there is a slot with a gray lever the moves up an down. There is an piece of aluminum on the right side the drives the screw in the box.
Rotate the screw drive to 45 degrees.
THIS IS THE SECRET.
On the left side of the box is a rod that is spring loaded and has a bent end.
It’s about “timing”.
Find a piece of “kite string”. I used the string from the yellow energy tag that came with the fridge.
The box is sitting on the frozen food. The wire in the back is connected.
Loop the string around the lever AND PULL UP.
Slide the whole thing into place using the slots.
When it’s in place, let go of the string.
Put the two screws back in.
FINAL.
You have to PRESS AND HOLD the IceMaker button to reset. You’ll get ice cubes in a couple of hours. Through the first 24 hrs away.
You’re welcom.
Read less
Was this instruction helpful to you?
Thank you for voting!
- Customer:
- Guy from FAIR OAKS, CA
- Parts Used:
- 243297613
- Difficulty Level:
- Really Easy
- Total Repair Time:
- 15 - 30 mins
- Tools:
- Nutdriver, Screw drivers, Socket set
Ice maker not making ice
Located problem part of ice maker on web site. Picked the part that had the highest percentage of being the the part that was broken (58% I think). Removed the part, waited for the new part, then put it all back together. Simple. It works great. Thanks for having such an easy web site to diagnose the problem.
Was this instruction helpful to you?
Thank you for voting!