


Models
>
CRT216HLS9
CRT216HLS9 Crosley Refrigerator
Jump to:
Find Part by Name
Keep searches simple, eg. "belt" or "pump".
Diagrams for CRT216HLS9
Viewing 6 of 6


Keep searches simple, eg. "belt" or "pump".

$58.25
This is a white plastic door shelf bin for your refrigerator. It is attached to the inside bottom of the refrigerator door shelf where it helps to contain items such as jars and condiments. This part ...
In Stock
Order now and your part arrives by Jul 19

$27.45
This 40-watt light bulb has a standard screw-in base and is used in many different appliances. If your current bulb is burnt out or broken you will need to replace it. This light bulb is a genuine OEM...
In Stock
Order now and your part arrives by Jul 19

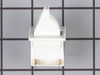
This crisper pan cover plays a key role in preserving food quality by maintaining the right humidity levels inside the crisper drawer. It includes both the frame and insert, offering protection from s...
No Longer Available

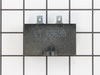
$51.53
The run capacitor is attached to the compressor in your refrigerator and is used to maintain a constant temperature in your freezer. It does this by cycling the compressor on and off. This run capacit...
In Stock
Order now and your part arrives by Jul 19

In Stock
Order now and your part arrives by Jul 19

$62.53
This is a replacement door bin for your refrigerator. The door bin fits into your refrigerator door and is used to store food and other items. It is made of white plastic and is approximately 13 inche...
In Stock
Order now and your part arrives by Jul 19

$109.64
This is the replacement meat pan for your refrigerator. It is made of clear plastic and is approximately 18 inches long and 13 inches wide. The meat pan slides into the bottom of the refrigerator shel...
In Stock
Order now and your part arrives by Jul 19

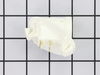
$25.25
Sold individually.
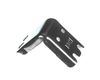
This is a genuine part. The handle mounting shoulder screw (no.10 ab) is made for use with many refrigerators. The metal screw helps to fasten the handle assembly to the outer do...
In Stock
Order now and your part arrives by Jul 19

$142.90
This Spill-Safe glass shelf helps contain spills and keeps your fridge organized. Includes a plastic frame and fits select refrigerator models. Check compatibility before ordering. Sold individually.
In Stock
Order now and your part arrives by Jul 19

$21.02
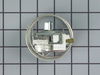
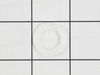
Improve door function and alignment with this hinge nylon washer, designed to support the door as it pivots on the hinge pin. Made from durable nylon, it helps reduce friction and noise while ensuring...
In Stock
Order now and your part arrives by Jul 19

$130.53
Keep your food fresh and organized with this crisper drawer. It’s perfect for storing fruits, veggies, and meats, and you can adjust the temperature and humidity to match what you’re storing. Before i...
In Stock
Order now and your part arrives by Jul 19

$31.85
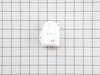
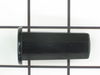
The light socket on your refrigerator houses the light bulb and connects it to the power source. If you notice that your refrigerator light does not come on when you open the door, you may need to rep...
In Stock
Order now and your part arrives by Jul 19
Common Problems and Symptoms for CRT216HLS9
Viewing 16 of 16Fridge too warm
Fixed by these parts
How to fix it
Light not working
Fixed by these parts

How to fix it
Door won’t open or close
Fixed by these parts
How to fix it
Noisy
Fixed by these parts
How to fix it
Will Not Start
Fixed by these parts
How to fix it
Fridge and Freezer are too warm
Fixed by these parts
How to fix it
Won’t start
Fixed by these parts
How to fix it
Freezer not defrosting
Fixed by these parts
How to fix it
Freezer section too warm
Fixed by these parts
How to fix it
Too warm
Fixed by these parts
How to fix it
Fridge too cold
Fixed by these parts
How to fix it
Clicking sound
Fixed by these parts
How to fix it
Fridge runs too long
Fixed by these parts
How to fix it
Frost buildup
Fixed by these parts
How to fix it
Door Sweating
Fixed by these parts
How to fix it
Leaking
Fixed by these parts
How to fix it


Keep searches simple. Use keywords, e.g. "leaking", "pump", "broken" or "fit".
- Customer:
- Bruce from Alton, IL
- Parts Used:
- 241537103
- Difficulty Level:
- Really Easy
- Total Repair Time:
- Less than 15 mins
- Tools:
- Pliers, Screw drivers
Refrigerator would not run but interior light was on.
I unplugged the refrigerator, then opened the door and removed four screws holding the plastic electrical panel to the interior top of the main refrigerator compartment and noticed the cold control was corroded badly, apparently from moisture in the panel. I ordered a new one from partselect.com. When it arrived the next day, I then pul
... Read more
led off the control knob, unclipped the cold control, unplugged the three wires to the control, then removed the styrofoam insulation blocks holding the thermocouple wire and then removed the thermocouple wire to complete the removal. I then reversed the process to install the new thermostat and control. That is repositioned the thermocouple wire, put the insulation blocks back to hold the wire, then replugged the three electrical wires, clipped the control back and pushed the control knob back on and finally screwed the panel back to the top of the main compartment and plugged the refrigerator electrical cord back in to provide current to the refrigerator. It immediately started up and ran fine. Total time - about 8 minutes.
Read less
Was this instruction helpful to you?
Thank you for voting!
- Customer:
- William from Alexandria, VA
- Parts Used:
- 218906802
- Difficulty Level:
- Really Easy
- Total Repair Time:
- Less than 15 mins
- Tools:
- Screw drivers
Light socket melted around bulb
After unsuccessfully trying to change the blown light bulb I discovered that the plastic light socket had gotten so hot that it melted and permanently fused with the blown bulb. After my new socket arrived in the mail I just popped the temp control assembly out with a screw driver and removed the old socket and placed the new one in.
... Read more
Whole operation to 5 minutes.
Read less
Was this instruction helpful to you?
Thank you for voting!
- Customer:
- Phillip from Cary, NC
- Parts Used:
- 240338101
- Difficulty Level:
- Really Easy
- Total Repair Time:
- Less than 15 mins
The door shelf/bin broke and fell off
I simply snapped in the new part. It took a few seconds. I would like to say that I found the part using the model number of the fridge. When I went to look at the description it said the part was 26 inches. The one I had was only 24 3/4 inches. I called you guys and was told that this was the correct part and to ignore the measuement.
... Read more
r />You were Right! the part fitted perfectly.
Read less
Was this instruction helpful to you?
Thank you for voting!