


Models
>
CRT182NWB
CRT182NWB Crosley Refrigerator
Jump to:
Find Part by Name
Keep searches simple, eg. "belt" or "pump".
Diagrams for CRT182NWB
Viewing 6 of 6


Keep searches simple, eg. "belt" or "pump".

$41.43
This is a genuine door shelf retaining bar for a refrigerator. It attaches to the inside of the door on the refrigerator and helps to secure items placed on the shelf. It is made of white plastic and ...
In Stock

$51.09
This middle shelf retainer bar attaches to the inside of the refrigerator door and helps to contain items on the shelf inside your appliance, like condiments and small containers. Its approximate size...
In Stock

$116.89
This authentic replacement crisper pan, also known as a vegetable drawer, inserts into the refrigerator crisper area. It is used to hold produce and maintain an ideal temperature to help preserve them...
In Stock

$113.65
This glass shelf sits above the crisper drawers in your refrigerator. This part is just the glass, there are no brackets or additional mounting hardware (these can be purchased separately if needed). ...
In Stock

$47.55
This handle works on both the fridge and freezer door, and if yours has become damaged it should be replaced. This is a genuine OEM replacement part, and is sold individually. If you need to replace b...
In Stock

$16.04
This screw is used to secure the handle to your refrigerator and comes in a pack of four. This genuinely sourced part can be loosened and tightened with a Phillips-head or square-head screwdriver. Wit...
In Stock

In Stock

In Stock

$25.94
This small, Phillips-head screw works with your refrigerator/freezer. It screws in to the freezer door and connects to the door handle. This part is made of stainless steel and is sold individually. T...
In Stock

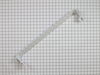
$64.94
This is a replacement rear shelf trim for your refrigerator. It is approximately 24 inches long and 1 inch wide. The shelf trim is made of white plastic and is sold individually. You will find the rea...
In Stock

In Stock

In Stock
Questions and Answers
We're sorry, but our Q&A experts are temporarily unavailable.
Please check back later if you still haven't found the answer you need.
Common Problems and Symptoms for CRT182NWB
Viewing 16 of 16Door won’t open or close
Fixed by these parts


How to fix it
Noisy
Fixed by these parts

How to fix it
Fridge too warm
Fixed by these parts


How to fix it
Freezer not defrosting
Fixed by these parts

How to fix it
Light not working
Fixed by these parts


How to fix it
Freezer section too warm
Fixed by these parts
How to fix it
Fridge and Freezer are too warm
Fixed by these parts
How to fix it
Will Not Start
Fixed by these parts
How to fix it
Fridge too cold
Fixed by these parts
How to fix it
Leaking
Fixed by these parts


How to fix it
Won’t start
Fixed by these parts

How to fix it
Frost buildup
Fixed by these parts

How to fix it
Door Sweating
Fixed by these parts

How to fix it
Fridge runs too long
Fixed by these parts
How to fix it
Clicking sound
Fixed by these parts
How to fix it
Too warm
Fixed by these parts
How to fix it


Keep searches simple. Use keywords, e.g. "leaking", "pump", "broken" or "fit".
- Customer:
- Lisa from Linton, ND
- Parts Used:
- 218428101
- Difficulty Level:
- Really Easy
- Total Repair Time:
- 1- 2 hours
- Tools:
- Screw drivers
Door handle broke off
First I removed the top screws, then I slide it off the lower screw that is hidden behind the handle. I replaced the handle by sliding it onto the bottem first then attaching it onto the top with the two top screws.
Was this instruction helpful to you?
Thank you for voting!
- Customer:
- Bruce from Alton, IL
- Parts Used:
- 241537103
- Difficulty Level:
- Really Easy
- Total Repair Time:
- Less than 15 mins
- Tools:
- Pliers, Screw drivers
Refrigerator would not run but interior light was on.
I unplugged the refrigerator, then opened the door and removed four screws holding the plastic electrical panel to the interior top of the main refrigerator compartment and noticed the cold control was corroded badly, apparently from moisture in the panel. I ordered a new one from partselect.com. When it arrived the next day, I then pul
... Read more
led off the control knob, unclipped the cold control, unplugged the three wires to the control, then removed the styrofoam insulation blocks holding the thermocouple wire and then removed the thermocouple wire to complete the removal. I then reversed the process to install the new thermostat and control. That is repositioned the thermocouple wire, put the insulation blocks back to hold the wire, then replugged the three electrical wires, clipped the control back and pushed the control knob back on and finally screwed the panel back to the top of the main compartment and plugged the refrigerator electrical cord back in to provide current to the refrigerator. It immediately started up and ran fine. Total time - about 8 minutes.
Read less
Was this instruction helpful to you?
Thank you for voting!
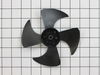
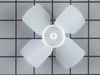
- Customer:
- Milton from Camp Hill, PA
- Parts Used:
- 240524102
- Difficulty Level:
- Really Easy
- Total Repair Time:
- 15 - 30 mins
- Tools:
- Wrench (Adjustable)
Broke a blade off of the fan
When cleaning the coils on your refrigerator always remember rule number 1, unplug it first. I was cleaning the coils and hit the fan blade while it was moving with a brush, thus breaking off one of the fan blades. I ordered a new fan and installed it in about 15 minutes. Very easy repair.
Was this instruction helpful to you?
Thank you for voting!