


Models
>
WRS23MW3AWJ
WRS23MW3AWJ Crosley Refrigerator
Jump to:
Find Part by Name
Keep searches simple, eg. "belt" or "pump".
Diagrams for WRS23MW3AWJ
Viewing 12 of 12


Manuals & Guides for WRS23MW3AWJ
Click to downloadInstall
Installation Instructions
(1.1MB)
Manual
Owner's Manuals
(1.8MB)
Wiring
Wiring Diagram
(0.25MB)
Keep searches simple, eg. "belt" or "pump".

If opening and closing your refrigerator is difficult, it could be due to a damaged or warped crisper cover front support. This part keeps the crisper shelf in place and mounts to the inside cabinet w...
In Stock

$13.20
This rear crisper support mounts on the inside of the refrigerator wall to support the rear crisper cover. It is made of white plastic and is sold as an individual part. The support is secured in plac...
In Stock

In Stock

$52.76
The door shelf bin, sometimes referred to as a 2-liter bin, measures approximately 15 inches wide by 6 inches high and 6 inches deep. It is a genuine OEM replacement part that is made of white plastic...
In Stock

$153.41
This is a genuine OEM ice maker assembly for your refrigerator. The ice maker makes eight cubes at a time, by filling the mold with water from the inlet valve, freezing the water until the cubes are f...
In Stock

$45.75
Sold individually. This cam is located at the bottom of the fridge/freezer door.
In Stock

$20.58
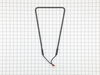
This is a genuine OEM kit for the defrost thermostat in your freezer. This kit comes with the clip, leads, and heat shrink. Some indicators that you may need to replace your thermostat is if there is ...
In Stock

In Stock

In Stock

In Stock

$53.31
This door bin holds items on the door of your refrigerator. They are sometimes called Cantilever Shelves as they are supported by the back of the shelf itself to the door of your refrigerator. Sold individually.
In Stock

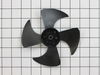
This kit includes the motor, clips and terminal connectors. This part has been updated by the manufacture.
This evaporator fan motor is located in the back of the freezer, and circulates air over t...
In Stock
Questions and Answers
We're sorry, but our Q&A experts are temporarily unavailable.
Please check back later if you still haven't found the answer you need.
Common Problems and Symptoms for WRS23MW3AWJ
Viewing 23 of 23Fridge too warm
Fixed by these parts


How to fix it
Noisy
Fixed by these parts


How to fix it
Door won’t open or close
Fixed by these parts


How to fix it
Clicking sound
Fixed by these parts

How to fix it
Fridge too cold
Fixed by these parts


How to fix it
Freezer section too warm
Fixed by these parts
How to fix it
Ice maker won’t dispense ice
Fixed by these parts


How to fix it
Light not working
Fixed by these parts


How to fix it
Ice maker not making ice
Fixed by these parts


How to fix it
Not dispensing water
Fixed by these parts


How to fix it
Will Not Start
Fixed by these parts
How to fix it
Freezer not defrosting
Fixed by these parts
How to fix it
Fridge and Freezer are too warm
Fixed by these parts
How to fix it
Leaking
Fixed by these parts


How to fix it
Too warm
Fixed by these parts
How to fix it
Won’t start
Fixed by these parts
How to fix it
Frost buildup
Fixed by these parts
How to fix it
Door Sweating
Fixed by these parts
How to fix it
Ice maker dispenses too much ice
Fixed by these parts

How to fix it
Freezer too cold
Fixed by these parts
How to fix it
Fridge runs too long
Fixed by these parts
How to fix it
Doesn’t stop running
Fixed by these parts
How to fix it
Ice maker dispenses too little ice
Fixed by these parts
How to fix it


Keep searches simple. Use keywords, e.g. "leaking", "pump", "broken" or "fit".
Support studs were broken
Used pliers to remove the residual broken stud that was still attached to the wall of the refrigerator, and then just pushed the new part in place. The longest time was spent in removing the food and crisper drawers.
Was this instruction helpful to you?
Thank you for voting!
- Customer:
- Leo from Bentonville, AR
- Parts Used:
- 5303918214
- Difficulty Level:
- Easy
- Total Repair Time:
- 15 - 30 mins
- Tools:
- Nutdriver, Pliers
Running but not cooling off and frost in the back of the freezer
Unplugged the refrigerator. Removed the 4 hex head screws on the lower back panel at the back of the freezer. Used a blow dryer to defrost the pipes and area surrounding the thermostat. Unplug the connection from the back of the freezer, unplug the 2 wires, one that goes to the heater, one that comes from power. Unclip the thermostat
... Read more
from the pipe and note which pipe you unclipped it from. Cut the wires on the old thermostat midway between the plugs and the sensor. Using the supplied butt connectors, strip the wire ends on color matched wires (should be a dark blue or black) and crimp them together. Repeat with the other wire. Discard the white shrink wrapping. I wasn't able to get it small enough with a hair dryer or lighter. Plug the thermostat back into it's respective plugs. Clip the thermostat back onto the pipe you removed it from. Replace the back panel with the four screws. Ensure the bottom of the panel is set inside of the drip tray. Replace any shelving you removed. Plug the refrigerator back into the wall. Your done!
Read less
Was this instruction helpful to you?
Thank you for voting!
- Customer:
- Juan from Miami, FL
- Parts Used:
- 241798231
- Difficulty Level:
- Really Easy
- Total Repair Time:
- 15 - 30 mins
- Tools:
- Socket set
Broken ice maker
Unplugged faulty ice maker, removed two screws holding it to the refrigerator and took it out. Reversed the operation with the new ice maker and after a few minutes presto, we have ice.
Was this instruction helpful to you?
Thank you for voting!