


Models
>
GFS142
GFS142 (MN10) Caloric Refrigerator
Jump to:
Find Part by Name
Keep searches simple, eg. "belt" or "pump".
Diagrams for GFS142
Viewing 9 of 9


Keep searches simple, eg. "belt" or "pump".

$24.00
This oven control knob is a genuine OEM replacement part for your range. The control knob is made of black plastic and fits onto a double flat shaft. This part is used to control the oven temperature,...
In Stock
Order now and your part arrives by Jul 23

This hi-limit thermostat acts as a safety mechanism that keeps the dryer from overheating. Once the dryer temperature reaches a certain point, this piece will shut down power to the heating element.
No Longer Available

Common Problems and Symptoms for GFS142
Viewing 1 of 1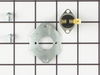
Keep searches simple. Use keywords, e.g. "leaking", "pump", "broken" or "fit".
- Customer:
- Douglas from NORFOLK, VA
- Parts Used:
- WP3150371
- Difficulty Level:
- Very Easy
- Total Repair Time:
- Less than 15 mins
The function setting knob spun freely without changing the setting.
The old knob pulled off easily. Its stem had broken. Examine the new control knob. Its stem has a protrusion on it which fits into the grove on the shaft of the oven's function-control switch. (It would be the same for the temperature-control switch, also.) The new knob slips on easily when properly aligned. You may want to use some
... Read more
gunk from a breakfast cereal box (the clear gummy gunk that is used to hold two cereal boxes together, when sold as a pair) to help the new knob stay on. Using whiteout or paint, mark the end of the ridge on the knob that points to the switch position, so that you can easily tell which way it's pointing.
Read less
Was this instruction helpful to you?
Thank you for voting!
- Customer:
- James from Mokena, IL
- Parts Used:
- 489P3
- Difficulty Level:
- Easy
- Total Repair Time:
- 15 - 30 mins
- Tools:
- Pliers, Screw drivers, Socket set
At the end of the drying cycle, the clothes had a bunt smell. I checked the lower compartment of the dryer and found the limit thermostat in two pieces and realized this could be the culprit. I was able to snap them together, but this did not work, therefore a new stat
First I unpluged the dryer, removed the two screws from the bottom access panel. I used a small socket to remove the screws securing the limit stat to the burner chamber, nut driver was too long.
I installed the new limit stat with the two screws and attached the two leads. Plugged in the dryer and conducted a test run, burner ig ... Read more nited. I turned the dryer off and replaced the access panel.
I installed the new limit stat with the two screws and attached the two leads. Plugged in the dryer and conducted a test run, burner ig ... Read more nited. I turned the dryer off and replaced the access panel.
Read less
Was this instruction helpful to you?
Thank you for voting!
- Customer:
- David from Humble, TX
- Parts Used:
- 489P3
- Difficulty Level:
- Really Easy
- Total Repair Time:
- Less than 15 mins
- Tools:
- Nutdriver, Screw drivers
Gas flame would not relight after it reached its first heat cycle.
I removed the two spade connectors and then removed the two 1/4" hex screws. I then simply removed the defective unit and replaced it with the new on and re-installed the two screws and wires.
This was not the problem though.
I turned out to be the solenoids on the gas valve.
This was not the problem though.
I turned out to be the solenoids on the gas valve.
Was this instruction helpful to you?
Thank you for voting!