


Models
>
GFS165MN01
GFS165MN01 (GFS165MN0 1) Caloric Refrigerator
Jump to:
Find Part by Name
Keep searches simple, eg. "belt" or "pump".
Diagrams for GFS165MN01
Viewing 7 of 7


Keep searches simple, eg. "belt" or "pump".

$19.75
This is a genuine OEM 40-Watt replacement light bulb that is compatible with various types of appliances. It has a frosted glass bulb with a standard metal socket base, making it easy to screw and uns...
In Stock
Order now and your part arrives by Jul 23

$71.11
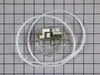
The evaporator is found in the back of the freezer. This kit comes with two mounting grommets, two sleeves (not to be used on porcelain models), two #8 mounting screws, and a push-on fan blade.
NOT...
In Stock
Order now and your part arrives by Jul 23

In Stock
Order now and your part arrives by Jul 23


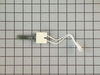
This cold control thermostat has a temperature range from 29.5 degrees Fahrenheit to 16.5 degrees Fahrenheit and a capillary length of 35 inches.
In Stock
Order now and your part arrives by Jul 23

$45.00
This filter dryer is for refrigerators and filters refrigerant that travels through the sealed system of the refrigerator.
In Stock
Order now and your part arrives by Jul 23

Special Order

Special Order
Common Problems and Symptoms for GFS165MN01
Viewing 6 of 6Noisy
Fixed by these parts
How to fix it
Fridge too warm
Fixed by these parts
How to fix it
Freezer section too warm
Fixed by these parts
How to fix it
Fridge and Freezer are too warm
Fixed by these parts
How to fix it
Not Heating
Fixed by these parts
How to fix it
Fridge too cold
Fixed by these parts
How to fix it

Keep searches simple. Use keywords, e.g. "leaking", "pump", "broken" or "fit".
- Customer:
- Michael from Churchville, NY
- Parts Used:
- 482731
- Difficulty Level:
- Easy
- Total Repair Time:
- 15 - 30 mins
- Tools:
- Nutdriver, Screw drivers
Unit very noisy and freezer too warm
First I removed the racks in the freezer. The rack supports on the sides lift off without tools. The evaporator cover is at the back of the freezer. 4 phillips head screws. The cover lifts up then forward to expose the evaporator, evaporator fan and duct. The duct is held by 3 hex head screws. The evaporator fan is attached to the duct wi
... Read more
th a wiring pigtail to a plug. Unplug the fan and remove the duct. The fan is held by 2 hexhead screws. The new fan is put in place and assembly is simply the reverse of disassembly. The unit is quiet and cools properly now. The new part fit perfectly.
Read less
Was this instruction helpful to you?
Thank you for voting!
- Customer:
- Duane from Piper City, IL
- Parts Used:
- 482731
- Difficulty Level:
- Really Easy
- Total Repair Time:
- Less than 15 mins
- Tools:
- Nutdriver, Screw drivers
Evaporator Fan had quit running
After unplugging the fridge, I removed all the phillips head screws from the evaporator fan housing as well as the back cover and the bottom of the freezer compartment (7) in all. After first removing the bottom cover - then the back cover I could access the evaporator fan unit. This was held in place with two hex-head screws that were e
... Read more
asily removed with a nut driver. Then after unplugging the Red, White, and Green wires from the fan I removed it and replaced it with the new one. I did have to break off the two ends of the mounting bracket as described in the instruction sheet since it was too wide. Repeating the above steps in reverse, I had the job done and refridgerator up and running as quiet as could be in less than 15 minutes.
Read less
Was this instruction helpful to you?
Thank you for voting!
- Customer:
- PAUL from Boiling Springs, SC
- Parts Used:
- 482731
- Difficulty Level:
- Easy
- Total Repair Time:
- 15 - 30 mins
- Tools:
- Nutdriver, Screw drivers
freezer making a squealing sound
First I Removed the racks. Next 3 hex bolts that secured the ice maker. Undid the ponytail wiring. 3 Phillips screws to remove the metal back. unplugged the Evaporator Fan Motor. Replaced the new one. reassembled.
Was this instruction helpful to you?
Thank you for voting!