



Models
>
TW518SW-P1180801W
TW518SW-P1180801W Amana Refrigerator
Jump to:
Find Part by Name
Keep searches simple, eg. "belt" or "pump".
Keep searches simple, eg. "belt" or "pump".
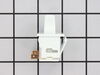
In Stock
Order now and your part arrives by Sep 24
$7.60
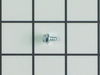
This is a multi-use screw and can be used on a variety of appliances. The measurements of the screw are: 8/18 x 3/8. *Please note: the screw is sold individually. Refer to the manual provided by the m...
In Stock
Order now and your part arrives by Sep 24
In Stock
Order now and your part arrives by Sep 24
In Stock
Order now and your part arrives by Sep 24
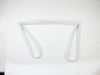
$177.42
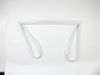
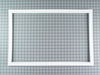
This fresh food door gasket is white and made of rubber. It measures approximately twenty-eight and a half inches wide by forty inches long.
In Stock
Order now and your part arrives by Sep 24
This wheel is sold individually. It is located on the bottom of the refrigerator.
In Stock
Order now and your part arrives by Sep 24
This kick plate retaining clip is sold individually and is made entirely of metal. If you are needing the kick plate as well, remember to check with your model number as these clips may already be included.
No Longer Available
This almond refrigerator door handle is just over eighteen inches long. ***Please Note*** If the hinges are on the left side of your refrigerator, then this handle becomes the freezer door handle. Mad...
No Longer Available
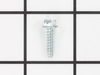
$7.60
This screw is a little under an inch long and is made of metal. It is used with a refrigerator's ice maker assembly. Sold individually.
In Stock
Order now and your part arrives by Sep 24
In Stock
Order now and your part arrives by Sep 24
In Stock
Order now and your part arrives by Sep 24
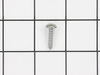
Follow appropriate safety practices when installing this refrigerator screw. This screw is sold individually.
Special Order
Common Problems and Symptoms for TW518SW-P1180801W
Viewing 8 of 8Light not working
Fixed by these parts
How to fix it
Door Sweating
Fixed by these parts
How to fix it
Noisy
Fixed by these parts
How to fix it
Door won’t open or close
Fixed by these parts
How to fix it
Door latch failure
Fixed by these parts
How to fix it
Fridge runs too long
Fixed by these parts
How to fix it
Fridge too warm
Fixed by these parts
How to fix it
Leaking
Fixed by these parts
How to fix it

Keep searches simple. Use keywords, e.g. "leaking", "pump", "broken" or "fit".
- Customer:
- Clint from Rayville, MO
- Parts Used:
- W11384469
- Difficulty Level:
- Really Easy
- Total Repair Time:
- Less than 15 mins
- Tools:
- Screw drivers
Lights inside refrigerator not working
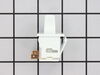
I used a flat-head screwdriver to pop out the old light rocker switch. Then, I unplugged the wires, plugged them into the new light rocker switch, and then popped the new switch into the hole. That's it! Lights began working again.
Was this instruction helpful to you?
Thank you for voting!
- Customer:
- James Richard from St. Cloud, MN
- Parts Used:
- W11384469
- Difficulty Level:
- Easy
- Total Repair Time:
- Less than 15 mins
- Tools:
- Socket set
Light Switch broke
An easy job for smaller hands. Removed the two bolts holding the light cover. Removed two electrical connections from the old switch by pinching the retaining clip,removed the switch, snapped in the new one and re-attached the connectors. Your online illustrations helped me to know that the plastic housing for the light switch would only
... Read more
swing down so far and was not intended to be removed. Saved me from breaking that plastic cover's tabs. This home repair saved me more than 5 times the cost of hiring a professional to do it. Very happy homeowner.
Read less
Was this instruction helpful to you?
Thank you for voting!
- Customer:
- Roger from Versailles, KY
- Parts Used:
- WP12550109Q
- Difficulty Level:
- Easy
- Total Repair Time:
- 30 - 60 mins
- Tools:
- Socket set
Replace the refrigerator door gasket.
I opted not to remove the entire door which did not cause any problems, and did not add to the complexity of the job by adding another step. I simply removed the numerous bolts from the sides an bottom of the existing gasket and loosened, but left in place, the top row of bolts. I slipped the old gasket out and slipped the new gasket in.
... Read more
Then tightened one bolt per side to secure it in place and verify it was even around the perimeter, then tightened all remaining bolts and then wait for the applause.
Read less
Was this instruction helpful to you?
Thank you for voting!