


Models
>
BC20WA-P6023515WA
BC20WA-P6023515WA Amana Refrigerator
Jump to:
Find Part by Name
Keep searches simple, eg. "belt" or "pump".
Diagrams for BC20WA-P6023515WA
Viewing 8 of 8


Keep searches simple, eg. "belt" or "pump".

$17.80
This is a genuine OEM 40-Watt replacement light bulb that is compatible with various types of appliances. It has a frosted glass bulb with a standard metal socket base, making it easy to screw and uns...
In Stock
Order now and your part arrives by Mar 21

In Stock
Order now and your part arrives by Mar 21

$5.56
This 25-watt light bulb is a genuine OEM replacement part for a variety of appliances. The 120-volt incandescent bulb has a screw-in base and is used to light up the appliance when the door is opened....
In Stock
Order now and your part arrives by Mar 21

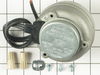
This condenser fan motor is used with frost-free refrigerators with a condenser coil. When the compressor runs, so does this fan, circulating air through the refrigerator grille, cooling the compresso...
In Stock
Order now and your part arrives by Mar 21

$7.30
This is a multi-use screw and can be used on a variety of appliances. The measurements of the screw are: 8/18 x 3/8. *Please note: the screw is sold individually. Refer to the manual provided by the m...
In Stock
Order now and your part arrives by Mar 21

The timer will shut off the cooling system of the refrigerator and the defrost heater will turn on.
In Stock
Order now and your part arrives by Mar 21

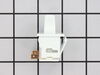
The water inlet valve is a solenoid-operated switch located at the bottom of the refrigerator. When it is energized by electrical power, water is released from the supply line through the water valve ...
In Stock
Order now and your part arrives by Mar 21

In Stock
Order now and your part arrives by Mar 21

$11.50
This is a compression nut for your refrigerator/freezer. The compression nut is used with the plastic water line for the icemaker assembly. It is the connection between the water supply line and the o...
In Stock
Order now and your part arrives by Mar 21

In Stock
Order now and your part arrives by Mar 21

$9.40
This fourteen cube ice cube tray is eleven inches long. It is all white in color and is made entirely of plastic.
In Stock
Order now and your part arrives by Mar 21

$7.30
This screw is a little under an inch long and is made of metal. It is used with a refrigerator's ice maker assembly. Sold individually.
In Stock
Order now and your part arrives by Mar 21
Questions and Answers
We're sorry, but our Q&A experts are temporarily unavailable.
Please check back later if you still haven't found the answer you need.
Common Problems and Symptoms for BC20WA-P6023515WA
Viewing 14 of 14Light not working
Fixed by these parts
How to fix it
Fridge too warm
Fixed by these parts

How to fix it
Freezer section too warm
Fixed by these parts
How to fix it
Noisy
Fixed by these parts
How to fix it
Ice maker not making ice
Fixed by these parts


How to fix it
Leaking
Fixed by these parts
How to fix it
Fridge runs too long
Fixed by these parts
How to fix it
Freezer not defrosting
Fixed by these parts
How to fix it
Fridge and Freezer are too warm
Fixed by these parts
How to fix it
Will Not Start
Fixed by these parts
How to fix it
Too warm
Fixed by these parts
How to fix it
Frost buildup
Fixed by these parts
How to fix it
Ice maker won’t dispense ice
Fixed by these parts
How to fix it
Freezer too cold
Fixed by these parts
How to fix it


Keep searches simple. Use keywords, e.g. "leaking", "pump", "broken" or "fit".
- Customer:
- Tom from Franklin, WI
- Parts Used:
- 833697
- Difficulty Level:
- A Bit Difficult
- Total Repair Time:
- 15 - 30 mins
- Tools:
- Nutdriver, Pliers
Sometimes the condenser fan would start causing the refrigerator to overheat.
Unplug the appliance.
Removed the screws holding the back panel.
Removed the fan blade.
removed 3 screws holding the condenser fan.
Remove the 3 metal brackets attached to the fan.
(First note which studs the brackets are attached to. Attach the 3 metal brackets to the new fan. (New screws were supplied)
Cut ... Read more and strip the wire about two inches from the fan.
Cut and strip the new wire. I cut the new wire in half (about 6 inches.) Connect the two wires, twist and used 2 wire nuts. Tie wrap the wire to the wire harness. Mount the new fan (three screws)
Screw the back panel back on.
Mount the new
Read less
Was this instruction helpful to you?
Thank you for voting!
- Customer:
- Peter from Eden, UT
- Parts Used:
- R0131577
- Difficulty Level:
- Really Easy
- Total Repair Time:
- Less than 15 mins
- Tools:
- Socket set
Fridge and freezer didn't cool enough
I diagnosed the problem via the internet. Diagrams helped a lot. Coils were frozen over. Thawed them out overnight. Manually advanced timer and the defrost heater was operable. The defrost timer wasn't "turning" on it's own. I turned the fridge back on while I awaited the part. It worked fine for the time I had to wait. (over two
... Read more
weeks since I had delayed ordering the part) New timer arrived as promised. Undid 4 hex head (1/4") screws. Unplugged 4 prong connection. Plugged in new timer and replaced the 4 screws. Frigde works great.
Read less
Was this instruction helpful to you?
Thank you for voting!
- Customer:
- Clint from Rayville, MO
- Parts Used:
- W11384469
- Difficulty Level:
- Really Easy
- Total Repair Time:
- Less than 15 mins
- Tools:
- Screw drivers
Lights inside refrigerator not working
I used a flat-head screwdriver to pop out the old light rocker switch. Then, I unplugged the wires, plugged them into the new light rocker switch, and then popped the new switch into the hole. That's it! Lights began working again.
Was this instruction helpful to you?
Thank you for voting!