


Models
>
72355-207
72355-207 Admiral Refrigerator
Jump to:
Find Part by Name
Keep searches simple, eg. "belt" or "pump".
Diagrams for 72355-207
Viewing 1 of 1
Keep searches simple, eg. "belt" or "pump".

$16.35
Sold individually. This bulb is a 7 watt appliance incandescent light bulb.This appliance light bulb is two inches long. It is used for many clothes dryers.
In Stock
Order now and your part arrives by Jul 23

$11.98
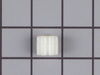
This is a compression nut for your refrigerator/freezer. The compression nut is used with the plastic water line for the icemaker assembly. It is the connection between the water supply line and the o...
Special Order

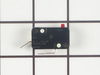
This is an authentic OEM replacement part. This actuator switch is used in refrigerators that dispense ice and water. This actuator is what activates the dispenser switch when you press your water gla...
No Longer Available


Special Order
Common Problems and Symptoms for 72355-207
Viewing 3 of 3Leaking
Fixed by these parts
How to fix it
Ice maker not making ice
Fixed by these parts
How to fix it
Not dispensing water
Fixed by these parts
How to fix it

Keep searches simple. Use keywords, e.g. "leaking", "pump", "broken" or "fit".
- Customer:
- Jon from Nampa, ID
- Parts Used:
- 55440-2
- Difficulty Level:
- Easy
- Total Repair Time:
- 15 - 30 mins
- Tools:
- Screw drivers
the ice/water actuator switch burnt out and was stuck on.
Removed the rubber cover over the actuator switch. Used a screwdriver to remove the switch, disconnected the wires. I then removed the switch from the mounting bracket using a small philips head screw driver. Installed the new switch on the mounting bracket then installed the switch onto the freezer door. The only difficult part was
... Read more
installing the rubber cover. Now I just need to repair the damage to my hardwood floors and carpet from all the water.
Read less
Was this instruction helpful to you?
Thank you for voting!
- Customer:
- Vernon from Festus, MO
- Parts Used:
- 55440-2
- Difficulty Level:
- Really Easy
- Total Repair Time:
- Less than 15 mins
- Tools:
- Screw drivers
Ice Maker would not shut off.
Removed the rubber gasket and checked the switch. The switch displayed signs of scorching and the plastic was very brittle. Removed the switch which was held in by a small bracket and one screw. Replaced switch on bracket and remounted the switch. It took longer to reinstall the rubber gasket that to diagnoise and repair the switch. This
... Read more
was a very easy repair and the time from the part order to receiving it was two days. I'm very pleased with the part availability and quick shipping.
Read less
Was this instruction helpful to you?
Thank you for voting!
- Customer:
- Kevin from FOUNTAIN HLS, AZ
- Parts Used:
- 55440-2
- Difficulty Level:
- A Bit Difficult
- Total Repair Time:
- 1- 2 hours
- Tools:
- Screw drivers
Water / Ice dispenser would not stop flowing / running
Our 20+ year old Maytag refrigerator suddenly started dispensing water one day without anyone near the refrigerator. Thankfully, my wife was nearby; my son temporarily solved the problem by shutting off water to the house. The ice dispenser unit has a "Lock" switch which turns off power to the ice & water dispenser. With the switch in
... Read more
the "lock" position, we were able to continue using the refrigerator (and turn the water back on) until I was able to get a replacement part.
The biggest hurdle that I encountered was removing the trim; I spent perhaps an hour and a half trying to figure it out. In the end it turned out to be easy and would have been perhaps half an hour job total had I known the trick. So... to remove the trim on a Maytag RSW2400, you remove a single Phillips head screw on the bottom of the trim. The trim then slides to the left and can be removed.
The next mistake I made was removing the entire dispenser unit. Instead, if you look closely, there are screws which may be used to disassemble part of it, leaving the ice/water dispenser housing mounted to the refrigerator door. This provides access to the ice/water actuator switch. Perform this disassembly and access to the switch becomes obvious.
The switch is held in place with a single Phillips screw. Make sure that you've disconnected the power to the fridge well before this point because, AFAICT, 120VAC flows through this switch! The switch that I replaced didn't appear to be in bad shape and, once removed, the switch seemed to work correctly when I tested it with an ohmmeter. I replaced it anyway.
Reassembly was straightforward and easy. Better still, ice and water are now dispensed correctly again.
Read less
Was this instruction helpful to you?
Thank you for voting!