


Models
>
1259A26
1259A26 Whirlpool Range
Jump to:
Find Part by Name
Keep searches simple, eg. "belt" or "pump".
Keep searches simple, eg. "belt" or "pump".

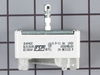
If the large surface burner on your range will not heat up, you may need to replace the switch. This genuine OEM switch is used to control the temperature of the large 8-inch burner, along with turnin...
In Stock
Order now and your part arrives by Jul 30

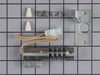
This round style carborundum gas oven igniter has 10 inch lead and amperage range between 2.5 and 3.0 amps. Be very careful when handling this igniter as it is very fragile. Please note - The bracket ...
In Stock
Order now and your part arrives by Jul 30

This part sends enough current to the igniter to create a spark to the bottom of the burner cap.
No Longer Available


This single round chrome drip pan is 7-7/16 inches in diameter. Its center hole has a diameter of three and a half inches wide. Use this chrome drip pan for your Whirlpool brand gas range or cooktop.
No Longer Available
Common Problems and Symptoms for 1259A26
Viewing 7 of 7Element will not heat
Fixed by these parts
How to fix it
Will Not Start
Fixed by these parts
How to fix it
Little to no heat when baking
Fixed by these parts
How to fix it
Oven is too hot
Fixed by these parts
How to fix it
Gas igniter glows, but will not light
Fixed by these parts
How to fix it
Will not program
Fixed by these parts
How to fix it
Oven not heating evenly
Fixed by these parts
How to fix it

Keep searches simple. Use keywords, e.g. "leaking", "pump", "broken" or "fit".
- Customer:
- chaz from fairplay, CO
- Parts Used:
- WP3149400
- Difficulty Level:
- Easy
- Total Repair Time:
- 15 - 30 mins
- Tools:
- Screw drivers
the element did not turn compleatly off, the on light stayed on.
removed the screws holding the back metal panel, this exposed the wires to the switch. tested the wires to find that they were live when the switch was in the off position. ordered a new switch. UNPLUGED THE STOVE. removed the knob on the front of the stove. this exposed 2 screws, removed screws and the switch came away from the stove. re
... Read more
moved each wire from the old switch and replaced them in the same position on the new switch. inserted new switch into the stove and attached the 2 screws. replaced back panel and pluged in stove. all tested well
Read less
Was this instruction helpful to you?
Thank you for voting!
- Customer:
- Mark from Rego Park, NY
- Parts Used:
- 4342528
- Difficulty Level:
- Easy
- Total Repair Time:
- Less than 15 mins
- Tools:
- Screw drivers, Socket set
The lower burner would not ignite.
First I removed the oven racks. Then I loosened the two screws in the back of the oven floor and figured out how to remove it. Then I loosened the two screws at the front of the diverter and, with some pushing and pulling and twisting, was able to get that to come out, too. Then I tried lighting the oven and noticed that the igniter wa
... Read more
s not glowing. When I saw that the upper (broiler) burner was working fine, I hoped that the problem was the lower igniter itself. I checked the wires and they seemed fine. I saw that two bolts held the igniter onto its bracket, so with a socket wrench (which size I got right on the first guess!) I removed those bolts and the igniter came loose. I found the connecter for the wires when I removed the drawer under the oven and was able to pull it apart easily. The igniter came out completely. There was nothing unusual about it, but I decided to take a chance and order a new one, hoping that replacing it would solve the problem. I put the rest of the oven together and waited. About three days later the part arrived (it was sent on a holiday; FedEx is soooo much better than USPS). I retraced the steps of taking the oven apart, put the two bolts into the new igniter to attach it to the bracket, and went back underneath behind the drawer to connect the wires. Then came the moment of truth: I tried turing on the oven. I held the button down to keep the light off, and after a few seconds I saw it: IT GLOWED!! It worked!! After yelling a satisfying "YEAH!!," I turned it off, put back the drawer, the diverter (more pulling and pushing and twisting), and the oven floor. Now it's all working perfectly and it took a very short time to fix. And a little luck that the problem was with such a simple part.
Read less
Was this instruction helpful to you?
Thank you for voting!
- Customer:
- John from Clinton, CT
- Parts Used:
- WP3149400
- Difficulty Level:
- Easy
- Total Repair Time:
- 15 - 30 mins
- Tools:
- Pliers, Screw drivers
Burner would go high without warning
We felt the only possible problem could be the switch assembly. I removed the switch panel, removed the wires from the old switch, one at a time, removed the old switch assembly and installed the new switch assembly. The extended stem did have to be snapped off (per your instructions) and that too was a very simple task.
Was this instruction helpful to you?
Thank you for voting!