


Models
>
KSES330SPS0
KSES330SPS0 Whirlpool Range
Jump to:
Find Part by Name
Keep searches simple, eg. "belt" or "pump".
Diagrams for KSES330SPS0
Viewing 6 of 6


 Diagram and Parts List for Whirlpool Range")
Keep searches simple, eg. "belt" or "pump".

$24.15
This 18 ml bottle of white appliance touch-up paint is used to cover scratches or marks on your appliance. The white touch-up paint can be used on refrigerators, microwaves, ranges, clothes dryers, an...
In Stock
Order now and your part arrives by Jul 31

$52.50
Need a new oven rack? This chrome wire rack is built to handle the heat and give you a solid surface for baking, broiling, or roasting. It fits a variety of compatible ovens and is tough enough for ev...
In Stock
Order now and your part arrives by Jul 31

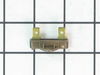
$35.34
This part is used as a safety feature. If your range overheats this part will shut the range down.
In Stock
Order now and your part arrives by Jul 31

In Stock
Order now and your part arrives by Jul 31

In Stock
Order now and your part arrives by Jul 31

In Stock
Order now and your part arrives by Jul 31

In Stock
Order now and your part arrives by Jul 31

$41.78
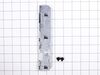
This oven door gasket prevents heat from escaping the oven cavity when in use. It contains all of the attaching clips needed for installation.
In Stock
Order now and your part arrives by Jul 31

In Stock
Order now and your part arrives by Jul 31

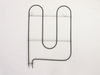
$87.74
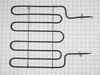
Note: This part has been updated by the manufacturer. It may differ in appearance but will still function the same as the original. This part is located on the inside of the oven on the top.
In Stock
Order now and your part arrives by Jul 31

In Stock
Order now and your part arrives by Jul 31

$76.42
This surface burner switch regulates the temperature of the left front burner on an electric range. It turns the burner on and off to maintain the selected heat level. A damaged switch may cause heating issues.
In Stock
Order now and your part arrives by Jul 31
Common Problems and Symptoms for KSES330SPS0
Viewing 7 of 7Element will not heat
Fixed by these parts
How to fix it
Little to no heat when baking
Fixed by these parts
How to fix it
Oven is too hot
Fixed by these parts
How to fix it
Little to no heat when broiling
Fixed by these parts
How to fix it
Oven not heating evenly
Fixed by these parts
How to fix it
Will Not Start
Fixed by these parts
How to fix it
Door won’t close
Fixed by these parts
How to fix it


Keep searches simple. Use keywords, e.g. "leaking", "pump", "broken" or "fit".
- Customer:
- Terry from Rockwall, TX
- Parts Used:
- W11171119
- Difficulty Level:
- Really Easy
- Total Repair Time:
- Less than 15 mins
- Tools:
- Screw drivers
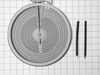
Surface Element Out
Took 2 screws under front edge of smooth top. Unscrewed ground wire from back of smooth top unit. Unplugged 2 wire bundles, from back. Took bad element out , put in new one. Put back together. About 10 min's tops. Easy peasy.
Was this instruction helpful to you?
Thank you for voting!
- Customer:
- Robert from Fruitland Park, FL
- Parts Used:
- W11171119
- Difficulty Level:
- Easy
- Total Repair Time:
- 15 - 30 mins
- Tools:
- Screw drivers
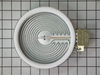
Glass top stove element stopped working
really easy! Removed 2 screws under the glass top at the front, access from the open oven door, then removed the ground wire, removed the stove top, took the element holder off,( 2 screws)and replaced with new element, 30 minutes. I ordered the part and came within 18 hrs of ordering it, fantastic experience.
Was this instruction helpful to you?
Thank you for voting!
- Customer:
- EVERETT from BARTOW, FL
- Parts Used:
- WP9755770
- Difficulty Level:
- A Bit Difficult
- Total Repair Time:
- 30 - 60 mins
- Tools:
- Pliers, Screw drivers
Hidden bake element, oven doesn't maintain hear
To access the hidden bake element you have to remove the warmer drawer and the left side panel (your left from the back of the oven). To remove the side panel you need to access 3 screws under the side of the glass top, to lift the glass top open the oven door and remove 2 screws from the bottom side of the glass top. Once the drawer and
... Read more
side panel are removed you can use a flat head screwdriver to pry out the false bottom on the front side of the oven and remove 2 more screws on the side so it drops down. Move the insulation out of the way and relase the element tray by prying out 2 tabs on the front side. Unplug the connectors from the element terminals and remove the bolt holding the element. Fold the side of the element tray down to remove the element. Reverse order to install.
Read less
Was this instruction helpful to you?
Thank you for voting!