



Models
>
WFG550S0LB4
WFG550S0LB4 Whirlpool Range
Jump to:
Find Part by Name
Keep searches simple, eg. "belt" or "pump".
Keep searches simple, eg. "belt" or "pump".
In Stock
Order now and your part arrives by Sep 28
$51.43
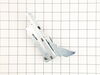
This passive oven door hinge fits either side of the door and helps it open and stay in place smoothly. It’s a genuine OEM part and does not include the spring. Compatible with many Whirlpool-related ...
In Stock
Order now and your part arrives by Sep 28
In Stock
Order now and your part arrives by Sep 28
$80.13
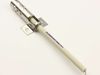
The broil igniter ignites the gas to light the oven broil burner. Shut off the house circuit breaker and gas supply before installing this part. Wear work gloves to protect your hands.
In Stock
Order now and your part arrives by Sep 28
In Stock
Order now and your part arrives by Sep 28
In Stock
Order now and your part arrives by Sep 28
In Stock
Order now and your part arrives by Sep 28
Special Order

Special Order
In Stock
Order now and your part arrives by Sep 28
Special Order
On Order
Common Problems and Symptoms for WFG550S0LB4
Viewing 1 of 1
Keep searches simple. Use keywords, e.g. "leaking", "pump", "broken" or "fit".
- Customer:
- Richard from MAGALIA, CA
- Parts Used:
- W10919249
- Difficulty Level:
- Very Easy
- Total Repair Time:
- Less than 15 mins
burned the rubber feet off of the burner grates
cleaned the hole and inserted glue, then the rubber feet.
Was this instruction helpful to you?
Thank you for voting!
- Customer:
- Richard from Highland Park, IL
- Parts Used:
- W10919249
- Difficulty Level:
- Really Easy
- Total Repair Time:
- Less than 15 mins
Grate Feet fell off early
Used Silicone Rubber to "glue" them. It's heat resistant unlike super glue which is why 8 of them fell off. I only found 6 of them and had to order replacements.
Was this instruction helpful to you?
Thank you for voting!
- Customer:
- Teddy from PRAIRIEVILLE, LA
- Parts Used:
- WPW10184491
- Difficulty Level:
- Really Easy
- Total Repair Time:
- 15 - 30 mins
- Tools:
- Screw drivers
Gas oven interment lighting. Pan was cracked and out of shape.
Loosen top two rear screws from the top pan. Remove top pan
Remove 2 front screws from bottom pan. Remove bottom pan. Reverse order.
Replace both pans.
Remove 2 front screws from bottom pan. Remove bottom pan. Reverse order.
Replace both pans.
Was this instruction helpful to you?
Thank you for voting!