Models > WEE750H0HV1

WEE750H0HV1 Whirlpool Range

Jump to:

Find Part by Name

Keep searches simple, eg. "belt" or "pump".

Diagrams for WEE750H0HV1

Viewing 5 of 5
Keep searches simple, eg. "belt" or "pump".
This is a genuine OEM 40-Watt replacement light bulb that is compatible with various types of appliances. It has a frosted glass bulb with a standard metal socket base, making it easy to screw and uns...
In Stock
Order now and your part arrives by Jun 1
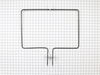
This authentic OEM bake element is square in shape with the terminals in the center and sits at the bottom of your oven. The purpose of this part is to heat your oven in order to cook your food. If yo...
In Stock
Order now and your part arrives by Jun 1
This genuine OEM part is a replacement sensor for your oven. The sensor works with the control board to measure and regulate the temperature in your oven. If the sensor has become defective, the tempe...
In Stock
Order now and your part arrives by Jun 1
$21.82
This is a screw and it is made for multiple appliances in your home. This model is called a sheet metal screw because it has sharp points, and the threads are closer together. This screw is designed t...
In Stock
Order now and your part arrives by Jun 1
This 18 ml bottle of white appliance touch-up paint is used to cover scratches or marks on your appliance. The white touch-up paint can be used on refrigerators, microwaves, ranges, clothes dryers, an...
In Stock
Order now and your part arrives by Jun 1
It provides a way of connecting individual electrical wires and offers protection of the device from electrical surges (voltages and/or currents).
In Stock
Order now and your part arrives by Jun 1
$7.60
Sold individually.
In Stock
Order now and your part arrives by Jun 1
This broiler pan and roasting rack set features a two-piece design that allows fat to drain away for cleaner cooking and reduced splatter. Made with a durable, high-heat resistant porcelain finish, it...
In Stock
Order now and your part arrives by Jun 1
$67.93
The light socket on your electric range connects the power source to the light bulb. If your oven light is malfunctioning, you may need to replace the light socket. The light socket is located in the ...
In Stock
Order now and your part arrives by Jun 1
This part is used as a safety feature. If your range overheats this part will shut the range down.
In Stock
Order now and your part arrives by Jun 1
In Stock
Order now and your part arrives by Jun 1
This cooling fan assembly helps regulate temperature around the control panel in compatible ranges and ovens. It includes a hall sensor and replaces older fan models to resolve issues like overheating...
In Stock
Order now and your part arrives by Jun 1

Questions and Answers

Ask our experts a question about this part and we'll get back to you as soon as possible!

1 question answered by our experts.
  • 1
Sort by:
Sorry, we couldn't find any existing answers that matched.
Try using some different or simpler keywords, or submit your new question by using the "Ask a Question" button above!
Thomas
January 15, 2026
This oven keeps turning itself off but the electric burners still stay on
For model number WEE750H0HV1
Fix.com logo
Hi Thomas, thank you for reaching out. We would suggest checking the safety thermostat, part number FIX11740991. It shuts off the oven if it detects overheating. You may need to replace it to fix the issue. We hope this solves your problem!

Was this helpful?
Thank you for voting!
Related Parts:

Common Problems and Symptoms for WEE750H0HV1

Viewing 8 of 8
Element will not heat
Fixed by these parts
Fixing Fixing Fixing
How to fix it
Little to no heat when baking
Fixed by these parts
Fixing Fixing Fixing
How to fix it
Oven not heating evenly
Fixed by these parts
Fixing Fixing Fixing
How to fix it
Oven is too hot
Fixed by these parts
Fixing Fixing Fixing
How to fix it
Will Not Start
Fixed by these parts
Fixing Fixing Fixing
How to fix it
Little to no heat when broiling
Fixed by these parts
Fixing Fixing Fixing
How to fix it
Door won’t close
Fixed by these parts
Fixing Fixing Fixing
How to fix it
Touchpad does not respond
Fixed by these parts
Fixing
How to fix it
Keep searches simple. Use keywords, e.g. "leaking", "pump", "broken" or "fit".
Customer:
Wendy from Red Hook, NY
Parts Used:
WPW10208653
Difficulty Level:
Easy
Total Repair Time:
More than 2 hours
Tools:
Screw drivers
mice had made nests in the insulation wrap in the range
I numbered every part. ex: 1 L., for first part removed left side. I used a magic marker to circle the holes and wrote the number of screws used on the part, set the srews in a separete place, so that I new where these screws went to. The cleanup was pretty time consuming, but I was able to keep my stove, when every repairman I called to fix my stove told me I was better off buying a new stove. ($600.00 stove 2 years old)Please Note: The insulation blanket needed for the entire stove is two pieces, the sides and top are one part # and the bottom and back, are another part #. I did not know this. I just purchased the top and sides. I got lucky, the back and bottom were still in good shape. So I guess I should have read the description of the part more carefully to see what it covers, before I ordered it. It took two people two hours to do the work, it was really nice to have an extra set of eyes, to remember what direction pieces of metal from the stove went. I would do it all over in a heart beat instead of buying a new stove.
125 of 202 people found this instruction helpful.
Was this instruction helpful to you?
Thank you for voting!
Customer:
Ruth from Oregon, IL
Parts Used:
WPW10181986
Difficulty Level:
Really Easy
Total Repair Time:
15 - 30 mins
Tools:
Screw drivers
temperature not accurate after 3 1/2 years of happy usage
Opened up the back of the stove. Unpluged the sensor. Replaced the sensor. Replace the back of the stove.

The sensor that has been replaced is not what is expected. After reading all of the instructions for adjusting the temperatures, the only temp that stays steady is when we first turn on the oven to 350 degrees. That stays s teady but when I turn it to 400 it slowly goes up to 425 degrees.
144 of 272 people found this instruction helpful.
Was this instruction helpful to you?
Thank you for voting!
Customer:
Helen from PURVIS, MS
Parts Used:
W10779716
Difficulty Level:
Very Easy
Total Repair Time:
Less than 15 mins
Tools:
Screw drivers
The oven would take an hour to preheat.
First, we turned on broil and the upper element turned orange and obviously worked. We figured the bottom element went out. The diagram on this site showed a bottom heating element that looked nothing like ours, but after reading other reviews, and reading that part that goes through the back of the oven was in the middle, and not off to the side, we ordered this element. It was perfect. All you have to do is unplug the oven, take out the bottom pan covering the element by removing 2 screws in the back, remove the lower small cover on the back of the oven and then unplug the old element, unscrew the old element on the inside of the stove, then install the new element and put everything back like it was. Nothing to it. It worked like a charm and my oven now heats up fast again. Easiest appliance repair job ever!
53 of 58 people found this instruction helpful.
Was this instruction helpful to you?
Thank you for voting!