


Models
>
ACR4503SFW2
ACR4503SFW2 Maytag Range
Jump to:
Find Part by Name
Keep searches simple, eg. "belt" or "pump".
Diagrams for ACR4503SFW2
Viewing 6 of 6


Keep searches simple, eg. "belt" or "pump".

$19.75
This is a genuine OEM 40-Watt replacement light bulb that is compatible with various types of appliances. It has a frosted glass bulb with a standard metal socket base, making it easy to screw and uns...
In Stock
Order now and your part arrives by Aug 3

$15.26
The drip bowl is used for electric ranges or cooktops with the coiled style burners, to catch any drips, spills, or crumbs that may occur while cooking. If your bowls have become discolored, corroded,...
In Stock
Order now and your part arrives by Aug 3

$16.35
The drip bowl is found underneath the burner element of ranges with a rolled terminal style plug-in surface element. The purpose of the bowl is to catch any drips or spills that may occur while cookin...
In Stock
Order now and your part arrives by Aug 3

$76.42
This genuine OEM part is a replacement sensor for your oven. The sensor works with the control board to measure and regulate the temperature in your oven. If the sensor has become defective, the tempe...
In Stock
Order now and your part arrives by Aug 3

$21.82
This is a screw and it is made for multiple appliances in your home. This model is called a sheet metal screw because it has sharp points, and the threads are closer together. This screw is designed t...
In Stock
Order now and your part arrives by Aug 3

$24.15
This 18 ml bottle of white appliance touch-up paint is used to cover scratches or marks on your appliance. The white touch-up paint can be used on refrigerators, microwaves, ranges, clothes dryers, an...
In Stock
Order now and your part arrives by Aug 3

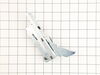
$58.37
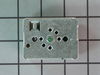
Designed for 8-inch surface burners, this infinite control switch lets you turn the burner on and adjust its heat level. It works by sending voltage to the heating element based on the knob setting. A...
In Stock
Order now and your part arrives by Aug 3

$27.83
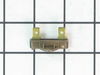
It provides a way of connecting individual electrical wires and offers protection of the device from electrical surges (voltages and/or currents).
In Stock
Order now and your part arrives by Aug 3

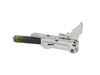
$53.58
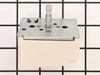
This OEM surface element control switch regulates heat for 6-inch electric burners. It fits Whirlpool, KitchenAid, Maytag, and other compatible ranges. Common signs of failure include no heat, stuck o...
In Stock
Order now and your part arrives by Aug 3

$50.36
This broiler pan and roasting rack set features a two-piece design that allows fat to drain away for cleaner cooking and reduced splatter. Made with a durable, high-heat resistant porcelain finish, it...
In Stock
Order now and your part arrives by Aug 3

$52.50
Need a new oven rack? This chrome wire rack is built to handle the heat and give you a solid surface for baking, broiling, or roasting. It fits a variety of compatible ovens and is tough enough for ev...
On Order

$67.93
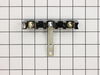
The light socket on your electric range connects the power source to the light bulb. If your oven light is malfunctioning, you may need to replace the light socket. The light socket is located in the ...
In Stock
Order now and your part arrives by Aug 3
Common Problems and Symptoms for ACR4503SFW2
Viewing 9 of 9Little to no heat when baking
Fixed by these parts

How to fix it
Element will not heat
Fixed by these parts
How to fix it
Oven is too hot
Fixed by these parts
How to fix it
Oven not heating evenly
Fixed by these parts

How to fix it
Will Not Start
Fixed by these parts
How to fix it
Door won’t close
Fixed by these parts
How to fix it
Little to no heat when broiling
Fixed by these parts
How to fix it
Touchpad does not respond
Fixed by these parts
How to fix it
Door won’t open after self cleaning cycle
Fixed by these parts

How to fix it


Keep searches simple. Use keywords, e.g. "leaking", "pump", "broken" or "fit".
- Customer:
- Michael from Kings Park, NY
- Parts Used:
- W10196406RW, W10196405RW
- Difficulty Level:
- Really Easy
- Total Repair Time:
- Less than 15 mins
Drip bowls were rusty and rotting through
I simply removed the elements and replaced the drip bowls with new ones. Put the elements back in and my stove looks %1000 better!
Was this instruction helpful to you?
Thank you for voting!
- Customer:
- Roger from Osage Beach, MO
- Parts Used:
- W10196405RW, W10196406RW
- Difficulty Level:
- Really Easy
- Total Repair Time:
- Less than 15 mins
Just Replaced Ole Drip Bowls.
Unplugged burners. . . . . Removed old bowls and replaced with new. . . . . . Plugged burners back in. However, I do want you to know that I could not believe the promptness of your service and the courteous customer service person that assisted me with my problem in selecting the correct drip bowls. You are definitely a unique compan
... Read more
y!!!!
Read less
Was this instruction helpful to you?
Thank you for voting!
- Customer:
- Wendy from Red Hook, NY
- Parts Used:
- WPW10208653
- Difficulty Level:
- Easy
- Total Repair Time:
- More than 2 hours
- Tools:
- Screw drivers
mice had made nests in the insulation wrap in the range
I numbered every part. ex: 1 L., for first part removed left side. I used a magic marker to circle the holes and wrote the number of screws used on the part, set the srews in a separete place, so that I new where these screws went to. The cleanup was pretty time consuming, but I was able to keep my stove, when every repairman I called to
... Read more
fix my stove told me I was better off buying a new stove. ($600.00 stove 2 years old)Please Note: The insulation blanket needed for the entire stove is two pieces, the sides and top are one part # and the bottom and back, are another part #. I did not know this. I just purchased the top and sides. I got lucky, the back and bottom were still in good shape. So I guess I should have read the description of the part more carefully to see what it covers, before I ordered it. It took two people two hours to do the work, it was really nice to have an extra set of eyes, to remember what direction pieces of metal from the stove went. I would do it all over in a heart beat instead of buying a new stove.
Read less
Was this instruction helpful to you?
Thank you for voting!