



Models
>
LRG3194BD
LRG3194BD (00) LG Range
Jump to:
Find Part by Name
Keep searches simple, eg. "belt" or "pump".
Keep searches simple, eg. "belt" or "pump".
In Stock
Order now and your part arrives by Sep 26
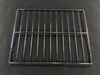
$55.18
Upgrade your oven with this durable gliding shelf rack, designed to provide a stable surface for baking, roasting, and broiling. Its smooth sliding design makes it easy to insert and remove dishes, of...
In Stock
Order now and your part arrives by Sep 26
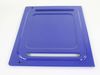
$256.90
This oven base plate and bottom heat shield is designed to protect the lower section of the oven from excessive heat while providing structural support for internal components. Positioned at the base ...
Special Order
In Stock
Order now and your part arrives by Sep 26

Special Order
$65.80
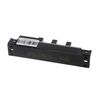
The spark module controls the spark for lighting the cooktop surface burners.
In Stock
Order now and your part arrives by Sep 26
Special Order
Special Order
In Stock
Order now and your part arrives by Sep 26
In Stock
Order now and your part arrives by Sep 26
Keep searches simple. Use keywords, e.g. "leaking", "pump", "broken" or "fit".
- Customer:
- Jeffrey from CERRITOS, CA
- Parts Used:
- 4890W1N005L
- Difficulty Level:
- Really Easy
- Total Repair Time:
- 30 - 60 mins
- Tools:
- Screw drivers
Replace Inner Oven glass because it shattered
Go onto youtube, such as https://www.youtube.com/watch?v=-ITkrwhDNMQ and watch similar videos for DYI. The process is very similar to other models.
Once the door is removed, place oven door on a towel or soft place so it does not scratch the door. Unscrew the screws and make sure you notice where each screw goes, so you know ... Read more the process of where each screw goes when you re-assemble.
Once the inner cover is removed, remove the insulation, too so you don't damage it. Use Wet/Dry Shop Vac to clean the shattered glass. (WORD OF ADVICE: I did not remove the insulation and the suction of the Shop Vac removed part of the insulation, so now instead of a quick turn around repair turns into a few weeks repair, because the insulation is on back order 10-14 days from the supplier. DON"T MAKE THE SAME MISTAKE!)
Once the glass has been removed, the new inner glass is replaced, begin by re-assemble the oven door with the correct screws and attached the oven door to the range.
Hope this helps
Once the door is removed, place oven door on a towel or soft place so it does not scratch the door. Unscrew the screws and make sure you notice where each screw goes, so you know ... Read more the process of where each screw goes when you re-assemble.
Once the inner cover is removed, remove the insulation, too so you don't damage it. Use Wet/Dry Shop Vac to clean the shattered glass. (WORD OF ADVICE: I did not remove the insulation and the suction of the Shop Vac removed part of the insulation, so now instead of a quick turn around repair turns into a few weeks repair, because the insulation is on back order 10-14 days from the supplier. DON"T MAKE THE SAME MISTAKE!)
Once the glass has been removed, the new inner glass is replaced, begin by re-assemble the oven door with the correct screws and attached the oven door to the range.
Hope this helps
Read less
Was this instruction helpful to you?
Thank you for voting!
- Customer:
- rorke, from tarzana, CA
- Parts Used:
- MAM63404404
- Difficulty Level:
- Really Easy
- Total Repair Time:
- Less than 15 mins
- Tools:
- Screw drivers
melted foil on the base pan in the oven
i removed the oven door by lifting the safety latches on each hinge and gently lifted the door off. once off i could access the 2 large phillips head screws and loosened and removed them. then i simply slid out the old and slid in the new & reversed the process.
Was this instruction helpful to you?
Thank you for voting!
- Customer:
- Yokarina from NEW YORK, NY
- Parts Used:
- EBF60662911
- Difficulty Level:
- Very Difficult
- Total Repair Time:
- 30 - 60 mins
- Tools:
- Screw drivers, Wrench (Adjustable)
Clicking noise while the stove is plugged.
After consulting with multiple specialists, watching several videos/ tutorials online and trying multiple cleaning tools. They all coincided that if the stove was not wet and it is making that noise, It could be a problem with a switch board or the computer of the range. Ordering the part was the easiest part (and trust me, i am not a fix
... Read more
er or an expert on doing any repairs). However, PartSelect offers you precise parts if you know what you are looking for and have the correct model. The problem? Well, LG and Samsung ranges are known for their cook top being hard to dismantle and you need to remove a few pieces before you can get under the knobs where the switch boards are. It took a lot of time to just do that. The connection is a bit complex and I would suggest to leave it for an expect to do it. I must say this… i am glad that i have tried to work on the switch board before i started ordering parts that I did not need. I have over 5 hours with the range plugged, since i have switched the switch board and so far, it is not making that clicking sound. Ps. An expert was charging me from $180-250 to do an inspection and to order the part I needed and an extra fee for installing it. I certainly saved some money by just doing it myself.
Read less
Was this instruction helpful to you?
Thank you for voting!