Models > LRE3083ST

LRE3083ST ((01)(ASTLLGA)) LG Range

Jump to:

Find Part by Name

Keep searches simple, eg. "belt" or "pump".
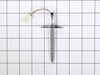
This thermal safety thermostat is used to help protect the appliance from overheating by interrupting an electrical circuit when temperatures rise above its cutoff point. It senses heat at its mountin...
In Stock
Order now and your part arrives by Nov 28
This oven temperature sensor maintains steady cooking temperatures. It measures heat inside the oven cavity and sends readings to the main control board, helping the heating elements cycle as needed. ...
In Stock
Order now and your part arrives by Nov 28
$31.85
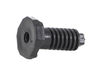
This range leveling leg is used to support the appliance and lets you adjust the height of one corner for a steady, level cooking surface. Its threaded post screws into the base and turns to raise or ...
In Stock
Order now and your part arrives by Nov 28
In Stock
Order now and your part arrives by Nov 28
$72.17
In Stock
Order now and your part arrives by Nov 28
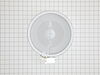
This top-mounted heating element helps your oven broil and bake evenly. If your oven isn’t heating properly or the element looks damaged, this genuine replacement can restore performance. It’s built t...
In Stock
Order now and your part arrives by Nov 28
In Stock
Order now and your part arrives by Nov 28
$16.45
Special Order
In Stock
Order now and your part arrives by Nov 28
$142.95
In Stock
Order now and your part arrives by Nov 28
No Longer Available
In Stock
Order now and your part arrives by Nov 28

Questions and Answers

Be the first to ask our experts a question about this part!

Common Problems and Symptoms for LRE3083ST

Viewing 8 of 8
Little to no heat when baking
Fixed by these parts
Fixing Fixing
How to fix it
Element will not heat
Fixed by these parts
Fixing Fixing Fixing
How to fix it
Oven not heating evenly
Fixed by these parts
Fixing Fixing Fixing
How to fix it
Oven is too hot
Fixed by these parts
Fixing Fixing
How to fix it
Door won’t open after self cleaning cycle
Fixed by these parts
Fixing
How to fix it
Won’t turn on
Fixed by these parts
Fixing
How to fix it
Will Not Start
Fixed by these parts
Fixing
How to fix it
Gas igniter glows, but will not light
Fixed by these parts
Fixing
How to fix it
Keep searches simple. Use keywords, e.g. "leaking", "pump", "broken" or "fit".
Customer:
Richard from CHESAPEAKE, VA
Parts Used:
MEE62385201
Difficulty Level:
Easy
Total Repair Time:
30 - 60 mins
Tools:
Screw drivers
Hammer 1, Glass range top and heating element 0
Dropped a hammer on the range while removing a ceiling light. Viewed a How-To video on Google. Ordered the needed parts. Followed the steps from the How-To video. Reinstall was a bit tricky by myself - could have used an extra set of hands. I have a few words of caution:
1) Put something between the range top and range - like a sheet or drop cloth - to prevent a dropped screw from falling into a crevice in the stove. I dropped a screw and was unable to retrieve it, even with a magnet.
2) Makes sure you remove all bumpers, screws, clips, etc. from the item being replaced and put them on the new item if the new item does not come with replacement bumpers, screws, etc.
24 of 56 people found this instruction helpful.
Was this instruction helpful to you?
Thank you for voting!
Customer:
Norman from ST PETERSBURG, FL
Parts Used:
AGU73969703
Difficulty Level:
Really Easy
Total Repair Time:
15 - 30 mins
Tools:
Pliers, Screw drivers
Plate Assembly Replacment
1. Unplug the stove (you will need 1 person to assist).
2. Remove the 3 assembly screw (Philips screws) located underneath the front of the assembly, near the oven door.
3. Raise the plate assembly to expose the heating elements (Take a photo of the positioning for installation reference).
4. Remove the wires connected th e heating elements (unclip the connectors only).
5. Remove the holding clips from the heating elements (2 clips on each elements, the large element has 1 clip and 1 screw).
6. Remove the elements only (leave the wires in place).
7. Remove the Plate Assemble (save the 2 black rubber mounts located on the sides, the new assembly dose not come with replacements) .
8. Now your are ready to reinstall the Plate Assembly, so do the reverse and you should have no issues (check your photo for proper installation).
3 of 6 people found this instruction helpful.
Was this instruction helpful to you?
Thank you for voting!
Customer:
Jack from LEXINGTON, KY
Parts Used:
MEE62306401
Difficulty Level:
Really Easy
Total Repair Time:
30 - 60 mins
Tools:
Pliers, Screw drivers
Bottom heat element went out
Checked element no reading. Took off back panel and removed element. Took 5 days to get element. Put in new one. Took 20 minutes. Did not have to cut panel as video had shown. It had screws and was easy to get out and put the new one in. The new element was exactly the same as the old one. I checked all elements before ordering. Wa s satisfied with everything but the delivery time
5 of 14 people found this instruction helpful.
Was this instruction helpful to you?
Thank you for voting!