



Models
>
LRG3095ST
LRG3095ST (FSTELGA) LG Range
Jump to:
Find Part by Name
Keep searches simple, eg. "belt" or "pump".
Diagrams for LRG3095ST
Viewing 5 of 5


Keep searches simple, eg. "belt" or "pump".
In Stock
Order now and your part arrives by Oct 1
$78.20
If your appliance isn’t heating or cooling the way it should, this temperature sensor might be the issue. Also known as a thermistor, it helps your appliance stay at the right temperature by working w...
In Stock
Order now and your part arrives by Oct 1
$214.67
This gas range oven igniter is compatible with various models of LG gas ranges. It is made up of the igniter element, wire harness, connector and mounting bracket. The igniter is responsible for gener...
In Stock
Order now and your part arrives by Oct 1
In Stock
Order now and your part arrives by Oct 1
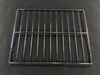
$55.18
Upgrade your oven with this durable gliding shelf rack, designed to provide a stable surface for baking, roasting, and broiling. Its smooth sliding design makes it easy to insert and remove dishes, of...
In Stock
Order now and your part arrives by Oct 1
$76.42
The burner cap attaches to the top of the burner head and acts like a cover for the burner head. This part helps to protect the burner from spills and helps to even the flame while cooking. The cap is...
Special Order
$256.90
This oven base plate and bottom heat shield is designed to protect the lower section of the oven from excessive heat while providing structural support for internal components. Positioned at the base ...
Special Order


In Stock
Order now and your part arrives by Oct 1

On Order
Common Problems and Symptoms for LRG3095ST
Viewing 6 of 6Little to no heat when baking
Fixed by these parts
How to fix it
Oven not heating evenly
Fixed by these parts
How to fix it
Element will not heat
Fixed by these parts
How to fix it
Gas igniter glows, but will not light
Fixed by these parts
How to fix it
Will Not Start
Fixed by these parts
How to fix it
Oven is too hot
Fixed by these parts
How to fix it
Keep searches simple. Use keywords, e.g. "leaking", "pump", "broken" or "fit".
- Customer:
- Jeffrey from CERRITOS, CA
- Parts Used:
- 4890W1N005L
- Difficulty Level:
- Really Easy
- Total Repair Time:
- 30 - 60 mins
- Tools:
- Screw drivers
Replace Inner Oven glass because it shattered
Go onto youtube, such as https://www.youtube.com/watch?v=-ITkrwhDNMQ and watch similar videos for DYI. The process is very similar to other models.
Once the door is removed, place oven door on a towel or soft place so it does not scratch the door. Unscrew the screws and make sure you notice where each screw goes, so you know ... Read more the process of where each screw goes when you re-assemble.
Once the inner cover is removed, remove the insulation, too so you don't damage it. Use Wet/Dry Shop Vac to clean the shattered glass. (WORD OF ADVICE: I did not remove the insulation and the suction of the Shop Vac removed part of the insulation, so now instead of a quick turn around repair turns into a few weeks repair, because the insulation is on back order 10-14 days from the supplier. DON"T MAKE THE SAME MISTAKE!)
Once the glass has been removed, the new inner glass is replaced, begin by re-assemble the oven door with the correct screws and attached the oven door to the range.
Hope this helps
Once the door is removed, place oven door on a towel or soft place so it does not scratch the door. Unscrew the screws and make sure you notice where each screw goes, so you know ... Read more the process of where each screw goes when you re-assemble.
Once the inner cover is removed, remove the insulation, too so you don't damage it. Use Wet/Dry Shop Vac to clean the shattered glass. (WORD OF ADVICE: I did not remove the insulation and the suction of the Shop Vac removed part of the insulation, so now instead of a quick turn around repair turns into a few weeks repair, because the insulation is on back order 10-14 days from the supplier. DON"T MAKE THE SAME MISTAKE!)
Once the glass has been removed, the new inner glass is replaced, begin by re-assemble the oven door with the correct screws and attached the oven door to the range.
Hope this helps
Read less
Was this instruction helpful to you?
Thank you for voting!
- Customer:
- Martin from KEWASKUM, WI
- Parts Used:
- MEE61841401
- Difficulty Level:
- Easy
- Total Repair Time:
- 15 - 30 mins
- Tools:
- Nutdriver
Oven wouldn't ignite
Took off the oven door then took out the racks and two screws in the oven bottom and removed it . Then removed the heat deflector. Then un plugged the old igniter and removed the burner to make it easier to remove the old igniter. Then installed the new igniter and reversed the process
Was this instruction helpful to you?
Thank you for voting!
- Customer:
- Sheila from HOPKINTON, MA
- Parts Used:
- MEE61841401
- Difficulty Level:
- Very Easy
- Total Repair Time:
- 30 - 60 mins
Oven would not light
As soon as my husband put it in the oven, the very thin prongs broke. There was no guard on either side of the prongs for protection like the one that had been in there. Very costly to us of $185 with no fix. Very disappointed in that ignitor. It would have been an easy fix. Had replaced one previously but it only lasted 6 months. Now
... Read more
we have a new stove
Read less
Was this instruction helpful to you?
Thank you for voting!