


Models
>
KDRS407VSS01
KDRS407VSS01 KitchenAid Range
Jump to:
Find Part by Name
Keep searches simple, eg. "belt" or "pump".
Diagrams for KDRS407VSS01
Viewing 8 of 8


Manuals & Guides for KDRS407VSS01
Click to downloadInstall
Installation Instructions
(3.42MB)
Install
Installation Instructions
(6.92MB)
Manual
Owner's Manuals
(4.35MB)
Manual
Owner's Manuals
(7.69MB)
Specs
Product Specifications Sheet
(0.59MB)
Keep searches simple, eg. "belt" or "pump".

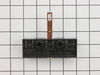
$105.26
The glass panel on the door of your range allows you to see your food as it is being cooked in the oven. If it has become damaged, broken, or so grimy that it is beyond cleaning, it should be replaced...
In Stock
Order now and your part arrives by Aug 2

$21.82
This is a screw and it is made for multiple appliances in your home. This model is called a sheet metal screw because it has sharp points, and the threads are closer together. This screw is designed t...
In Stock
Order now and your part arrives by Aug 2

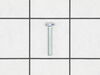
$7.60
This is a multi-use screw and can be used on a variety of appliances. The measurements of the screw are: 8/18 x 3/8. *Please note: the screw is sold individually. Refer to the manual provided by the m...
In Stock
Order now and your part arrives by Aug 2

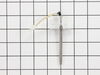
$73.24
This temperature sensor detects the temperature within the oven cavity.
In Stock
Order now and your part arrives by Aug 2

In Stock
Order now and your part arrives by Aug 2

In Stock
Order now and your part arrives by Aug 2

This 10 oz bottle of cooktop cleaner is formulated to safely and effectively remove tough, baked-on residues from glass, ceramic, and porcelain surfaces. Its non-abrasive, creamy texture breaks down s...
No Longer Available

In Stock
Order now and your part arrives by Aug 2

$49.29
This is a replacement light bulb to illuminate the inside of your oven. It is 25 watts and 120 volts. Please wear gloves during replacement if your existing bulb is shattered. Consider ordering a spar...
In Stock
Order now and your part arrives by Aug 2

In Stock
Order now and your part arrives by Aug 2

Special Order

In Stock
Order now and your part arrives by Aug 2
Common Problems and Symptoms for KDRS407VSS01
Viewing 8 of 8Oven is too hot
Fixed by these parts
How to fix it
Will Not Start
Fixed by these parts
How to fix it
Little to no heat when baking
Fixed by these parts
How to fix it
Oven not heating evenly
Fixed by these parts
How to fix it
Element will not heat
Fixed by these parts
How to fix it
Lid or door won’t close
Fixed by these parts
How to fix it
Will not program
Fixed by these parts
How to fix it
Door won’t open after self cleaning cycle
Fixed by these parts
How to fix it


Keep searches simple. Use keywords, e.g. "leaking", "pump", "broken" or "fit".
- Customer:
- Robert from Wildwood, MO
- Parts Used:
- WP4449259
- Difficulty Level:
- Easy
- Total Repair Time:
- 30 - 60 mins
- Tools:
- Screw drivers
Broke the glass panel inside the oven door -- dropped a baking dish on the glass!
Easily removed the door from the oven by releasing clips attached to the door hinge -- very nicely engineered. Removed about 6 philips head screws to allow the door assembly to be taken apart for access to the glass. Lifted out the broken glass, cleaned the inside of the door, installed the new glass, reassembled the door (a two minute
... Read more
project), and reattached the door to the oven. Cleaning the inside of the door took longer than the actual repair!
Read less
Was this instruction helpful to you?
Thank you for voting!
- Customer:
- James from Renton, WA
- Parts Used:
- WP4449259
- Difficulty Level:
- Easy
- Total Repair Time:
- 30 - 60 mins
- Tools:
- Screw drivers
Cracked the inner door glass by wiping with wet rag when hot
Removed the oven door by following the straightforward instructions in the user's manual. Removed philips head screws to take the door assembly apart. Removed clips holding the two inner door glass plates, and the two plates. Removed the clamp holding the broken glass plate, then the glass and associated glass fragments. Then cleaned
... Read more
and re-installed the three glass plates and their clamps in reverse order. Re-assembled the door and re-attached to the oven. Only cautionary note is to be careful when removing, handling and re-installing the various glass plates. Watch out for fragments from the broken plate; they can cut you and/or fall on the floor.
Read less
Was this instruction helpful to you?
Thank you for voting!
- Customer:
- william from albuquerque, NM
- Parts Used:
- WP4449259
- Difficulty Level:
- A Bit Difficult
- Total Repair Time:
- 30 - 60 mins
- Tools:
- Screw drivers
cracked iner door glass
Important note: hinges are left and right do not mix them up or door will not re-assemble properly and you'll get to do it twice.
Steps I took:
Removed the oven door per the instructions in the oven operator manual. Removed several screws to release the interior steel liner.
Removing the steel liner was a ... Read more bit of a hassle, Had to manipulate it to get it loose but it eventually came away from the stainless steel exterior door panel.
Disassembled the interior glass layers, there are three. The glass you need to replace is the last layer, of course. removed and discarded the broken glass. Note: the interior glass is not secured by a bracket or screws, it is held in place by compression of the interior steel liner and a another liner that is inside the door assembly (you'll figure this out when you dis-assemble).
Another note: there is a fluffy material gasket between these two liners, use care when you disassemble or the fluffy gasket will turn into confetti.
Take the opportunity to clean all glass and parts of the accumulated oven grease.
Re-assembled door and re-installed...looks good.
Another note, getting the door back together requires a little patience because there are clamping overlaps of the steel liner to the SS exterior door panel. Be prepared to jockey things around a little and make sure all your screw holes are all lined up before you begin to button it up. Remember, hinges are left and right they are not interchangeable.
Read less
Was this instruction helpful to you?
Thank you for voting!