


Models
>
KDRP463LSS02
KDRP463LSS02 KitchenAid Range
Jump to:
Find Part by Name
Keep searches simple, eg. "belt" or "pump".
Diagrams for KDRP463LSS02
Viewing 8 of 8


Keep searches simple, eg. "belt" or "pump".

$105.26
The glass panel on the door of your range allows you to see your food as it is being cooked in the oven. If it has become damaged, broken, or so grimy that it is beyond cleaning, it should be replaced...
In Stock
Order now and your part arrives by Aug 1

$6.51
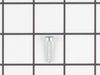
This is a genuine OEM Torx screw that measures 7-18 and 3/4-inch. The screw is sold individually and can be used in a variety of appliances. The star shaped head allows the screw to have more torque a...
In Stock
Order now and your part arrives by Aug 1

$21.82
This is a screw and it is made for multiple appliances in your home. This model is called a sheet metal screw because it has sharp points, and the threads are closer together. This screw is designed t...
In Stock
Order now and your part arrives by Aug 1

$50.36
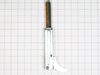
This 5-watt 12-volt halogen light bulb provides light in the oven cavity when the door is open or the switch is turned on. The light assembly is a little over 1” long. If the light is not coming on th...
In Stock
Order now and your part arrives by Aug 1

$73.24
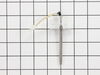
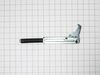
This temperature sensor detects the temperature within the oven cavity.
In Stock
Order now and your part arrives by Aug 1

In Stock
Order now and your part arrives by Aug 1

$102.43
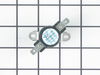
Replace this part if the oven stops working and the door locks while using the self-clean option on some appliances.
In Stock
Order now and your part arrives by Aug 1

Special Order

In Stock
Order now and your part arrives by Aug 1

In Stock
Order now and your part arrives by Aug 1

Special Order

$7.60
Follow appropriate safety practices when installing your range screw. Sold individually.
In Stock
Order now and your part arrives by Aug 1
Common Problems and Symptoms for KDRP463LSS02
Viewing 8 of 8Door won’t open after self cleaning cycle
Fixed by these parts
How to fix it
Oven is too hot
Fixed by these parts
How to fix it
Will Not Start
Fixed by these parts

How to fix it
Little to no heat when baking
Fixed by these parts
How to fix it
Oven not heating evenly
Fixed by these parts
How to fix it
Element will not heat
Fixed by these parts
How to fix it
Door won’t close
Fixed by these parts
How to fix it
Gas igniter glows, but will not light
Fixed by these parts
How to fix it


Keep searches simple. Use keywords, e.g. "leaking", "pump", "broken" or "fit".
- Customer:
- Robert from Wildwood, MO
- Parts Used:
- WP4449259
- Difficulty Level:
- Easy
- Total Repair Time:
- 30 - 60 mins
- Tools:
- Screw drivers
Broke the glass panel inside the oven door -- dropped a baking dish on the glass!
Easily removed the door from the oven by releasing clips attached to the door hinge -- very nicely engineered. Removed about 6 philips head screws to allow the door assembly to be taken apart for access to the glass. Lifted out the broken glass, cleaned the inside of the door, installed the new glass, reassembled the door (a two minute
... Read more
project), and reattached the door to the oven. Cleaning the inside of the door took longer than the actual repair!
Read less
Was this instruction helpful to you?
Thank you for voting!
- Customer:
- Abdurehman from Lawrenceville, GA
- Parts Used:
- WP8300802
- Difficulty Level:
- Really Easy
- Total Repair Time:
- 15 - 30 mins
- Tools:
- Screw drivers
When using self cleaning, oven door wouldn't open and screen panel went blank.
I searched similar problems on the web and learned that a whole lot of people have Kitchenaid stove with the same problem. They all stated that the thermostat burns when self cleaning. Since technician wanted $190.00, I decided to change it myself. The part cost me $40.00. To instal the thermostat, I removed the panel at the back of
... Read more
the stove and the thermostat is attached with two wires. After I replaced the thrmostat, the screen panel came on and I was able to open the door. I am posting this to tell people that anyone can do this.
Read less
Was this instruction helpful to you?
Thank you for voting!
- Customer:
- James from Renton, WA
- Parts Used:
- WP4449259
- Difficulty Level:
- Easy
- Total Repair Time:
- 30 - 60 mins
- Tools:
- Screw drivers
Cracked the inner door glass by wiping with wet rag when hot
Removed the oven door by following the straightforward instructions in the user's manual. Removed philips head screws to take the door assembly apart. Removed clips holding the two inner door glass plates, and the two plates. Removed the clamp holding the broken glass plate, then the glass and associated glass fragments. Then cleaned
... Read more
and re-installed the three glass plates and their clamps in reverse order. Re-assembled the door and re-attached to the oven. Only cautionary note is to be careful when removing, handling and re-installing the various glass plates. Watch out for fragments from the broken plate; they can cut you and/or fall on the floor.
Read less
Was this instruction helpful to you?
Thank you for voting!