



Models
>
KGRT500BAL3
KGRT500BAL3 KitchenAid Range
Jump to:
Find Part by Name
Keep searches simple, eg. "belt" or "pump".
Diagrams for KGRT500BAL3
Viewing 7 of 7


Keep searches simple, eg. "belt" or "pump".

$19.75
This is a genuine OEM 40-Watt replacement light bulb that is compatible with various types of appliances. It has a frosted glass bulb with a standard metal socket base, making it easy to screw and uns...
In Stock
Order now and your part arrives by Oct 13
$14.16
These pads go on the bottom of your gas cooktop grates to prevent them from moving and scratching the top of your appliance.
In Stock
Order now and your part arrives by Oct 13
This 18 ml bottle of white appliance touch-up paint is used to cover scratches or marks on your appliance. The white touch-up paint can be used on refrigerators, microwaves, ranges, clothes dryers, an...
No Longer Available
On Order
$50.36
This broiler pan and roasting rack set features a two-piece design that allows fat to drain away for cleaner cooking and reduced splatter. Made with a durable, high-heat resistant porcelain finish, it...
In Stock
Order now and your part arrives by Oct 13

In Stock
Order now and your part arrives by Oct 13
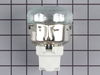
$67.93
The light socket on your electric range connects the power source to the light bulb. If your oven light is malfunctioning, you may need to replace the light socket. The light socket is located in the ...
In Stock
Order now and your part arrives by Oct 13
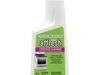
This 10 oz bottle of cooktop cleaner is formulated to safely and effectively remove tough, baked-on residues from glass, ceramic, and porcelain surfaces. Its non-abrasive, creamy texture breaks down s...
No Longer Available
In Stock
Order now and your part arrives by Oct 13
In Stock
Order now and your part arrives by Oct 13
In Stock
Order now and your part arrives by Oct 13
Common Problems and Symptoms for KGRT500BAL3
Viewing 10 of 10Little to no heat when baking
Fixed by these parts
How to fix it
Gas igniter glows, but will not light
Fixed by these parts
How to fix it
Will Not Start
Fixed by these parts
How to fix it
Door won’t close
Fixed by these parts
How to fix it
Element will not heat
Fixed by these parts
How to fix it
Noisy
Fixed by these parts

How to fix it
Oven not heating evenly
Fixed by these parts
How to fix it
Gas smell
Fixed by these parts
How to fix it
Little to no heat when broiling
Fixed by these parts
How to fix it
Oven is too hot
Fixed by these parts
How to fix it





Keep searches simple. Use keywords, e.g. "leaking", "pump", "broken" or "fit".
- Customer:
- Wendy from Red Hook, NY
- Parts Used:
- WPW10208653
- Difficulty Level:
- Easy
- Total Repair Time:
- More than 2 hours
- Tools:
- Screw drivers
mice had made nests in the insulation wrap in the range
I numbered every part. ex: 1 L., for first part removed left side. I used a magic marker to circle the holes and wrote the number of screws used on the part, set the srews in a separete place, so that I new where these screws went to. The cleanup was pretty time consuming, but I was able to keep my stove, when every repairman I called to
... Read more
fix my stove told me I was better off buying a new stove. ($600.00 stove 2 years old)Please Note: The insulation blanket needed for the entire stove is two pieces, the sides and top are one part # and the bottom and back, are another part #. I did not know this. I just purchased the top and sides. I got lucky, the back and bottom were still in good shape. So I guess I should have read the description of the part more carefully to see what it covers, before I ordered it. It took two people two hours to do the work, it was really nice to have an extra set of eyes, to remember what direction pieces of metal from the stove went. I would do it all over in a heart beat instead of buying a new stove.
Read less
Was this instruction helpful to you?
Thank you for voting!
- Customer:
- Sabrina from Mooresville, NC
- Parts Used:
- 814323
- Difficulty Level:
- Really Easy
- Total Repair Time:
- Less than 15 mins
several grate pads fell out/lost /broke during cleaning
The only real issue was locating the proper adhesive to ensure that the new pads would not fall out. The small insert paper slip in the package noted that a RTV adhesive should be used. After much searching at the home improvement super store, I learned it would be found at an auto supply store. It is black, and is for high temp use. It i
... Read more
s available in a small tube for around $2.00. The RTV is usually used to make gaskets for heat/oil exposure in auto repair. I did have trouble removing a broken stub from a pad that had broken off in the hole. I used an awl to get what I could and push the rest into the hole deeper, then insert a new pad with along with the adhesive.
Read less
Was this instruction helpful to you?
Thank you for voting!
- Customer:
- John from Chicago, IL
- Parts Used:
- WP9782065
- Difficulty Level:
- A Bit Difficult
- Total Repair Time:
- 30 - 60 mins
- Tools:
- Nutdriver, Screw drivers, Wrench set
Oven stopped working/Slow to ignite
Although the ignitors glowed brilliant yellow I learned from an expert there are 2 fail modes. 1. that they break and don't glow well enough to ignite the gas or 2. they get resistive over the years and do not pass enough current to open the valve. This is important to know because the current passes through the ignitor before it gets t
... Read more
o the valve. If the ignitor resists too much then the valve never gets enough power to open. As evidence you get slow ignitions until one day it stops altogether.
There are 2 ignitors in this oven. one for the broiler and 1 for the oven. The broiler is exposed so easily removed. For the oven you need to remove the flame spreader cover and the flame spreader. Need a good screw driver for all the screws in the oven because they get corroded from the hostile environment and also the factory torques them in pretty good when new. It is hard to get leverage leaning into an oven without leaning on the oven door which could unhinge it. With a good screw driver and getting a good seat into the screw you can break it loose. Then some muscle power to get it out. 1 screw refused to come out all the way so I grabbed it with some pliers and pulled and twisted it out. A trick I learned from my days as a mechanic is to use valve lapping compound on the screw driver. The diamond dust bites into the screw for a grip on those really bad ones.
The last tricky part is you have to remove the back cover on the oven, unplug the wires and pull the ignitor out through the oven. When you see the wires in the back you will see insulation packing.
Hint: If your smart you will tie a string to the wires before you pull it though so it is easier to pull the new ignitor wires back the same way. Else you need to use a stick to feel your way through the insulation packing to find the wires.
Hardest part of this job is undoing the screws. The rest is easy.
There are 2 ignitors in this oven. one for the broiler and 1 for the oven. The broiler is exposed so easily removed. For the oven you need to remove the flame spreader cover and the flame spreader. Need a good screw driver for all the screws in the oven because they get corroded from the hostile environment and also the factory torques them in pretty good when new. It is hard to get leverage leaning into an oven without leaning on the oven door which could unhinge it. With a good screw driver and getting a good seat into the screw you can break it loose. Then some muscle power to get it out. 1 screw refused to come out all the way so I grabbed it with some pliers and pulled and twisted it out. A trick I learned from my days as a mechanic is to use valve lapping compound on the screw driver. The diamond dust bites into the screw for a grip on those really bad ones.
The last tricky part is you have to remove the back cover on the oven, unplug the wires and pull the ignitor out through the oven. When you see the wires in the back you will see insulation packing.
Hint: If your smart you will tie a string to the wires before you pull it though so it is easier to pull the new ignitor wires back the same way. Else you need to use a stick to feel your way through the insulation packing to find the wires.
Hardest part of this job is undoing the screws. The rest is easy.
Read less
Was this instruction helpful to you?
Thank you for voting!