


Models
>
91193591990
91193591990 Kenmore Range
Jump to:
Find Part by Name
Keep searches simple, eg. "belt" or "pump".
Keep searches simple, eg. "belt" or "pump".

$22.91
This burner bowl, also known as a drip bowl, is an authentic OEM part for your electric range or cooktop. This part is black in color and designed to fit under the 8-inch coiled burner elements and is...
In Stock
Order now and your part arrives by Aug 6

$18.95
This genuine OEM burner bowl, also known as a drip tray, is black and color and measures 6 inches in diameter. It is designed to be used under the coiled elements on an electric stove or range, in ord...
In Stock
Order now and your part arrives by Aug 6

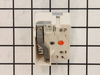
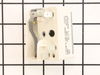
If your burner element is not turning on or heating up, it is possible there is an issue with the switch. The surface burner switch, also known as an infinite heat switch, is what turns your burner el...
In Stock
Order now and your part arrives by Aug 6

In Stock
Order now and your part arrives by Aug 6

This infinite switch controls the heat level of a 6-inch, 1560-watt surface element by regulating power flow. It operates at 240 volts and helps maintain consistent temperatures. Replacing it can fix ...
In Stock
Order now and your part arrives by Aug 6

$38.45
This burner bowl or drip pan is found beneath the heating element on your cooktop or range. This part measures 8 inches in diameter, and should not be confused with the smaller pan, which measures 6 i...
In Stock
Order now and your part arrives by Aug 6

$53.58
This is an authentic GE oven rack, sourced directly from the manufacturer. It is made of metal, and provides a stable surface for cookware inside the oven. If your current oven rack is damaged or miss...
In Stock
Order now and your part arrives by Aug 6

In Stock
Order now and your part arrives by Aug 6

In Stock
Order now and your part arrives by Aug 6

In Stock
Order now and your part arrives by Aug 6

In Stock
Order now and your part arrives by Aug 6

$43.92
This is a broiler pan for your range. It catches drippings from the cookware, when broiling in the oven. This assembly includes the grill/grate and the bottom pan. These parts are made of porcelain. T...
In Stock
Order now and your part arrives by Aug 6
Common Problems and Symptoms for 91193591990
Viewing 7 of 7Element will not heat
Fixed by these parts
How to fix it
Little to no heat when broiling
Fixed by these parts
How to fix it
Little to no heat when baking
Fixed by these parts
How to fix it
Oven not heating evenly
Fixed by these parts
How to fix it
Oven is too hot
Fixed by these parts
How to fix it
Will Not Start
Fixed by these parts
How to fix it
Door won’t close
Fixed by these parts
How to fix it


Keep searches simple. Use keywords, e.g. "leaking", "pump", "broken" or "fit".
- Customer:
- Marc from Columbia, NJ
- Parts Used:
- WB24T10029, WB24T10025
- Difficulty Level:
- Easy
- Total Repair Time:
- 15 - 30 mins
- Tools:
- Nutdriver, Screw drivers
The switches failed on both front burners.
Remove nobs from both switches.
Pull out the range (the hardest part).
REMOVE THE POWER PLUG FROM THE WALL
Remove 7 screws with nut driver and take off upper back panel.
Remove 2 phillips screws from front, they hold the switch brackets.
The new switches don't fit in the bracket so discard the bracket keeping the ... Read more screws.
Removing 1 wire at a time from the old switch transfer to the new noting the letter/number ie "H1 P1" combos they are all there just not in the same places on the new switch.
When wiring is complete, using the bracket ,screws from the front screw on the switches.
Replace the back panel with 7 screws.
In my case the old nobs did not fit the shafts of the new switches. I found some at the local hardware store. I bought 4 for $0.29 each! I expect to be replacing the other burner switches shortly.
Read less
Was this instruction helpful to you?
Thank you for voting!
- Customer:
- paul from west grove, PA
- Parts Used:
- WB44T10009
- Difficulty Level:
- Really Easy
- Total Repair Time:
- 15 - 30 mins
- Tools:
- Nutdriver
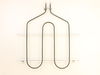
Broiler element failed
repair took about 30minutes total tiem..first turn off power to stove..then open oven removed racks..used nut drive to loosen top two screw hold element..then remove screw hold temp sensor element...then removed two screws holding broiler element...then removed the top screw ...then pulled element out about 7 inches to expose wire connect
... Read more
ion..held on with spade lugs.. pulled wires off...element now free to remove ...placed spade lug on new element...put element in pace with top two screws..loosely...then did rear screw that held temp element and broiler element...then tighten all screws ..turned on power..did 15 sec test to make sure wired properly..then 5 minutes to operating temperature... job done...hardest part was crazwling in and out the stove...old bones..
Read less
Was this instruction helpful to you?
Thank you for voting!
- Customer:
- Rick from Avon Park, FL
- Parts Used:
- WB24T10025
- Difficulty Level:
- Really Easy
- Total Repair Time:
- Less than 15 mins
- Tools:
- Pliers, Screw drivers
Burner was constantly at high heat
I removed the rear cover from the stove then removed the knob and two screws on the front panel that hold the control in place. I then took the wires off the old control one at a time and placed them on the new control. Then I placed the control in position and tightened the two screws on the front panel, replaced the knob and screwed t
... Read more
he back panel in place.
Read less
Was this instruction helpful to you?
Thank you for voting!