


Models
>
66578003700
66578003700 Kenmore Range
Jump to:
Find Part by Name
Keep searches simple, eg. "belt" or "pump".
Manuals & Guides for 66578003700
Click to downloadKeep searches simple, eg. "belt" or "pump".
 – Part Number: W11665456")
$24.00
This part includes one range leveling leg, sourced directly from the original manufacturer. The leveling leg is what supports the range and ensures it is sitting level, stable, and at the proper heigh...
In Stock
Order now and your part arrives by Jul 23

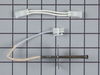
$36.42
This temperature sensor detects the temperature within the oven cavity.
In Stock
Order now and your part arrives by Jul 23

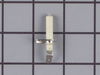
$21.82
This is a screw and it is made for multiple appliances in your home. This model is called a sheet metal screw because it has sharp points, and the threads are closer together. This screw is designed t...
In Stock
Order now and your part arrives by Jul 23

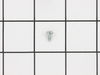
$7.60
This is a replacement screw and washer for your oven/range. It is a Phillips-head screw approximately half an inch long, and the washer is approximately 1 inch in diameter. The screw attaches the oven...
In Stock
Order now and your part arrives by Jul 23

In Stock
Order now and your part arrives by Jul 23

In Stock
Order now and your part arrives by Jul 23

$31.85
This part is a replacement halogen lamp for your oven. The bulb is 25 watts and 120 volts. If your light bulb is burned out, this is the part that replaces it. Be sure to turn off power to your range ...
In Stock
Order now and your part arrives by Jul 23

$114.45
The interior oven door glass is the innermost heat resistant piece of glass that faces in your oven. The see-through glass measures approximately 20 5/8” x 13 1/8”. If the glass is cracked it should b...
In Stock
Order now and your part arrives by Jul 23

In Stock
Order now and your part arrives by Jul 23

In Stock
Order now and your part arrives by Jul 23

In Stock
Order now and your part arrives by Jul 23

In Stock
Order now and your part arrives by Jul 23
Common Problems and Symptoms for 66578003700
Viewing 9 of 9Little to no heat when baking
Fixed by these parts
How to fix it
Will Not Start
Fixed by these parts
How to fix it
Gas igniter glows, but will not light
Fixed by these parts
How to fix it
Oven not heating evenly
Fixed by these parts
How to fix it
Oven is too hot
Fixed by these parts
How to fix it
Element will not heat
Fixed by these parts
How to fix it
Door won’t close
Fixed by these parts
How to fix it
Touchpad does not respond
Fixed by these parts
How to fix it
Little to no heat when broiling
Fixed by these parts
How to fix it


")
Keep searches simple. Use keywords, e.g. "leaking", "pump", "broken" or "fit".
- Customer:
- george from birmingham, AL
- Parts Used:
- 12001655
- Difficulty Level:
- Easy
- Total Repair Time:
- 15 - 30 mins
- Tools:
- Screw drivers
F1 code - gas over would not heat.
Repair tech checked oven and said the control panel was bad and needed to be replaced. The new control panel would cost over $450.00! I found that the oven sensor was bad and replaced it for $30.00. The old oven sensor had failed following a self cleaning cycle. I found that the wires coming out of it were burnt.
Replacing ... Read more the oven sensor was very easy. I removed the back panels 6 screws to gain access to the sensor's connection. I then removed the 2 screw that hold the sensor in place inside the oven and pulled the old sensor out through the oven. I reversed this process to place the new sensor in the oven.
Replacing ... Read more the oven sensor was very easy. I removed the back panels 6 screws to gain access to the sensor's connection. I then removed the 2 screw that hold the sensor in place inside the oven and pulled the old sensor out through the oven. I reversed this process to place the new sensor in the oven.
Read less
Was this instruction helpful to you?
Thank you for voting!
- Customer:
- Wendy from Red Hook, NY
- Parts Used:
- WPW10208653
- Difficulty Level:
- Easy
- Total Repair Time:
- More than 2 hours
- Tools:
- Screw drivers
mice had made nests in the insulation wrap in the range
I numbered every part. ex: 1 L., for first part removed left side. I used a magic marker to circle the holes and wrote the number of screws used on the part, set the srews in a separete place, so that I new where these screws went to. The cleanup was pretty time consuming, but I was able to keep my stove, when every repairman I called to
... Read more
fix my stove told me I was better off buying a new stove. ($600.00 stove 2 years old)Please Note: The insulation blanket needed for the entire stove is two pieces, the sides and top are one part # and the bottom and back, are another part #. I did not know this. I just purchased the top and sides. I got lucky, the back and bottom were still in good shape. So I guess I should have read the description of the part more carefully to see what it covers, before I ordered it. It took two people two hours to do the work, it was really nice to have an extra set of eyes, to remember what direction pieces of metal from the stove went. I would do it all over in a heart beat instead of buying a new stove.
Read less
Was this instruction helpful to you?
Thank you for voting!
- Customer:
- Shariq from West Conshohocken, PA
- Parts Used:
- 74003645
- Difficulty Level:
- Easy
- Total Repair Time:
- 30 - 60 mins
- Tools:
- Nutdriver, Screw drivers
Oven Door Inner Glass Broken
This is fairly easy for anyone to do. First I opened up the front (silver part) of the oven door by removing the screws at the top and the bottom. Then I kept on removing the various layers of glass... the 2 outside ones are removed by removing their respective screws and then you get to the inner-most. These 2 inner ones are in a fra
... Read more
me that holds them together. I removed the large silver frame that holds the insulation and the 2-glass-frame in it. Just remove the screws and then tilt the insulation frame out a bit to remove the glass frame. You can tilt the entire insulation holder out but the insulation is soft and it starts to fall off. Just tilting it enough worked for me. Then I opened up the glass frame from one end, removed the left-over broken piece of the old glass pane and installed the new one in. Then reassemble. The entire process is very easy - but you will need another person for a few minutes when you remove /reinstall the glass frame inside the insulation holder. You would just need a little help holding everything... nothing technical. I would rate the repair technicality at 4 or 5/10. It could even be a 3 if there were less steps involved. Good luck! By the way, Amana/Maytag wanted $70 or so for the glass and then the repair fee. I got the part here for about $50.
Read less
Was this instruction helpful to you?
Thank you for voting!