


Models
>
79060042404
79060042404 Kenmore Range
Jump to:
Find Part by Name
Keep searches simple, eg. "belt" or "pump".
Keep searches simple, eg. "belt" or "pump".

$20.85
This range indicator light lens is designed to cover and protect the appliance’s indicator light, allowing you to easily see when a burner or oven is in use. Made from clear, heat-resistant plastic, i...
In Stock
Order now and your part arrives by Jul 30

$12.05
Sold Individually. These legs should be adjusted to make your appliance level on uneven flooring.
In Stock
Order now and your part arrives by Jul 30

In Stock
Order now and your part arrives by Jul 30

$113.55
If your oven isn’t holding heat like it used to, the door gasket might be the culprit. This flexible seal lines the edge of the oven door to keep heat inside while you cook, helping your meals bake ev...
In Stock
Order now and your part arrives by Jul 30


$26.35
This is a screw for your range or microwave. This part is sold individually. It has a pan head, a pointed tip for use with sheet metal, and an x-shaped drive. This screw is a #8, has 18 threads to the...
In Stock
Order now and your part arrives by Jul 30

$57.87
This range terminal block kit provides a secure connection point between the household power cord and the appliance’s internal wiring. It helps distribute electrical power safely and reliably to the r...
In Stock
Order now and your part arrives by Jul 30

In Stock
Order now and your part arrives by Jul 30

$8.75
This is an authentic mounting screw, which works with ranges, wall ovens, cooktops and warming drawers.
In Stock
Order now and your part arrives by Jul 30

In Stock
Order now and your part arrives by Jul 30

In Stock
Order now and your part arrives by Jul 30

Common Problems and Symptoms for 79060042404
Viewing 1 of 1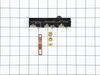


Keep searches simple. Use keywords, e.g. "leaking", "pump", "broken" or "fit".
- Customer:
- Susan from Newington, CT
- Parts Used:
- 316047707
- Difficulty Level:
- Easy
- Total Repair Time:
- 15 - 30 mins
- Tools:
- Screw drivers
In a seasonal house, a mouse got into the oven insulation during the winter. We have gotten rid of the mouse but when we used the oven we could smell mouse urine! Upon inspection we could see that the mouse lived and urinated in the oven insulation.
My husband removed the screws that held the top of the stove on and then lifted the top up. It is hinged. He then took out the old insulation, wiped down all visible parts of the interior with a bleach solution and replaced the blanket insulation with the new insulation. That took care of the problem!
Was this instruction helpful to you?
Thank you for voting!
- Customer:
- Kathy from NEW BERN, NC
- Parts Used:
- 316557300
- Difficulty Level:
- Really Easy
- Total Repair Time:
- Less than 15 mins
- Tools:
- Nutdriver
Burner indicator light lense broke off
The light apparatus was loose behind the panel. Remove the remaining part of the lens. Install the new lens from the outside of the panel and hold it in position, protruding into the inside of the panel. Slide the light apparatus onto the lens from the inside, allowing the bracket to hold it in place - it will be spring loaded, which will
... Read more
hold it in place.
Read less
Was this instruction helpful to you?
Thank you for voting!
- Customer:
- Melinda from Three Rivers, MA
- Parts Used:
- 5304509869
- Difficulty Level:
- Really Easy
- Total Repair Time:
- Less than 15 mins
- Tools:
- Pliers, Screw drivers, Socket set, Wrench (Adjustable)
Rusted leveling foot
I couldn't unscrew the leveling foot because it was rusted and corroded. The bracket holding it was easy to remove so I took the bracket with the corroded foot off and replaced it with the new foot and bracket. Very simple. I made sure I oiled it so it wouldn't rust again.
Was this instruction helpful to you?
Thank you for voting!