



Models
>
79075429414
79075429414 Kenmore Range
Jump to:
Find Part by Name
Keep searches simple, eg. "belt" or "pump".
Keep searches simple, eg. "belt" or "pump".
In Stock
Order now and your part arrives by Sep 25
$36.92
This orifice is a replacement fuel-delivery component designed to regulate gas flow to a burner. It plays a critical role in maintaining proper flame size and efficiency and is commonly replaced when ...
In Stock
Order now and your part arrives by Sep 25
$26.35
This is a screw for your range or microwave. This part is sold individually. It has a pan head, a pointed tip for use with sheet metal, and an x-shaped drive. This screw is a #8, has 18 threads to the...
In Stock
Order now and your part arrives by Sep 25
In Stock
Order now and your part arrives by Sep 25
$41.88
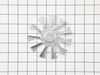
This convection fan blade is designed for use with various makes and models of range and oven and is sold as an individual part. Made of metal and measuring approximately 4.75-inches in diameter, this...
In Stock
Order now and your part arrives by Sep 25
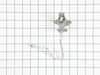
This orifice holder ensures the left front burner delivers the right amount of gas for safe, efficient cooking. Built from heat-resistant metal, it provides a secure fit and reliable flame control, so...
In Stock
Order now and your part arrives by Sep 25
$54.95
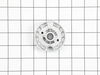
This sealed burner delivers consistent heat output for precise cooking performance. Its design helps contain spills and simplifies cleanup while ensuring efficient flame control. Installation is strai...
In Stock
Order now and your part arrives by Sep 25
In Stock
Order now and your part arrives by Sep 25
In Stock
Order now and your part arrives by Sep 25
$53.85
This replacement light bulb provides clear illumination to improve visibility during appliance operation. It is commonly replaced when the original bulb burns out, flickers, or no longer produces adequate light.
In Stock
Order now and your part arrives by Sep 25

On Order

Keep searches simple. Use keywords, e.g. "leaking", "pump", "broken" or "fit".
- Customer:
- John from Stevensville, MD
- Parts Used:
- 318398302
- Difficulty Level:
- A Bit Difficult
- Total Repair Time:
- 30 - 60 mins
- Tools:
- Pliers, Screw drivers, Socket set
replacing the fan on a convection oven (fan was making a vibration noise)
This was the first time replacing the fan. It is a lot easier to work in the oven compartment with the oven door removed, only two screws on the door and the hinges were released. I found that a couple of the screws were either rusted or stripped so I used a pair of pliers to remove the screws that were holding the diffuser in place. O
... Read more
nce there was access to the fan I found that the fan was warped and that the blades were scraping against the back wall of the oven. The next challenge was to remove the retaining nut. I used a sheet metal screw to secure the warped fan to keep it from spinning. once I figured out that you have to turn the retaining nut to the right to loosen, it came off easily. 1/2" socket with extension. When I replace the fan I used two washers for spacers to make sure that the fan would not scrape the wall of the oven. Its been tested many times and the oven does not make that horrible sound anymore.
Read less
Was this instruction helpful to you?
Thank you for voting!
- Customer:
- John J from UPTON, MA
- Parts Used:
- 139001800
- Difficulty Level:
- Really Easy
- Total Repair Time:
- 15 - 30 mins
- Tools:
- Screw drivers
Washer would not spin.
Remove two screws in back to release the top.
Lift the top from the back and pull backwards to remove.
Open washer door and unscrew two screws to release the switch.
Reach down inside from the front and remove the switch.
Unplug the switch and replace with the new one. Reverse the process to install.
I found it ea ... Read more sier to have someone hold the switch while I screwed it back in.
Lift the top from the back and pull backwards to remove.
Open washer door and unscrew two screws to release the switch.
Reach down inside from the front and remove the switch.
Unplug the switch and replace with the new one. Reverse the process to install.
I found it ea ... Read more sier to have someone hold the switch while I screwed it back in.
Read less
Was this instruction helpful to you?
Thank you for voting!
- Customer:
- James from KENSINGTON, OH
- Parts Used:
- GRLP4
- Difficulty Level:
- Very Easy
- Total Repair Time:
- Less than 15 mins
- Tools:
- Nutdriver
BAD LIGHT SOCKET
Repaired under warranty
Was this instruction helpful to you?
Thank you for voting!