


Models
>
79092583513
79092583513 Kenmore Range
Jump to:
Find Part by Name
Keep searches simple, eg. "belt" or "pump".
Keep searches simple, eg. "belt" or "pump".

This surface burner switch controls the temperature of the stove top 6-inch surface burner. This switch is 240-volt, 1250-1500 watt, and 5.2-6.25 amp. If your element will not heat and is not defectiv...
In Stock
Order now and your part arrives by Aug 1

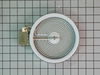
The 6” radiant cooking element with limiter fits under the glass cooktop and supplies heat to the cooking area. If your element is not heating, you can test the element for continuity with a multimete...
In Stock
Order now and your part arrives by Aug 1

$20.85
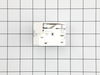
This range indicator light lens is designed to cover and protect the appliance’s indicator light, allowing you to easily see when a burner or oven is in use. Made from clear, heat-resistant plastic, i...
In Stock
Order now and your part arrives by Aug 1

In Stock
Order now and your part arrives by Aug 1

$26.35
This is a screw for your range or microwave. This part is sold individually. It has a pan head, a pointed tip for use with sheet metal, and an x-shaped drive. This screw is a #8, has 18 threads to the...
In Stock
Order now and your part arrives by Aug 1

In Stock
Order now and your part arrives by Aug 1

In Stock
Order now and your part arrives by Aug 1

In Stock
Order now and your part arrives by Aug 1

$41.88
This convection fan blade is designed for use with various makes and models of range and oven and is sold as an individual part. Made of metal and measuring approximately 4.75-inches in diameter, this...
In Stock
Order now and your part arrives by Aug 1

$46.97
This genuine OEM oven temperature sensor probe monitors the internal temperature of the oven to ensure accurate and consistent cooking performance. By sending temperature readings to the control syste...
In Stock
Order now and your part arrives by Aug 1

In Stock
Order now and your part arrives by Aug 1

$53.85
This replacement light bulb provides clear illumination to improve visibility during appliance operation. It is commonly replaced when the original bulb burns out, flickers, or no longer produces adequate light.
In Stock
Order now and your part arrives by Aug 1
Common Problems and Symptoms for 79092583513
Viewing 3 of 3Element will not heat
Fixed by these parts
How to fix it
Will Not Start
Fixed by these parts
How to fix it
Oven is too hot
Fixed by these parts
How to fix it


Keep searches simple. Use keywords, e.g. "leaking", "pump", "broken" or "fit".
- Customer:
- Lori from Winter Haven, FL
- Parts Used:
- 318178110
- Difficulty Level:
- Easy
- Total Repair Time:
- Less than 15 mins
- Tools:
- Pliers, Screw drivers
burned out burner
First we removed two screws under the rim of the range top to open the lid. Lifted the lid and removed the screws from the bracket that holds the elements, Be careful with the clips that hold the element in, if you break them or bend them there aren't any more! Also note which holes they were in, they are marked according to the differ
... Read more
ent sizes of elements. Disconnected the wires, needed needlenose pliers to grip them...connected new element, popped it back in place, replaced bracket, closed top ...Easy peasy!!!
Read less
Was this instruction helpful to you?
Thank you for voting!
- Customer:
- Gerald from Paris, TN
- Parts Used:
- 316436000
- Difficulty Level:
- Easy
- Total Repair Time:
- 15 - 30 mins
- Tools:
- Screw drivers
Switch Was Making A Arcing Sound When Burner Was On
Removed the back cover of the range. Removed the knob from the front of the switch. Removed 2 screws holding switch to range. Removed wires one at a time and connected to proper poles on replacement switch and reinstalled new switch on range
Was this instruction helpful to you?
Thank you for voting!
- Customer:
- PERRY from LECANTO, FL
- Parts Used:
- 316436000
- Difficulty Level:
- A Bit Difficult
- Total Repair Time:
- 30 - 60 mins
- Tools:
- Screw drivers
new switch was not wired like old one
i first replaced element after old smoked & quit. replaced switch but i noticed when i started to replace the wires one at a time something didn't seem right. after checking the #s on the old one, they didn't match up with the new one.luckily i had the stove diagram from a packet on the back of the stove. i traced each wire according to
... Read more
the diagram and everything worked out fine. i'm just glad i didn't replace each wire to wire.the #'s were on the switch where each wire went which was different than the org. even though they looked the same.
Read less
Was this instruction helpful to you?
Thank you for voting!