


Models
>
9119558999
9119558999 Kenmore Range
Jump to:
Find Part by Name
Keep searches simple, eg. "belt" or "pump".
Keep searches simple, eg. "belt" or "pump".

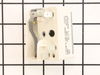
This infinite switch controls the heat level of a 6-inch, 1560-watt surface element by regulating power flow. It operates at 240 volts and helps maintain consistent temperatures. Replacing it can fix ...
In Stock
Order now and your part arrives by Jul 31

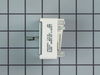
This switch controls the large burner on a range/stove top.
In Stock
Order now and your part arrives by Jul 31

In Stock
Order now and your part arrives by Jul 31

$15.26
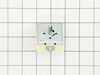
This indicator or pilot light is a manufacturer-approved replacement part for your stove or range. It comes on when the the stove is in use, indicating heat. The bulb can burn out over time and fail t...
In Stock
Order now and your part arrives by Jul 31

Special Order

In Stock
Order now and your part arrives by Jul 31

Special Order

This indicator light lens is sold individually. It is located in front of the indicator light, and displays when the burner/oven is on.
No Longer Available

Special Order
 – Part Number: WB03T10024")

Special Order
Common Problems and Symptoms for 9119558999
Viewing 2 of 2Element will not heat
Fixed by these parts
How to fix it
Will Not Start
Fixed by these parts
How to fix it


Keep searches simple. Use keywords, e.g. "leaking", "pump", "broken" or "fit".
- Customer:
- Thomas from Bonifay, FL
- Parts Used:
- WB24T10029
- Difficulty Level:
- Easy
- Total Repair Time:
- 15 - 30 mins
- Tools:
- Screw drivers, Wrench (Adjustable)
Replace stove top burners (3 total)
Unplug stove first. Raised the stove top and propped up useing wooden spoon and wife assistance holding up. Pay attention to spot brackets hand to top. Removed sheet metal screws from bracket clamp holding burner in place. Removed one extension bracket from old burner and transfeered to new burner. Removeing one bracket clamp allows the
... Read more
other one to act like a hinge and make for easy removal and replacement. Back of burner had corresponding numbers which made it easy to replace brackets in same place as old. I carefully take one electrical wire at a time from old burner and transfeered to the new burner. Replaced burner same way it came off.
Read less
Was this instruction helpful to you?
Thank you for voting!
- Customer:
- William from Shenandoah, PA
- Parts Used:
- WB24T10029
- Difficulty Level:
- Really Easy
- Total Repair Time:
- 15 - 30 mins
- Tools:
- Screw drivers, Socket set
back burner not getting hot
unplug stove first...take back of stove off to get to burner switch remove wires colors coded.. get new switch put wires on the same way.plug stove in test burner...very simple to replace.and save $$$$$$$$
Was this instruction helpful to you?
Thank you for voting!
- Customer:
- Frank from Glen Cove, NY
- Parts Used:
- WB24T10029
- Difficulty Level:
- Easy
- Total Repair Time:
- 15 - 30 mins
- Tools:
- Nutdriver, Screw drivers
switch went to high setting no matter what the setting was
took off cover, pulled all wires off switch, pushed wires on new switch, put cover back on. Whalaa..
Was this instruction helpful to you?
Thank you for voting!