


Models
>
JGR8750ADQ
JGR8750ADQ Jenn-Air Range
Jump to:
Find Part by Name
Keep searches simple, eg. "belt" or "pump".
Diagrams for JGR8750ADQ
Viewing 6 of 6


Manuals & Guides for JGR8750ADQ
Click to downloadKeep searches simple, eg. "belt" or "pump".

If your gas range is not lighting or coming up to temperature, there may be an issue with the igniter. The igniter is used to create a spark that lights the gas, and if it is glowing but will not ligh...
In Stock
Order now and your part arrives by Mar 21

In Stock
Order now and your part arrives by Mar 21

$20.95
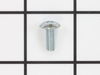
This is a screw and it is made for multiple appliances in your home. This model is called a sheet metal screw because it has sharp points, and the threads are closer together. This screw is designed t...
In Stock
Order now and your part arrives by Mar 21

In Stock
Order now and your part arrives by Mar 21

The water inlet valve is a solenoid-operated switch located at the bottom of the refrigerator. When it is energized by electrical power, water is released from the supply line through the water valve ...
In Stock
Order now and your part arrives by Mar 21

$7.30
Sold individually. Lock washers are used with screws when vibration from an appliance may cause the screw to loosen. Lock washers are also used in the electrical components of an appliance to ensure ...
In Stock
Order now and your part arrives by Mar 21

$104.95
The interior oven door glass is the innermost heat resistant piece of glass that faces in your oven. The see-through glass measures approximately 20 5/8” x 13 1/8”. If the glass is cracked it should b...
In Stock
Order now and your part arrives by Mar 21

This part distributes flame evenly to your cookware.
No Longer Available

$219.59
This gas oven safety valve is used to make sure that no gas is released until the igniter is ready to ignite. This part is for both the bake and broil igniter in your appliance.
Special Order

In Stock
Order now and your part arrives by Mar 21

$90.97
This part sends enough current to the igniter to create a spark to the bottom of the burner cap.
In Stock
Order now and your part arrives by Mar 21

In Stock
Order now and your part arrives by Mar 21
Questions and Answers
We're sorry, but our Q&A experts are temporarily unavailable.
Please check back later if you still haven't found the answer you need.
Common Problems and Symptoms for JGR8750ADQ
Viewing 13 of 13Gas igniter glows, but will not light
Fixed by these parts


How to fix it
Will Not Start
Fixed by these parts

How to fix it
Little to no heat when baking
Fixed by these parts
How to fix it
Element will not heat
Fixed by these parts
How to fix it
Ice maker not making ice
Fixed by these parts

How to fix it
Oven not heating evenly
Fixed by these parts
How to fix it
Door won’t close
Fixed by these parts
How to fix it
Gas smell
Fixed by these parts
How to fix it
Leaking
Fixed by these parts
How to fix it
Little to no heat when broiling
Fixed by these parts
How to fix it
Touchpad does not respond
Fixed by these parts
How to fix it
Oven is too hot
Fixed by these parts
How to fix it
Ice maker won’t dispense ice
Fixed by these parts
How to fix it


Keep searches simple. Use keywords, e.g. "leaking", "pump", "broken" or "fit".
- Customer:
- James from Berwick, ME
- Parts Used:
- 74007498
- Difficulty Level:
- Really Easy
- Total Repair Time:
- 15 - 30 mins
- Tools:
- Screw drivers
Oven wouldn’t heat up properly
My oven has two igniters so I needed to determine which one was the problem.
Using the amp/multi meter I tested the connection between the igniters and the valve, with the oven turned on, to find the bad igniter. Depending on the model of stove you have, the amp reading you need for a properly functioning igniter will vary. My ... Read more lower igniter read 2.7 amps with a rated amp between 3.3 and 3.6. So that was the culprit.
Replacing the igniter was easy. Two screws and a wire connected with a plug. I was able to do the diagnosis and unplug the wire without pulling the oven out. I pulled the drawer out and removed the two screws in a cover behind where the drawer was. You may not be so lucky…I have long arms.
I found removing the oven door made it easier to reach the igniter itself. To remove the door just open it slightly and pull up, it should come off easy…and replace in opposite manner.
Keep track of your screws and put it back together the way you found it except for the igniter that is.
Anyone with moderate technical skill could easily do this repair. The diagnosis is the hard part. I estimate I saved about $200 doing it myself.
Good luck.
Read less
Was this instruction helpful to you?
Thank you for voting!
- Customer:
- roy from East Providence, RI
- Parts Used:
- 74004053
- Difficulty Level:
- Easy
- Total Repair Time:
- 15 - 30 mins
- Tools:
- Screw drivers
gas burner ignitor failure
Lift out sealed burner assembly rear of stove first while careully sliding to rear to disengage ignitor probes.Remove philips head screws from bottom sheet metal housing to expose bottom of burners Remove gas tube assembly screws and move tube away carefully.Unplug wires from ignitor.Remove screws for ignitor .Remove ignitor, I noticed t
... Read more
hat rust and dirt had built up around burner to pan connection.I used my oil filter wrench to turn slightly the burner to remove it from the pan to clean.Reassembled in reverse order.
Read less
Was this instruction helpful to you?
Thank you for voting!
- Customer:
- Kevin from Boston, MA
- Parts Used:
- 4318047
- Difficulty Level:
- Really Easy
- Total Repair Time:
- Less than 15 mins
- Tools:
- Screw drivers, Wrench (Adjustable)
no water getting to ice maker
The ice maker had been slowly dying and one day just stopped making ice. No water was getting to the trays.
I read that this could be caused by a failure of the valve, even though the continuity test indicated that the solenoid was okay.
I ordered the part Friday afternoon. It was delivered Saturday. I did the repai ... Read more r in 10 minutes.
I pulled the fridge away from the wall.
I unplugged the fridge. I closed the water supply valve.
I unscrewed the two mounting screws using a flat head screwdriver.
I pulled the old valve out from refrigerator.
Using an adjustable wrench I detached the water supply from the valve. I detached the hose leading to the ice maker from the valve.
I pulled the electrical connectors from the connectors on the valve.
I attached the hoses to the new valve, attached the electrical connector, screwed the new valve in its place, opened the water supply, plugged the fridge back in, checked for leaks, and waited for a few hours.
My ice maker is working better than it has in at least two years.
Read less
Was this instruction helpful to you?
Thank you for voting!