


Models
>
88369
88369 Jenn-Air Range
Jump to:
Find Part by Name
Keep searches simple, eg. "belt" or "pump".
Diagrams for 88369
Viewing 6 of 6


 Diagram and Parts List for Jenn-Air Range")

Keep searches simple, eg. "belt" or "pump".

$19.75
This is a genuine OEM 40-Watt replacement light bulb that is compatible with various types of appliances. It has a frosted glass bulb with a standard metal socket base, making it easy to screw and uns...
In Stock
Order now and your part arrives by Aug 1

In Stock
Order now and your part arrives by Aug 1

$21.82
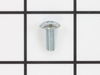
This is a screw and it is made for multiple appliances in your home. This model is called a sheet metal screw because it has sharp points, and the threads are closer together. This screw is designed t...
In Stock
Order now and your part arrives by Aug 1

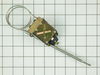
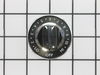
This is a push-and-turn switch. This kit includes all necessary hardware to install the part. Switch comes with a D-shaped shaft.
In Stock
Order now and your part arrives by Aug 1

$7.60
This is a multi-use screw and can be used on a variety of appliances. The measurements of the screw are: 8/18 x 3/8. *Please note: the screw is sold individually. Refer to the manual provided by the m...
In Stock
Order now and your part arrives by Aug 1

$7.60
Sold individually. Lock washers are used with screws when vibration from an appliance may cause the screw to loosen. Lock washers are also used in the electrical components of an appliance to ensure ...
In Stock
Order now and your part arrives by Aug 1

$50.36
This broiler pan and roasting rack set features a two-piece design that allows fat to drain away for cleaner cooking and reduced splatter. Made with a durable, high-heat resistant porcelain finish, it...
In Stock
Order now and your part arrives by Aug 1

Special Order

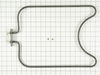
$90.10
This bake element is eighteen inches long. Its terminal depth is less than an inch long, and it comes with two screws.
In Stock
Order now and your part arrives by Aug 1

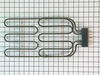
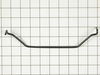
This part is used as a support for the grill element. Sold individually.
No Longer Available

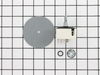
This indicator light kit comes with two red jewel light lenses.
No Longer Available

This jar is a little over five inches long. It is made of glass and is used for collecting the grease drippings of gas ranges.
On Order
Common Problems and Symptoms for 88369
Viewing 5 of 5Element will not heat
Fixed by these parts
How to fix it
Little to no heat when baking
Fixed by these parts
How to fix it
Will Not Start
Fixed by these parts
How to fix it
Touchpad does not respond
Fixed by these parts
How to fix it
Door won’t close
Fixed by these parts
How to fix it


Keep searches simple. Use keywords, e.g. "leaking", "pump", "broken" or "fit".
- Customer:
- Eric from North Andover, MA
- Parts Used:
- 700855K
- Difficulty Level:
- Easy
- Total Repair Time:
- 15 - 30 mins
- Tools:
- Pliers, Screw drivers
Burner had no temperature control other that full on.
Locate and open appropriate breaker to kill power to the range. (very important if you intend to see tomorrow).
Pull off the control knob.
Remove 2 screws that hold in control pannel.
Lift out the control pannel to the extent that the wires will let you. (2-3 inches)
Remove the nut that holds t ... Read more he switch/controller in the pannel.
Remove the wires one at a time and reconnect them to the new switch. Make sure to connect them the same way on the new switch.
Re-install the switch in the pannel.
Re-install the pannel in the stove.
Close breaker and test burner contol.
Read less
Was this instruction helpful to you?
Thank you for voting!
- Customer:
- Chris from Poway, CA
- Parts Used:
- WPY700854
- Difficulty Level:
- Really Easy
- Total Repair Time:
- Less than 15 mins
Lettering on old stove knobs was no longer visible and knobs were loose.
Took the old knobs off and replaced them with the new!
Was this instruction helpful to you?
Thank you for voting!
- Customer:
- Susan from Chino, AL
- Parts Used:
- WP5701M122-60
- Difficulty Level:
- Really Easy
- Total Repair Time:
- Less than 15 mins
Just ugly this time`
It's wonderful to get accessories for this 20 year old Jenn-Air. I love it and now it looks like new.
Was this instruction helpful to you?
Thank you for voting!