



Models
>
RS622GP1
RS622GP1 Hotpoint Range
Jump to:
Find Part by Name
Keep searches simple, eg. "belt" or "pump".
Diagrams for RS622GP1
Viewing 3 of 3


Keep searches simple, eg. "belt" or "pump".
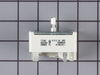
Designed for 8-inch surface burners, this heat control switch regulates temperature and turns the burner on and off using a push-to-turn style. It operates at 240 volts and supports a range of GE and ...
In Stock
Order now and your part arrives by Sep 3
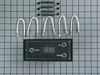
This digital timer kit replaces the mechanical clock. This kit includes the connectors and buttons. It is recommended that this kit be installed by a repair person.
No Longer Available

Special Order

Special Order
Special Order
Common Problems and Symptoms for RS622GP1
Viewing 1 of 1
Keep searches simple. Use keywords, e.g. "leaking", "pump", "broken" or "fit".
- Customer:
- anthony from maumelle, AR
- Parts Used:
- WB23K5027
- Difficulty Level:
- Really Easy
- Total Repair Time:
- Less than 15 mins
- Tools:
- Nutdriver, Screw drivers
uncontrollable heat - would not cycle off
Turn circuit breaker off.Raise up cook top and remove 6 screws that hold catch pan in place.move 3 screws that hold switch cover panel [2 sections]in place. Pull off knob for bad switch and remove 2 screws.Pull off each of the 5 wire terminal clips by removing one at a time and replacing that one on the new switch control to assure correc
... Read more
t placement.Reinstall switch cover panel and catch pan.
Read less
Was this instruction helpful to you?
Thank you for voting!
- Customer:
- Daniel from Centreville, VA
- Parts Used:
- WB15K5060
- Difficulty Level:
- Easy
- Total Repair Time:
- 15 - 30 mins
- Tools:
- Nutdriver, Screw drivers
Replace oven door handle
I first removed oven glass panel from frame by removing three screws which secured it to the frame. I then removed the spacer and handle mounts with a 1/4 inch nut driver. This is the only tool that worked for the application. Using an oen wrench or a rachet without a long extension would have taken much more time. Then reattached new
... Read more
handle using existing screws and resecured oven dorr glass to the frame.
One thing to look at is the old handle bracket vs. new bracket. The old bracket had metal threaded inserts to secure the mounting screws. The new handle is all plastic. This said, the existing screws might not work for the application and may split the plastic mounting bracket if it is over tightened. In my case they worked fine but, it is just something to think about.
One thing to look at is the old handle bracket vs. new bracket. The old bracket had metal threaded inserts to secure the mounting screws. The new handle is all plastic. This said, the existing screws might not work for the application and may split the plastic mounting bracket if it is over tightened. In my case they worked fine but, it is just something to think about.
Read less
Was this instruction helpful to you?
Thank you for voting!
- Customer:
- Mell from San Antonio, TX
- Parts Used:
- WB23K5027
- Difficulty Level:
- Easy
- Total Repair Time:
- 1- 2 hours
- Tools:
- Screw drivers
Large burner didn't work
Switching out the part was reasonably easy. The hard part twas that over 15 years some of the other parts have dried out. The oven indicator light came loose and the tabs on the clock were broken. With the help of some glue & some Z bracket it is back together minus the oven indicator light. Not perfect but cheaper than buying a new one.
Was this instruction helpful to you?
Thank you for voting!