



Models
>
RC747*03
RC747*03 Hotpoint Range
Jump to:
Find Part by Name
Keep searches simple, eg. "belt" or "pump".
Keep searches simple, eg. "belt" or "pump".
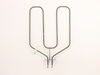
$45.00
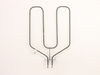
This is an OEM authorized screw-on broil element for a range. It is inside the oven on the top, where it supplies heating for broiling. A few reasons it might be replaced include: no heating coming fr...
In Stock
Order now and your part arrives by Oct 29
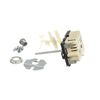
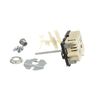
The infinite switch controls the stove top surface burner. This switch will work with most of the electrical range models with coil burner elements.
In Stock
Order now and your part arrives by Oct 29
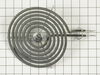
This part fits most ranges where a ceramic terminal block is used.
In Stock
Order now and your part arrives by Oct 29
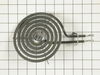
$49.29
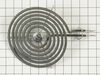
This 6-inch stove surface element features a durable coil design that delivers steady, reliable heat for everyday cooking. It’s an ideal replacement when a burner no longer heats properly or warms une...
On Order
You won't find an "off" position on this dual range thermostat because the "off" function of this thermostat is controlled by the selector switch. This thermostat operates on a range of 150 degrees to...
No Longer Available

Common Problems and Symptoms for RC747*03
Viewing 5 of 5Element will not heat
Fixed by these parts
How to fix it
Little to no heat when broiling
Fixed by these parts
How to fix it
Little to no heat when baking
Fixed by these parts
How to fix it
Oven not heating evenly
Fixed by these parts
How to fix it
Will Not Start
Fixed by these parts
How to fix it
Keep searches simple. Use keywords, e.g. "leaking", "pump", "broken" or "fit".
- Customer:
- Ernest from Bellevue, NE
- Parts Used:
- WB21X36771
- Difficulty Level:
- Really Easy
- Total Repair Time:
- 15 - 30 mins
- Tools:
- Pliers, Socket set
Large burner would operate on high setting only.
1. Removed the back panel.
2. Disconnected the wires from the old switch while connecting wires to the new switch one at a time.
3. Installed the new switch and broke off the excess metal on the post which fits into the burner knob on front of the range.
4. Replaced the burner knob and replaced the back panel.
2. Disconnected the wires from the old switch while connecting wires to the new switch one at a time.
3. Installed the new switch and broke off the excess metal on the post which fits into the burner knob on front of the range.
4. Replaced the burner knob and replaced the back panel.
Was this instruction helpful to you?
Thank you for voting!
- Customer:
- Richard from Vestal, NY
- Parts Used:
- WB44X173
- Difficulty Level:
- Easy
- Total Repair Time:
- 30 - 60 mins
- Tools:
- Nutdriver, Screw drivers, Socket set, Wrench set
Broiler Element Burned Out
Successful repair to Our GE range, manufactured prior to 1965 (when installed in house). Pulled range from wall, unplugged, removed burned-out broiler element. Previous check with GE to make cross reference of range part number to Part-select part number for this nearly 50-year-old range. Obtained new part and installed. Works. Range has
... Read more
self-cleaning oven, accidentally destroyed thermal switch attached to element mounting bracket, difficulty with frozen mounting nut. Self-cleaning still works; thermal switch locks out a solenoid which defeats door latch; prevents premature opening of oven door when oven too hot to open safely. Internet search did not find GE part but there are generic devices of the same type available; will consider installation later.
Read less
Was this instruction helpful to you?
Thank you for voting!
- Customer:
- Shawn from Newburg, PA
- Parts Used:
- WB44X173
- Difficulty Level:
- Easy
- Total Repair Time:
- 15 - 30 mins
- Tools:
- Nutdriver
Broiler element not working
Pull the stove out from the wall and unplug. Had to remove back of stove, the aluminum sheilding and the duct work to get at wires use nut driver. Then used nut driver to remove nuts from broiler unit inside stove. Take the front overn dover off first. The new part did not match up with the wires so I used a needle nose to spread the wi
... Read more
re clips just a tad so they would fit over the tabs of the broiler unit. Do all of this behind the stove as you do not have eough wire to do this effectively from the oven side. After I had the tabs fitted to the broiler unit. I removed them and fed wires back through the stove. I then went back to the front of the stove and put the broiler back in and put support bar back in to ceiling of stove and the two nuts back on to affix broiler to back of oven. Put the aluminum baccking and duct work back onto the back of the stove and plugged it back in. Pretty easy job.
Read less
Was this instruction helpful to you?
Thank you for voting!