


Models
>
GGF334BHDD
GGF334BHDD Gibson Range
Jump to:
Find Part by Name
Keep searches simple, eg. "belt" or "pump".
Diagrams for GGF334BHDD
Viewing 7 of 7


Manuals & Guides for GGF334BHDD
Click to downloadInstall
Installation Instructions
(3.13MB)
Manual
Owner's Manuals
(1MB)
Manual
Owner's Manuals
(1.10MB)
Wiring
Wiring Diagram
(0.1MB)
Keep searches simple, eg. "belt" or "pump".

$27.45
This 40-watt light bulb has a standard screw-in base and is used in many different appliances. If your current bulb is burnt out or broken you will need to replace it. This light bulb is a genuine OEM...
In Stock
Order now and your part arrives by Aug 3

In Stock
Order now and your part arrives by Aug 3

$93.29
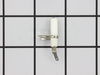
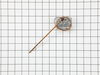
If the oven burner igniter in your gas range is no longer working, this is a genuine OEM replacement. The igniter is used to ignite the gas in order to light the oven burner. If the igniter is not wor...
In Stock
Order now and your part arrives by Aug 3

In Stock
Order now and your part arrives by Aug 3

$84.65
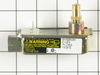
This part establishes and maintains the internal temperature of the oven cavity.
In Stock
Order now and your part arrives by Aug 3

$27.14
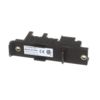
This is an anti-tip kit for your range. The kit comes with two installation screws, one metal bracket, and instructions. The kit stops your freestanding range from tipping over due to extra weight on ...
In Stock
Order now and your part arrives by Aug 3

This is now a new zinc and black-coated screw that will resist rust and
seizing.
In Stock
Order now and your part arrives by Aug 3

In Stock
Order now and your part arrives by Aug 3


$274.08
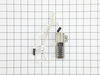
This safety valve ensures that no gas is released until the igniter has received the proper voltage needed to ignite the gas range.
In Stock
Order now and your part arrives by Aug 3

In Stock
Order now and your part arrives by Aug 3
Common Problems and Symptoms for GGF334BHDD
Viewing 7 of 7Gas igniter glows, but will not light
Fixed by these parts
How to fix it
Will Not Start
Fixed by these parts
How to fix it
Little to no heat when baking
Fixed by these parts
How to fix it
Element will not heat
Fixed by these parts
How to fix it
Oven is too hot
Fixed by these parts
How to fix it
Gas smell
Fixed by these parts
How to fix it
Oven not heating evenly
Fixed by these parts
How to fix it


Keep searches simple. Use keywords, e.g. "leaking", "pump", "broken" or "fit".
- Customer:
- Ed from Darby, PA
- Parts Used:
- 3203459
- Difficulty Level:
- Easy
- Total Repair Time:
- 15 - 30 mins
- Tools:
- Nutdriver, Screw drivers, Wrench set
Safety valve would not open
I am an HVAC tech by trade so it wasn't difficult to diagnose problem with safety valve. The hard part was being without an oven for a week. Repair was simple and effective--oven works good as new.
Shut off gas and unplugged oven. Removed floor of oven between broiler and bake section, used wrenches to disconnect gas line from saf ... Read more ety valve in back of oven, used philipps head screwdriver to remove burner assembly and gas valve, reversed process to replace. Checked out operation--OK.
Shut off gas and unplugged oven. Removed floor of oven between broiler and bake section, used wrenches to disconnect gas line from saf ... Read more ety valve in back of oven, used philipps head screwdriver to remove burner assembly and gas valve, reversed process to replace. Checked out operation--OK.
Read less
Was this instruction helpful to you?
Thank you for voting!
- Customer:
- Paul from Spokane Valley, WA
- Parts Used:
- 316116400
- Difficulty Level:
- Easy
- Total Repair Time:
- 30 - 60 mins
- Tools:
- Screw drivers
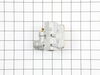
Oven light receptacle broken - bulb base broke off
Turned power off at electrical panel. Pulled oven away from wall. Removed back cover (6 screws), then unplugged wires from old receptacle. I had to pull the squeeze clips backwards & break them to remove the old receptacle - couldn't squeeze them enough to remove them otherwise. The old receptacle came out through the inside of the oven,
... Read more
and the new one snapped in easily from inside the oven as well. Replaced wiring, installed new bulb, restored power & tested. Replaced back cover. Good time to vacuum under/behind where the oven usually lives before sliding it back to the wall.
Read less
Was this instruction helpful to you?
Thank you for voting!
- Customer:
- Rusty from Howell, NJ
- Parts Used:
- 316011200
- Difficulty Level:
- Easy
- Total Repair Time:
- 15 - 30 mins
- Tools:
- Screw drivers
Igniter porcelain was cracked and burner would not light.
un-pluged stove,removed the one screw holding the broken igniter. disconected the one wire. installed new igniter and slipped on wire. The igniter came with a new bracket, the old one rusted away which is why the old igniter broke.
Was this instruction helpful to you?
Thank you for voting!