



Models
>
JGBS23SELS
JGBS23SELS General Electric Range
Jump to:
Find Part by Name
Keep searches simple, eg. "belt" or "pump".
Keep searches simple, eg. "belt" or "pump".
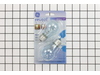
$21.95
This 40-Watt light bulb is sold individually.
It is specially designed to withstand extreme temperatures, so this bulb is compatible with a variety of appliance types including refrigerators, ranges,...
In Stock
Order now and your part arrives by Oct 29
This genuine OEM part is a top burner spark electrode, also known as a range surface burner igniter. This part is used to create a spark that lights the flame for the surface burner on your gas range....
No Longer Available
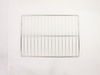
$70.95
If the racks in your oven have become discolored, or if you need a spare, this is a genuine OEM replacement. The rack is used to hold cookware in the oven, and slides in and out of the oven for easy a...
In Stock
Order now and your part arrives by Oct 29
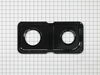
This double burner pan works with your range to catch grease and debris during the cooking process. It is designed to fit under a small and large burner. Your range will have two double burner pans, o...
In Stock
Order now and your part arrives by Oct 29
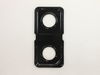
This double burner pan works with your range to catch and grease and debris during the cooking process. It is designed to fit under a small and large burner. Your range will have two double burner pan...
In Stock
Order now and your part arrives by Oct 29
In Stock
Order now and your part arrives by Oct 29
$64.85
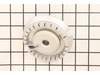
This metal burner head delivers 12,000 BTUs of heat and fits under the burner cap on gas ranges and cooktops. Measuring approximately 3.5 inches in diameter, it distributes gas evenly for a consistent...
In Stock
Order now and your part arrives by Oct 29
$56.05
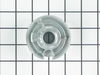
This genuine small burner is an original replacement part from GE, designed for use with a wide range of gas ranges. Positioned between the rangetop and bracket assembly and the burner cap, it plays a...
In Stock
Order now and your part arrives by Oct 29
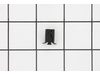
$18.54
This Genuine OEM GE Electrode Clip is a precision-engineered component designed for use across a wide range of gas ranges. Constructed from durable metal, the clip plays a critical role in securing th...
In Stock
Order now and your part arrives by Oct 29
In Stock
Order now and your part arrives by Oct 29
In Stock
Order now and your part arrives by Oct 29
On Order
Common Problems and Symptoms for JGBS23SELS
Viewing 7 of 7Gas igniter glows, but will not light
Fixed by these parts
How to fix it
Will Not Start
Fixed by these parts
How to fix it
Gas smell
Fixed by these parts
How to fix it
Little to no heat when baking
Fixed by these parts
How to fix it
Touchpad does not respond
Fixed by these parts
How to fix it
Element will not heat
Fixed by these parts
How to fix it
Timer will not advance
Fixed by these parts
How to fix it


Keep searches simple. Use keywords, e.g. "leaking", "pump", "broken" or "fit".
- Customer:
- D.W. from Jasper, AL
- Parts Used:
- WB16K10043
- Difficulty Level:
- Easy
- Total Repair Time:
- 30 - 60 mins
- Tools:
- Nutdriver, Screw drivers
Would not light.
I had to pull the drawer to get to the burner, then remove the heat shield to get to the connections. I took out the screw at the end of the burner tube, then the two screws holding the tube to the back wall. I had to pull the connections through the back wall of the oven, and disconnect them. I then removed the two screws holding the
... Read more
igniter to the old tube, and used them to connect the new igniter to the new tube. At that time, I also had to cut the old connections off of the old ignighter, and put them on the new one. I also had to redo the connection to the gas valve at the bottom of the tube. I then put all the wire and connections back through the hole in the back of the oven, connect the tube back to the rear of the oven, and the single screw to hold the end of the tube. I replaced the the heat shield, and tested. Everything worked fine.
Read less
Was this instruction helpful to you?
Thank you for voting!
- Customer:
- EARL from Buda, TX
- Parts Used:
- WB28K10189
- Difficulty Level:
- Easy
- Total Repair Time:
- 30 - 60 mins
- Tools:
- Screw drivers
I broke the oriface lines
First I needed the correct model number & the correct part numbers for the two front tube assemblies. After that well.... I removed everything on top of the stove. I then proceded to remove all the torx screws for each orifice holder bracket & igniter wires so i could raise the top lid ( without this step you will wind up replacing more t
... Read more
han one tube assembly!) Be careful when removing color coded wires so that they work with the correct burner. Remove compression nut to burner valve... i used a crowfoot. remove orifice holder from bracket & install new holder ( onto bracket). Install orifice assembly to burner valve ( do not over tighten), re-install wires to igniters, lower lid, and re-install torx screws. The correct parts require little effort to align. Last of all, test burners and check for leaks. Thanks for reading, I will continue to learn from my mistakes!
Read less
Was this instruction helpful to you?
Thank you for voting!
- Customer:
- Shannon from Blacklick, OH
- Parts Used:
- WB34K10010, WB34K10009
- Difficulty Level:
- Really Easy
- Total Repair Time:
- Less than 15 mins
Needed to replace the drip pans.
Really self explanatory. Removed the old drip pans and put in the new. No tools required. However, I would like to say I received the parts the day after I ordered them. EXTREMELY FAST SHIPPING!!
Was this instruction helpful to you?
Thank you for voting!