



Models
>
JGB860DEJ6BB
JGB860DEJ6BB General Electric Range
Jump to:
Find Part by Name
Keep searches simple, eg. "belt" or "pump".
Diagrams for JGB860DEJ6BB
Viewing 8 of 8


Keep searches simple, eg. "belt" or "pump".
In Stock
Order now and your part arrives by Sep 25
In Stock
Order now and your part arrives by Sep 25
In Stock
Order now and your part arrives by Sep 25

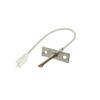
$34.27
This left-front orifice holder supports and positions the burner orifice securely to ensure proper gas flow and consistent burner performance. It helps maintain safe, even heating on your cooktop and ...
In Stock
Order now and your part arrives by Sep 25
In Stock
Order now and your part arrives by Sep 25
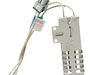
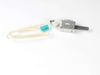
$88.67
This glow bar igniter generates the heat required to ignite gas during operation, enabling reliable and consistent heating. It plays a key safety and performance role by ensuring proper ignition timin...
In Stock
Order now and your part arrives by Sep 25
In Stock
Order now and your part arrives by Sep 25
In Stock
Order now and your part arrives by Sep 25
On Order

Special Order

In Stock
Order now and your part arrives by Sep 25
Common Problems and Symptoms for JGB860DEJ6BB
Viewing 1 of 1
Keep searches simple. Use keywords, e.g. "leaking", "pump", "broken" or "fit".
- Customer:
- Timothy F from LENNON, MI
- Parts Used:
- WB13X24741
- Difficulty Level:
- Easy
- Total Repair Time:
- 30 - 60 mins
- Tools:
- Nutdriver, Pliers, Screw drivers
Front right burner would not light.
After calling a appliance repair person out because I could not find the module, he pulled the range out so he could remove the top, back cover. He used the correct nut-driver to remove the back. The module is attached to the cover and is exposed when you take it off. Just gently pry the module from the cover. When I saw where it was I pa
... Read more
id the repair person for his visit and ordered the new module from PartSelect.com. When it arrived I proceeded to install the new module. I had to use pliers to grasp each connector going into the module and use a flat bladed screwdriver between the module and pliers to get each one to release. I took one wire off at a time and inserted each one into the new module, corresponding to the place it came out of the old module. When I had all the wires inserted into the new module I pushed the new module, using a flat bladed screwdriver, back onto the back cover of the stove. Reattached the back cover with the metal screws and pushed the range back into place. All burners are lighting as designed.
Read less
Was this instruction helpful to you?
Thank you for voting!
- Customer:
- Donald from WARSAW, MO
- Parts Used:
- WB13X24924
- Difficulty Level:
- Very Difficult
- Total Repair Time:
- More than 2 hours
- Tools:
- Screw drivers
top oven igniter
can not due repair as i have ordered the part four times and it was received broken in shipment all four times.once i recieve credits for the broken pieces i will order another.
Was this instruction helpful to you?
Thank you for voting!