


Models
>
13540-1
13540-1 General Electric Range
Jump to:
Find Part by Name
Keep searches simple, eg. "belt" or "pump".
Diagrams for 13540-1
Viewing 4 of 4


Keep searches simple, eg. "belt" or "pump".

In Stock
Order now and your part arrives by Aug 6

$61.55
This part provides a way of connecting individual electrical wires and offers protection of the device from electrical surges (voltages and/or currents).
In Stock
Order now and your part arrives by Aug 6

$14.16
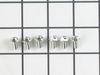
These are replacement screws designed to fit your range. They are made of metal and are approximately ¼ inch long. They come in a package of 12. These are OEM parts sourced directly from the manufacturer.
Special Order

In Stock
Order now and your part arrives by Aug 6

In Stock
Order now and your part arrives by Aug 6


Special Order


Special Order

Special Order
Common Problems and Symptoms for 13540-1
Viewing 2 of 2Will Not Start
Fixed by these parts
How to fix it
Element will not heat
Fixed by these parts
How to fix it
Keep searches simple. Use keywords, e.g. "leaking", "pump", "broken" or "fit".
- Customer:
- jonathan from willow springs, IL
- Parts Used:
- WB17T10011
- Difficulty Level:
- Easy
- Total Repair Time:
- Less than 15 mins
- Tools:
- Nutdriver, Screw drivers
terminal block melted
The existing terminal block on my Ge oven/Range had melted due to a loose wire causing sparking and starting the plastic casing of the terminal block on fire and melting it, Part select made the part easy to find and had it at my house in 2 days. All I had to do was remove six screws to take the back sheet metal cover off of the oven. U
... Read more
nscrew the terminal connections remove two mounting screws that held the terminal on to the oven body. This was a little trickier than it should have been because the melted plastic had reformed making it very hard to access the mounting screws. i then mounted the new piece and plugged the oven in, it took 15 minutes and was very easy. definitely saved me at-least a $100 for the service call i would have made if finding the part wasn't so convenient
Read less
Was this instruction helpful to you?
Thank you for voting!
- Customer:
- Brian from DOVER, PA
- Parts Used:
- WB17T10011
- Difficulty Level:
- Really Easy
- Total Repair Time:
- 30 - 60 mins
- Tools:
- Nutdriver
Original terminal block plastic shielding melted, protecting appliance when the wires overheated.
Safety first * Unplugged 220 VAC from outlet. Removed shield cover screws with 1/4" hex nut driver (5 screws). Removed all 6 silver screws from terminal block with 1/4" nut driver, freeing all wires. Removed the green ground screw and ground bracket from center terminal. Cut away (using the drill) melted original terminal block plastic to
... Read more
access the 2 black 1/4" nuts holding original terminal block onto appliance. Discarded the original damaged terminal block. Attached the new terminal block, aligning the mounting holes and the terminal block the same way the original terminal block was lined up and re-used the black 1/4" nuts (original used because the replacement package did not include new black screws). I bought a new appliance cord, since the original cord overheated. Reattached all wires using the 6 new silver screws. Start with the middle terminal by attaching the appliance wires and the ground bracket. The ground must be attached to the bracket and the bracket bridges between the terminal block and the range body. Reattached shield cover. Plugged in appliance. Note: it doesn't matter which outside wire attaches to the outside terminals (both are hot), but the middle wire (neutral) must attach to the middle terminal. However, the ring terminal should be flush on the terminal block so you don't bend the ring.
Read less
Was this instruction helpful to you?
Thank you for voting!
- Customer:
- Carolyn from North Port, FL
- Parts Used:
- WB07K10232
- Difficulty Level:
- Easy
- Total Repair Time:
- 15 - 30 mins
- Tools:
- Nutdriver
The bottom strip had become rusty and looking badly
I pulled the oven door off the hinges and took the bolts out of the bottom of the over that were holding the strip on. I then pulled the strip off and replaced it with the new on. I replaced the bolts and then replaced the door on the hinges.
Was this instruction helpful to you?
Thank you for voting!