



Models
>
10421-1
10421-1 General Electric Range
Jump to:
Find Part by Name
Keep searches simple, eg. "belt" or "pump".
Diagrams for 10421-1
Viewing 4 of 4


Keep searches simple, eg. "belt" or "pump".
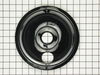
$22.91
This burner bowl, also known as a drip bowl, is an authentic OEM part for your electric range or cooktop. This part is black in color and designed to fit under the 8-inch coiled burner elements and is...
In Stock
Order now and your part arrives by Sep 27
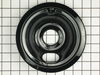
$18.95
This genuine OEM burner bowl, also known as a drip tray, is black and color and measures 6 inches in diameter. It is designed to be used under the coiled elements on an electric stove or range, in ord...
In Stock
Order now and your part arrives by Sep 27
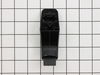
This authentic OEM part is an end cap for the door handle on your oven. It is black in color, made of plastic, can be used on either the left or right-hand side of the handle, and is sold individually...
No Longer Available
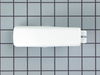
$49.45
This white end cap is sold individually. One cap is required for each end of the oven door handle.
In Stock
Order now and your part arrives by Sep 27
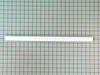
$48.35
This is just the handle. The end caps for this handle must be ordered separately if needed.
Special Order
Special Order
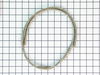
$117.86
This genuine OEM oven door gasket is designed to create a tight, heat-resistant seal between the oven door and the cooking cavity. By preventing heat from escaping, it helps maintain consistent cookin...
Special Order

Special Order
Common Problems and Symptoms for 10421-1
Viewing 2 of 2Element will not heat
Fixed by these parts
How to fix it
Door won’t close
Fixed by these parts
How to fix it
Keep searches simple. Use keywords, e.g. "leaking", "pump", "broken" or "fit".
- Customer:
- Harry from Thomasville, GA
- Parts Used:
- WB7X7183
- Difficulty Level:
- Easy
- Total Repair Time:
- 15 - 30 mins
- Tools:
- Screw drivers
The end caps broke on my oven door handle.
1st I opened the oven door and removed the 2 screws that hold the outside and inside of the door together. With the door separated I removed the 2 screws that hold the end caps in place, then removed the old end caps. I put the new end caps on the oven door handle, aligned the holes for the end cap screws and reinstalled the screws,then
... Read more
reinstalled the oven door screws,closed the oven door and started cooking.
Read less
Was this instruction helpful to you?
Thank you for voting!
- Customer:
- JoAnn from Auburn, WA
- Parts Used:
- WB2X2058
- Difficulty Level:
- Easy
- Total Repair Time:
- 15 - 30 mins
- Tools:
- Screw drivers
The gasket needed to be replaced in top oven, it was brittle and broken.
We took out the philips screws on the right and left side of inside of the oven and two hex head screws on the clip on the top of the oven in the front. Then using a slot screw driver pryed the oven liner out enough to remove old gasket and replace the new gasket. We did see in some online directions that we were suppose to remove enti
... Read more
re oven from cabinet and loosen bolts in the back. But, we were able to get enough space to get the old gasket out and new one installed. We did use a 1/4" thick piece of wood on face of oven to prevent any denting of oven when prying out the liner of the oven.
Read less
Was this instruction helpful to you?
Thank you for voting!
- Customer:
- Scott from Columbia, MD
- Parts Used:
- WB07K10043
- Difficulty Level:
- Really Easy
- Total Repair Time:
- 15 - 30 mins
- Tools:
- Pliers, Screw drivers
Oven Door Bracket Broke
After several temporary fixes, one of the end caps finally broke completely, so the handle fell off. Ordered both caps, they arrived remarkably fast, and were installed easily.
Was this instruction helpful to you?
Thank you for voting!