


Models
>
JCAS730L1WW
JCAS730L1WW General Electric Range
Jump to:
Find Part by Name
Keep searches simple, eg. "belt" or "pump".
Diagrams for JCAS730L1WW
Viewing 3 of 3


Keep searches simple, eg. "belt" or "pump".

$25.15
Drip bowls are designed to catch any spills or messes from cooking on your stove top. The bowls sit underneath the burner elements on your stove and can easily be removed for cleaning. If your drip bo...
In Stock
Order now and your part arrives by Mar 21

This metallic clip is used to help support the broil element. Sold individually.
In Stock
Order now and your part arrives by Mar 21

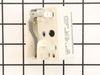
This infinite switch controls the heat level of a 6-inch, 1560-watt surface element by regulating power flow. It operates at 240 volts and helps maintain consistent temperatures. Replacing it can fix ...
In Stock
Order now and your part arrives by Mar 21

In Stock
Order now and your part arrives by Mar 21

$14.65
This part is a replacement lens for your oven or range. The lens is red in color, and when the elements are turned on, the light behind the lens will turn on to inform the user that the element is, in...
In Stock
Order now and your part arrives by Mar 21

$59.11
This part provides a way of connecting individual electrical wires and offers protection of the device from electrical surges (voltages and/or currents).
In Stock
Order now and your part arrives by Mar 21

In Stock
Order now and your part arrives by Mar 21

In Stock
Order now and your part arrives by Mar 21

In Stock
Order now and your part arrives by Mar 21

In Stock
Order now and your part arrives by Mar 21

In Stock
Order now and your part arrives by Mar 21

In Stock
Order now and your part arrives by Mar 21
Questions and Answers
We're sorry, but our Q&A experts are temporarily unavailable.
Please check back later if you still haven't found the answer you need.
Common Problems and Symptoms for JCAS730L1WW
Viewing 4 of 4Element will not heat
Fixed by these parts


How to fix it
Will Not Start
Fixed by these parts

How to fix it
Touchpad does not respond
Fixed by these parts
How to fix it
Timer will not advance
Fixed by these parts
How to fix it


Keep searches simple. Use keywords, e.g. "leaking", "pump", "broken" or "fit".
- Customer:
- jonathan from willow springs, IL
- Parts Used:
- WB17T10011
- Difficulty Level:
- Easy
- Total Repair Time:
- Less than 15 mins
- Tools:
- Nutdriver, Screw drivers
terminal block melted
The existing terminal block on my Ge oven/Range had melted due to a loose wire causing sparking and starting the plastic casing of the terminal block on fire and melting it, Part select made the part easy to find and had it at my house in 2 days. All I had to do was remove six screws to take the back sheet metal cover off of the oven. U
... Read more
nscrew the terminal connections remove two mounting screws that held the terminal on to the oven body. This was a little trickier than it should have been because the melted plastic had reformed making it very hard to access the mounting screws. i then mounted the new piece and plugged the oven in, it took 15 minutes and was very easy. definitely saved me at-least a $100 for the service call i would have made if finding the part wasn't so convenient
Read less
Was this instruction helpful to you?
Thank you for voting!
- Customer:
- Victor from Miami Beach, FL
- Parts Used:
- WB2X9719
- Difficulty Level:
- Really Easy
- Total Repair Time:
- Less than 15 mins
Heating element dangling
Snapped in the clip
Was this instruction helpful to you?
Thank you for voting!
- Customer:
- Thomas from Bonifay, FL
- Parts Used:
- WB24T10029
- Difficulty Level:
- Easy
- Total Repair Time:
- 15 - 30 mins
- Tools:
- Screw drivers, Wrench (Adjustable)
Replace stove top burners (3 total)
Unplug stove first. Raised the stove top and propped up useing wooden spoon and wife assistance holding up. Pay attention to spot brackets hand to top. Removed sheet metal screws from bracket clamp holding burner in place. Removed one extension bracket from old burner and transfeered to new burner. Removeing one bracket clamp allows the
... Read more
other one to act like a hinge and make for easy removal and replacement. Back of burner had corresponding numbers which made it easy to replace brackets in same place as old. I carefully take one electrical wire at a time from old burner and transfeered to the new burner. Replaced burner same way it came off.
Read less
Was this instruction helpful to you?
Thank you for voting!