


Models
>
CC2S985SET6SS
CC2S985SET6SS General Electric Range
Jump to:
Find Part by Name
Keep searches simple, eg. "belt" or "pump".
Diagrams for CC2S985SET6SS
Viewing 5 of 5


Keep searches simple, eg. "belt" or "pump".

$104.93
The bake element is the part of your oven that heats up in order to cook your food, and is found in the bottom part of the oven. If the temperature in your oven is inconsistent, or not heating up at a...
In Stock
Order now and your part arrives by Aug 1

$33.95
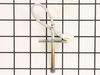
If your oven is running hot, not heating evenly, not coming up to temperature, or just not heating up at all, there may be an issue with the temperature sensor. This sensor is usually found in the bac...
In Stock
Order now and your part arrives by Aug 1

In Stock
Order now and your part arrives by Aug 1

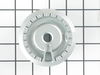
The burner cap is used on your gas range to cover the burner heads. This genuine OEM replacement part is black in color and measures approximately 3 inches in diameter. The purpose of the burner cap i...
In Stock
Order now and your part arrives by Aug 1

$47.14
This is a replacement burner cap for your gas range or cooktop. The burner cap is found on the burner head, and prevents debris from getting into the head when it is not in use. The cap is black in co...
In Stock
Order now and your part arrives by Aug 1

This is a burner cap for your gas range. The cap is black in color and about 3 inches in diameter. The cap acts as a cover for the burner head. If your old burner cap is damaged or missing, this is th...
In Stock
Order now and your part arrives by Aug 1

In Stock
Order now and your part arrives by Aug 1

$78.55
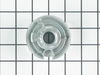
This knob accepts a D-shaped shaft. Sold individually.
NOTE: The manufacturer has updated this knob. It may be smaller than the original but will function the same.
In Stock
Order now and your part arrives by Aug 1

$88.71
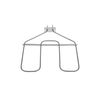
This broil element restores proper heating in wall ovens by providing direct heat from the top of the oven cavity. It’s ideal for replacing a faulty element that prevents the oven from reaching broil ...
In Stock
Order now and your part arrives by Aug 1

$56.05
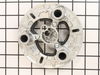
This genuine small burner is an original replacement part from GE, designed for use with a wide range of gas ranges. Positioned between the rangetop and bracket assembly and the burner cap, it plays a...
In Stock
Order now and your part arrives by Aug 1

$18.54
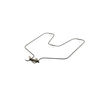
This Genuine OEM GE Electrode Clip is a precision-engineered component designed for use across a wide range of gas ranges. Constructed from durable metal, the clip plays a critical role in securing th...
In Stock
Order now and your part arrives by Aug 1

In Stock
Order now and your part arrives by Aug 1
Common Problems and Symptoms for CC2S985SET6SS
Viewing 9 of 9Little to no heat when baking
Fixed by these parts
How to fix it
Element will not heat
Fixed by these parts
How to fix it
Oven not heating evenly
Fixed by these parts
How to fix it
Will Not Start
Fixed by these parts

How to fix it
Oven is too hot
Fixed by these parts
How to fix it
Little to no heat when broiling
Fixed by these parts
How to fix it
Gas igniter glows, but will not light
Fixed by these parts
How to fix it
Touchpad does not respond
Fixed by these parts
How to fix it
Gas smell
Fixed by these parts
How to fix it


Keep searches simple. Use keywords, e.g. "leaking", "pump", "broken" or "fit".
- Customer:
- Ronald from Nassau, NY
- Parts Used:
- WB30X46987
- Difficulty Level:
- Really Easy
- Total Repair Time:
- Less than 15 mins
- Tools:
- Nutdriver, Pliers
Lower bake Element would not heat.
First I slid the stove out and unpluged it, then removed two screws,slid out element, disconected two wires, slid new element in to place, pluged two wires in ,put into place and installed two screws, pluged stove back in, and turned on to try. Works perfect.
Was this instruction helpful to you?
Thank you for voting!
- Customer:
- Peter from stamford, CT
- Parts Used:
- WB21X22134
- Difficulty Level:
- Really Easy
- Total Repair Time:
- 15 - 30 mins
- Tools:
- Nutdriver
Oven would go in to a F2 Error
Removed six 1/4" hex nuts on rear of oven. Then through front/inside removed a single 1/4" hex nut to actually remove sensor. Unplug sensor connector, remove. Reversed steps, push oven back in place and plugged in. Tested oven function.
Was this instruction helpful to you?
Thank you for voting!
- Customer:
- Paul from anna, TX
- Parts Used:
- WB30X46987
- Difficulty Level:
- Really Easy
- Total Repair Time:
- 15 - 30 mins
- Tools:
- Nutdriver, Pliers
Broken heating element
1)Turn off power to stove
2)remove 2 bolts holding heating element
3)pull element out of the back of the oven about 8" so that the wire connects is visable
4)pull wire clips off of heating element and remove element from the oven
5)put wire clips on the new heating element
6)push new heating element back into the ... Read more holes in the back of the oven
7)screw botls back into the oven holding the heating element in place
8)Turn power back on
Read less
Was this instruction helpful to you?
Thank you for voting!