



Models
>
JBP23SR1SS
JBP23SR1SS General Electric Range
Jump to:
Find Part by Name
Keep searches simple, eg. "belt" or "pump".
Diagrams for JBP23SR1SS
Viewing 5 of 5


Manuals & Guides for JBP23SR1SS
Click to downloadInstall
Installation Instructions
(1.63MB)
Install
Installation Instructions
(1.14MB)
Manual
Owner's Manuals
(8.09MB)
Manual
Owner's Manuals
(6.59MB)
Keep searches simple, eg. "belt" or "pump".
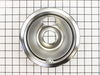
$21.95
This is a genuine replacement drip bowl, that measures 6 inches in internal diameter to match the burner, but actually measures closer to 8 inches in diameter in total to its outer edge. If this part ...
In Stock
Order now and your part arrives by Sep 18
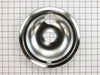
$26.95
This is a 10-inch chrome drip bowl intended to fit an 8-inch burner. This bowl is used to catch drips from food cooking on the oven element. This bowl might burn, become rusty, and just generally wear...
In Stock
Order now and your part arrives by Sep 18
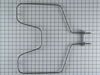
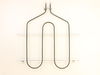
If your oven is not coming up to temperature, is not heating at all, or has inconsistent temperatures, it may be time to replace your bake element. The bake element is found at the bottom of your oven...
In Stock
Order now and your part arrives by Sep 18
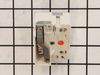
If your burner element is not turning on or heating up, it is possible there is an issue with the switch. The surface burner switch, also known as an infinite heat switch, is what turns your burner el...
In Stock
Order now and your part arrives by Sep 18
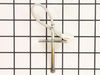
$33.95
If your oven is running hot, not heating evenly, not coming up to temperature, or just not heating up at all, there may be an issue with the temperature sensor. This sensor is usually found in the bac...
In Stock
Order now and your part arrives by Sep 18
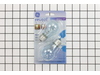
$21.95
This 40-Watt light bulb is sold individually.
It is specially designed to withstand extreme temperatures, so this bulb is compatible with a variety of appliance types including refrigerators, ranges,...
In Stock
Order now and your part arrives by Sep 18
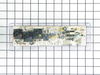
$165.05
The electronic oven control board manages heating and temperature functions in wall ovens. Modified wiring may require professional installation. Unplug the oven or shut off the circuit breaker before replacing.
In Stock
Order now and your part arrives by Sep 18
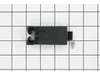
$15.26
This genuine GE drawer support is an original replacement part sourced from the manufacturer and is designed for use with electric ranges. Made of durable plastic, it attaches to the rear of the drawe...
In Stock
Order now and your part arrives by Sep 18
In Stock
Order now and your part arrives by Sep 18
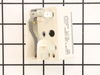
This infinite switch controls the heat level of a 6-inch, 1560-watt surface element by regulating power flow. It operates at 240 volts and helps maintain consistent temperatures. Replacing it can fix ...
In Stock
Order now and your part arrives by Sep 18
$67.95
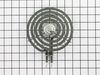
This Y-frame six inch surface burner element has four turns and a metallic center medallion.
In Stock
Order now and your part arrives by Sep 18
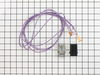
This kit comes with the terminal block, mounting clip and wires.
In Stock
Order now and your part arrives by Sep 18
Common Problems and Symptoms for JBP23SR1SS
Viewing 10 of 10Element will not heat
Fixed by these parts
How to fix it
Little to no heat when baking
Fixed by these parts
How to fix it
Oven not heating evenly
Fixed by these parts
How to fix it
Little to no heat when broiling
Fixed by these parts
How to fix it
Will Not Start
Fixed by these parts
How to fix it
Touchpad does not respond
Fixed by these parts
How to fix it
Oven is too hot
Fixed by these parts
How to fix it
Door won’t close
Fixed by these parts
How to fix it
Will not program
Fixed by these parts
How to fix it
Timer will not advance
Fixed by these parts
How to fix it



Keep searches simple. Use keywords, e.g. "leaking", "pump", "broken" or "fit".
- Customer:
- Tom from North Prairie, WI
- Parts Used:
- WB31T10011, WB31T10010
- Difficulty Level:
- Really Easy
- Total Repair Time:
- Less than 15 mins
Burner bowls needed replacement
Very easy repair, Pulled burner coil out, removed old burner bowl. Put in new burner bowl, plugged burner coil back in... easy as 1,2,3
Was this instruction helpful to you?
Thank you for voting!
- Customer:
- Stephen from Knoxville, TN
- Parts Used:
- WB31T10011, WB31T10010
- Difficulty Level:
- Really Easy
- Total Repair Time:
- Less than 15 mins
Burner Bowl Needed Replaced
Removed burner element and put in bowl
Was this instruction helpful to you?
Thank you for voting!
- Customer:
- Brad from Bedford, KY
- Parts Used:
- WB44T10010
- Difficulty Level:
- Easy
- Total Repair Time:
- 15 - 30 mins
- Tools:
- Pliers, Screw drivers
Bake Element burned out, bunt like a sparkler.
Ordered the part on Friday, got it on Saturday, very impressive. Be sure to unplug the range or disconnect the power at the breaker box before any repairs are started.
The lower (Bake) element is held in by 2 screws. Remove them and gently pull out the element to remove the power wires connected to the element. These wires are ... Read more very short and there is not much room in which to work. After having removed the wire connectors one slipped from my fingers and went back in the small opening in the back of the oven where the element is inserted. It took some time to fish out the wire. Not wanting to slide out the range I used some surgical forcepts I happen to have grab the wire ( handy to clip wires or compontents in place for some delicate repairs). Its all blind and the opening is very small plus the insulation must be pushed back to gain access. Anyway I managed to grab the wire, attached both wires to the element, replaced the plate and screws holding the element in place, all finished. Worked great. Other ranges I have owned provided a socket to plug in the element, I guess the bottom line gets in the way of quality.. Being 60 years old the worst part of this job is the getting down on my knees to do the work and getting back up again.
The lower (Bake) element is held in by 2 screws. Remove them and gently pull out the element to remove the power wires connected to the element. These wires are ... Read more very short and there is not much room in which to work. After having removed the wire connectors one slipped from my fingers and went back in the small opening in the back of the oven where the element is inserted. It took some time to fish out the wire. Not wanting to slide out the range I used some surgical forcepts I happen to have grab the wire ( handy to clip wires or compontents in place for some delicate repairs). Its all blind and the opening is very small plus the insulation must be pushed back to gain access. Anyway I managed to grab the wire, attached both wires to the element, replaced the plate and screws holding the element in place, all finished. Worked great. Other ranges I have owned provided a socket to plug in the element, I guess the bottom line gets in the way of quality.. Being 60 years old the worst part of this job is the getting down on my knees to do the work and getting back up again.
Read less
Was this instruction helpful to you?
Thank you for voting!