


Models
>
ABS200P2BB
ABS200P2BB General Electric Range
Jump to:
Find Part by Name
Keep searches simple, eg. "belt" or "pump".
Diagrams for ABS200P2BB
Viewing 3 of 3


Manuals & Guides for ABS200P2BB
Click to downloadKeep searches simple, eg. "belt" or "pump".

$104.93
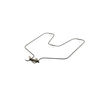
The bake element is the part of your oven that heats up in order to cook your food, and is found in the bottom part of the oven. If the temperature in your oven is inconsistent, or not heating up at a...
In Stock
Order now and your part arrives by Jul 31

$22.91
This burner bowl, also known as a drip bowl, is an authentic OEM part for your electric range or cooktop. This part is black in color and designed to fit under the 8-inch coiled burner elements and is...
In Stock
Order now and your part arrives by Jul 31

$18.95
This genuine OEM burner bowl, also known as a drip tray, is black and color and measures 6 inches in diameter. It is designed to be used under the coiled elements on an electric stove or range, in ord...
In Stock
Order now and your part arrives by Jul 31

The terminal block is the socket for the coiled burner elements of your cooktop or range in order for the burners to heat up. If your element is not heating up or turning on, there may be an issue wit...
In Stock
Order now and your part arrives by Jul 31

$70.95
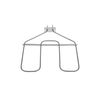
If the racks in your oven have become discolored, or if you need a spare, this is a genuine OEM replacement. The rack is used to hold cookware in the oven, and slides in and out of the oven for easy a...
In Stock
Order now and your part arrives by Jul 31

$15.26
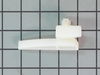
This is a replacement drawer support for your oven. The drawer support provides stability to the drawer unit as it opens and closes. If your oven drawer is hanging or will not slide in or out efficien...
In Stock
Order now and your part arrives by Jul 31

$88.71
This broil element restores proper heating in wall ovens by providing direct heat from the top of the oven cavity. It’s ideal for replacing a faulty element that prevents the oven from reaching broil ...
In Stock
Order now and your part arrives by Jul 31

In Stock
Order now and your part arrives by Jul 31

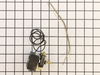
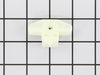
This switch controls the large burner on a range/stove top.
In Stock
Order now and your part arrives by Jul 31

In Stock
Order now and your part arrives by Jul 31

$61.55
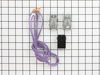
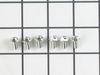
This part provides a way of connecting individual electrical wires and offers protection of the device from electrical surges (voltages and/or currents).
In Stock
Order now and your part arrives by Jul 31

In Stock
Order now and your part arrives by Jul 31
Common Problems and Symptoms for ABS200P2BB
Viewing 7 of 7Element will not heat
Fixed by these parts
How to fix it
Little to no heat when baking
Fixed by these parts
How to fix it
Oven is too hot
Fixed by these parts
How to fix it
Little to no heat when broiling
Fixed by these parts
How to fix it
Oven not heating evenly
Fixed by these parts
How to fix it
Will Not Start
Fixed by these parts
How to fix it
Door won’t close
Fixed by these parts
How to fix it


Keep searches simple. Use keywords, e.g. "leaking", "pump", "broken" or "fit".
- Customer:
- Ronald from Nassau, NY
- Parts Used:
- WB30X46987
- Difficulty Level:
- Really Easy
- Total Repair Time:
- Less than 15 mins
- Tools:
- Nutdriver, Pliers
Lower bake Element would not heat.
First I slid the stove out and unpluged it, then removed two screws,slid out element, disconected two wires, slid new element in to place, pluged two wires in ,put into place and installed two screws, pluged stove back in, and turned on to try. Works perfect.
Was this instruction helpful to you?
Thank you for voting!
- Customer:
- Paul from anna, TX
- Parts Used:
- WB30X46987
- Difficulty Level:
- Really Easy
- Total Repair Time:
- 15 - 30 mins
- Tools:
- Nutdriver, Pliers
Broken heating element
1)Turn off power to stove
2)remove 2 bolts holding heating element
3)pull element out of the back of the oven about 8" so that the wire connects is visable
4)pull wire clips off of heating element and remove element from the oven
5)put wire clips on the new heating element
6)push new heating element back into the ... Read more holes in the back of the oven
7)screw botls back into the oven holding the heating element in place
8)Turn power back on
Read less
Was this instruction helpful to you?
Thank you for voting!
- Customer:
- Alan from Hammondsville, OH
- Parts Used:
- WB20K10026
- Difficulty Level:
- Easy
- Total Repair Time:
- 30 - 60 mins
- Tools:
- Nutdriver, Pliers, Screw drivers
oven overheat would not shut off
r&r thermostat
Was this instruction helpful to you?
Thank you for voting!