


Models
>
JGB920BEC4BB
JGB920BEC4BB General Electric Range
Jump to:
Find Part by Name
Keep searches simple, eg. "belt" or "pump".
Diagrams for JGB920BEC4BB
Viewing 5 of 5


Keep searches simple, eg. "belt" or "pump".

$19.90
This 40-Watt light bulb is sold individually.
It is specially designed to withstand extreme temperatures, so this bulb is compatible with a variety of appliance types including refrigerators, ranges,...
In Stock
Order now and your part arrives by Mar 26

$58.09
This probe is used to check the internal temperature of the meat to ensure proper temperature is reached. Also known as a Meat Probe.
In Stock
Order now and your part arrives by Mar 26

$17.80
This Genuine OEM GE Electrode Clip is a precision-engineered component designed for use across a wide range of gas ranges. Constructed from durable metal, the clip plays a critical role in securing th...
In Stock
Order now and your part arrives by Mar 26

$60.13
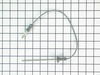
Also known as spark electrode. This part helps your burner ignite and produce flame.
In Stock
Order now and your part arrives by Mar 26

In Stock
Order now and your part arrives by Mar 26

$14.65
This part is the replacement light socket for your oven. The oven light socket provides power to the light, and at the same time holds the light bulb in place.
In Stock
Order now and your part arrives by Mar 26


In Stock
Order now and your part arrives by Mar 26

In Stock
Order now and your part arrives by Mar 26

$14.65
This orifice spud changes the burner from natural gas, to liquid propane. This orifice is sold individually. Size: .74mm
In Stock
Order now and your part arrives by Mar 26

In Stock
Order now and your part arrives by Mar 26
Questions and Answers
We're sorry, but our Q&A experts are temporarily unavailable.
Please check back later if you still haven't found the answer you need.
Common Problems and Symptoms for JGB920BEC4BB
Viewing 4 of 4Will Not Start
Fixed by these parts


How to fix it
Gas igniter glows, but will not light
Fixed by these parts
How to fix it
Little to no heat when baking
Fixed by these parts

How to fix it
Will not program
Fixed by these parts
How to fix it

Keep searches simple. Use keywords, e.g. "leaking", "pump", "broken" or "fit".
- Customer:
- Jeffrey from Freehold, NJ
- Parts Used:
- WB13X27058
- Difficulty Level:
- Really Easy
- Total Repair Time:
- Less than 15 mins
- Tools:
- Pliers, Screw drivers
Burner wouldn't light
I removed the old igniter by working a thin screwdriver under the edge of the igniter, and carefully prying it up. I then used pliers to pull off the electrical wire. Connected up the new igniter, and pushed it back into the hole. A very simple repair.
I've replaced 2 igniters on this stove. My symptoms were that when I tried ... Read more to light one of the bad burners I heard clicking, and could see the spark on the other (working) burners. So I knew the basic sparking function was working. Just that the igniter on the broken burner would not spark.
I've replaced 2 igniters on this stove. My symptoms were that when I tried ... Read more to light one of the bad burners I heard clicking, and could see the spark on the other (working) burners. So I knew the basic sparking function was working. Just that the igniter on the broken burner would not spark.
Read less
Was this instruction helpful to you?
Thank you for voting!
- Customer:
- Michael from Albuquerque, NM
- Parts Used:
- WB24T10147
- Difficulty Level:
- Really Easy
- Total Repair Time:
- 30 - 60 mins
- Tools:
- Nutdriver
Convection oven fan and door light not working
The first step was to determine whether the problem was with the fan itself or the switch. I did this by opening the back cover and using a Volt meter to verify that the fan was not getting power. (I could have skipped this step.)
Next, I unplugged the range, closed up the back cover and lifted the range hood by removing two he ... Read more x head screws that are just inside and on either side of the top of the opening in the range door. Propping the hood open, I removed the connector leading to the switch, then pushed the switch out the front. Inspection showed that the switch was damaged so I closed up the range and ordered the part from Part Select. Once the part arrived, it was a 15 minute job to unplug the range, lift the top, install the new switch, and close up the unit.
Caution. On starting to install the switch, I failed to unplug the range and my finger brushed one of the hot contacts leading to the switch. Thankfully, I was not injured. Do not repeat my mistake on this issue. Unplug the range even if you're only installing this simple switch.
Read less
Was this instruction helpful to you?
Thank you for voting!
- Customer:
- Leo from TWIN FALLS, ID
- Parts Used:
- 40A15
- Difficulty Level:
- Really Easy
- Total Repair Time:
- Less than 15 mins
- Tools:
- Nutdriver
Interior light needed replaced
Unplugged the appliance for safety. Removed two 1/4" screws that held the assembly in place. Carefully removed the wire guard that retains the glass shield. Unscrewed old light bulb and replaced with new part. Reversed the steps after cleaning glass cover.
Was this instruction helpful to you?
Thank you for voting!