


Models
>
JD968SK2SS
JD968SK2SS General Electric Range
Jump to:
Find Part by Name
Keep searches simple, eg. "belt" or "pump".
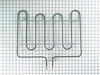
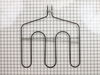
Diagrams for JD968SK2SS
Viewing 7 of 7


Manuals & Guides for JD968SK2SS
Click to downloadKeep searches simple, eg. "belt" or "pump".

In Stock
Order now and your part arrives by Aug 2

In Stock
Order now and your part arrives by Aug 2

$60.49
This probe is used to check the internal temperature of the meat to ensure proper temperature is reached. Also known as a Meat Probe.
In Stock
Order now and your part arrives by Aug 2

$54.95
This light bulb is used in the interior oven. NOTE: This bulb has looped pins, not the straight pins.
In Stock
Order now and your part arrives by Aug 2

In Stock
Order now and your part arrives by Aug 2

In Stock
Order now and your part arrives by Aug 2

$43.92
This is a broiler pan for your range. It catches drippings from the cookware, when broiling in the oven. This assembly includes the grill/grate and the bottom pan. These parts are made of porcelain. T...
In Stock
Order now and your part arrives by Aug 2

$87.67
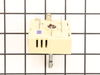
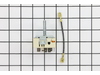
If your stove’s burner isn’t heating right or seems stuck on high, it might be time to replace the control switch. This part helps you adjust the heat on dual burners—those with both small and large c...
In Stock
Order now and your part arrives by Aug 2

$60.49
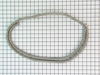
This oven door gasket helps seal in heat, ensuring even cooking and better energy efficiency. Made from durable rubber and fiberglass, it fits securely around the oven opening and is easy to install w...
In Stock
Order now and your part arrives by Aug 2

$155.32
The GE Oven Door Window Pack Assembly is a genuine OEM part that fits select GE ranges and ovens. It includes a heat-resistant inner glass panel, frame, and seals, providing insulation and clear visib...
On Order

In Stock
Order now and your part arrives by Aug 2

In Stock
Order now and your part arrives by Aug 2
Common Problems and Symptoms for JD968SK2SS
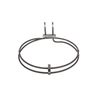
Viewing 7 of 7Element will not heat
Fixed by these parts
How to fix it
Little to no heat when baking
Fixed by these parts
How to fix it
Oven not heating evenly
Fixed by these parts
How to fix it
Little to no heat when broiling
Fixed by these parts
How to fix it
Oven is too hot
Fixed by these parts
How to fix it
Will Not Start
Fixed by these parts
How to fix it
Will not program
Fixed by these parts

How to fix it


Keep searches simple. Use keywords, e.g. "leaking", "pump", "broken" or "fit".
- Customer:
- Sean from Highlands Ranch, CO
- Parts Used:
- WB23T10015
- Difficulty Level:
- Really Easy
- Total Repair Time:
- 15 - 30 mins
- Tools:
- Nutdriver, Screw drivers
Oven was not coming up to temperature
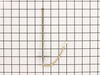
I had to remove the oven from the wall because the sensor plug connction is behind the unit. Two screws hold the sensor inside the oven and then I disconnected the lead and pulled the sensor out from the front. I installed the new sensor, tightened the two screws holding it in and connected the lead. Then reinstalled the oven into the wal
... Read more
l. Overall, a very easy repair once you get the oven out.
Read less
Was this instruction helpful to you?
Thank you for voting!
- Customer:
- John from Fresno, CA
- Parts Used:
- WB24T10119
- Difficulty Level:
- A Bit Difficult
- Total Repair Time:
- 30 - 60 mins
- Tools:
- Nutdriver, Pliers, Screw drivers
Switch failed
I turned off the circuit breaker and tested the cook top. I pulled the cook top out and laid a piece of plywood over the opening to work on the cook top and not scratch the granite counter top. The mistake I made was to turn the cook top upside down and separate the top from the housing. The dampening springs came off the burners and I
... Read more
could have damaged the elements (but they checked out ok). I turned the whole assembly right side up again and replaced the switch and put it all back together. It works great...thank you for the part.
Read less
Was this instruction helpful to you?
Thank you for voting!
- Customer:
- Linda from Oro Valley, AZ
- Parts Used:
- WB63T10034
- Difficulty Level:
- Really Easy
- Total Repair Time:
- Less than 15 mins
Aluminum Foil Bonded With Bottom
It was much easier than trying to remove the bonded aluminum foil from the false bottom/drip pan. Simply lift and remove oven front door, (see your manual), slide out false bottom and slide in new. For me it did take longer than 15 minutes, but that's because I was doing a thorough oven cleaning. The part was in the $50 range and well wor
... Read more
th it. Why didn't anyone ever tell me that you can no longer line the bottom of your oven with aluminum foil?
Read less
Was this instruction helpful to you?
Thank you for voting!