


Models
>
GRF400SV1BB
GRF400SV1BB General Electric Range
Jump to:
Find Part by Name
Keep searches simple, eg. "belt" or "pump".
Diagrams for GRF400SV1BB
Viewing 3 of 3


Keep searches simple, eg. "belt" or "pump".

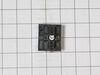
This control switch adjusts the heat level of your stove’s burner by cycling power based on your settings. It can help fix issues like overheating or burners not heating at all. Always disconnect powe...
In Stock
Order now and your part arrives by Aug 1

In Stock
Order now and your part arrives by Aug 1

In Stock
Order now and your part arrives by Aug 1

$48.35
This part is the replacement surface burner switch or element control switch for your range or cooktop. The burner switch turns the surface element on and off and controls the amount of heat the eleme...
In Stock
Order now and your part arrives by Aug 1

$25.10
This OEM halogen bulb provides warm white light for top-mounted oven lighting. It operates at 120V and 40W, with a G9 base designed for high-heat environments. Ideal for replacing a dim or burnt-out b...
In Stock
Order now and your part arrives by Aug 1

In Stock
Order now and your part arrives by Aug 1

Control your cooktop’s heat with this genuine infinite surface element switch, designed to regulate power to individual burners for precise temperature adjustment. Operating at 1250W and 240V, it allo...
In Stock
Order now and your part arrives by Aug 1

Special Order

In Stock
Order now and your part arrives by Aug 1

In Stock
Order now and your part arrives by Aug 1

$317.25
This glass cooktop maintop replaces the main cooking surface on an electric range, providing a smooth, durable surface that supports the heating elements underneath. It restores proper fit, function, ...
On Order

In Stock
Order now and your part arrives by Aug 1
Common Problems and Symptoms for GRF400SV1BB
Viewing 2 of 2Element will not heat
Fixed by these parts

How to fix it
Oven is too hot
Fixed by these parts
How to fix it


Keep searches simple. Use keywords, e.g. "leaking", "pump", "broken" or "fit".
- Customer:
- Robert from Henrico, VA
- Parts Used:
- WB24T10146
- Difficulty Level:
- Really Easy
- Total Repair Time:
- Less than 15 mins
- Tools:
- Nutdriver, Pliers, Screw drivers
surface element control contacts welded shut
First step is to unplug the range. Then simple to remove top portion of two part back panel behind controls console, then remove knob and two screws for control, then use needle nose to transfer push-on connectors from old control to new control one at a time, finish re-assembly in reverse order.
Was this instruction helpful to you?
Thank you for voting!
- Customer:
- daniel from ANN ARBOR, MI
- Parts Used:
- WB24X25013
- Difficulty Level:
- Really Easy
- Total Repair Time:
- 15 - 30 mins
- Tools:
- Nutdriver, Screw drivers
The double burner would not regulate, stuck on high
Unplug range, pull out to access back panel. Remove enough screws to access the burner switch. Remove knob, 2 screws hold the switch, remove them. You can now pull the switch out the back. It had 2 electrical plugs remove them. Install on new switch and put back together. The switch I got was exact replacement, thanks partselect
Was this instruction helpful to you?
Thank you for voting!
- Customer:
- Mary from KISSIMMEE, FL
- Parts Used:
- WB24X25013
- Difficulty Level:
- Really Easy
- Total Repair Time:
- Less than 15 mins
- Tools:
- Pliers, Screw drivers, Socket set
Right front heating element was either off or on high, no in between
Unplug range and pull it out to access the back. Pull knob off bad control at front making sure to check the orientation of the rod the knob goes on—it matters—and remove two brass screws. Then remove the four hex screws holding the top metal panel on at the back of the range (two have washers) and lift the panel off to expose the control
... Read more
s. (I then took a photo of the switch in situ to remember its orientation and how the wires were connected.) Use pliers to remove wires, then connect up and install the new switch, and put the brass screws back in at front to hold it in place. I used the pliers to turn the rod to the correct orientation before putting the knob back on. Reinstall the back panel with four hex screws. Plug the range in and test.
FYI the directions for accessing the infinite switch that came with the range also had me remove two screws under each side of the front of the control panel, but as far as I could tell that wasn’t necessary.
FYI the directions for accessing the infinite switch that came with the range also had me remove two screws under each side of the front of the control panel, but as far as I could tell that wasn’t necessary.
Read less
Was this instruction helpful to you?
Thank you for voting!