


Models
>
JGB920BEC3BB
JGB920BEC3BB General Electric Range
Jump to:
Find Part by Name
Keep searches simple, eg. "belt" or "pump".
Diagrams for JGB920BEC3BB
Viewing 4 of 4


Keep searches simple, eg. "belt" or "pump".

$19.90
This 40-Watt light bulb is sold individually.
It is specially designed to withstand extreme temperatures, so this bulb is compatible with a variety of appliance types including refrigerators, ranges,...
In Stock
Order now and your part arrives by Mar 26

$58.09
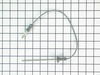
This probe is used to check the internal temperature of the meat to ensure proper temperature is reached. Also known as a Meat Probe.
In Stock
Order now and your part arrives by Mar 26

$17.80
This Genuine OEM GE Electrode Clip is a precision-engineered component designed for use across a wide range of gas ranges. Constructed from durable metal, the clip plays a critical role in securing th...
In Stock
Order now and your part arrives by Mar 26

$60.13
Also known as spark electrode. This part helps your burner ignite and produce flame.
In Stock
Order now and your part arrives by Mar 26

In Stock
Order now and your part arrives by Mar 26


In Stock
Order now and your part arrives by Mar 26

In Stock
Order now and your part arrives by Mar 26

$14.65
This orifice spud changes the burner from natural gas, to liquid propane. This orifice is sold individually. Size: .74mm
In Stock
Order now and your part arrives by Mar 26

In Stock
Order now and your part arrives by Mar 26

Questions and Answers
We're sorry, but our Q&A experts are temporarily unavailable.
Please check back later if you still haven't found the answer you need.
Common Problems and Symptoms for JGB920BEC3BB
Viewing 4 of 4Will Not Start
Fixed by these parts


How to fix it
Gas igniter glows, but will not light
Fixed by these parts
How to fix it
Little to no heat when baking
Fixed by these parts

How to fix it
Will not program
Fixed by these parts
How to fix it

Keep searches simple. Use keywords, e.g. "leaking", "pump", "broken" or "fit".
- Customer:
- Jeffrey from Freehold, NJ
- Parts Used:
- WB13X27058
- Difficulty Level:
- Really Easy
- Total Repair Time:
- Less than 15 mins
- Tools:
- Pliers, Screw drivers
Burner wouldn't light
I removed the old igniter by working a thin screwdriver under the edge of the igniter, and carefully prying it up. I then used pliers to pull off the electrical wire. Connected up the new igniter, and pushed it back into the hole. A very simple repair.
I've replaced 2 igniters on this stove. My symptoms were that when I tried ... Read more to light one of the bad burners I heard clicking, and could see the spark on the other (working) burners. So I knew the basic sparking function was working. Just that the igniter on the broken burner would not spark.
I've replaced 2 igniters on this stove. My symptoms were that when I tried ... Read more to light one of the bad burners I heard clicking, and could see the spark on the other (working) burners. So I knew the basic sparking function was working. Just that the igniter on the broken burner would not spark.
Read less
Was this instruction helpful to you?
Thank you for voting!
- Customer:
- Michael from Weatogue, CT
- Parts Used:
- WB18K10035, WB16T10011, WB13X27058, WB04T10012, WB04T10011, WB01K10112
- Difficulty Level:
- A Bit Difficult
- Total Repair Time:
- More than 2 hours
- Tools:
- Nutdriver, Pliers, Screw drivers
No spark at one burner
Other writers have claimed that this is a "really easy" job. They apparently had one or more of: 1. Less used appliance. 2. Never spilled anything on the cooktop 3. Much better luck. In my case, the apparently faulty igniter absolutely would not pull out. I removed it by removing the burner retaining screws and prying under the burner cas
... Read more
ting. Having done that, I cleaned the igniter and tested it again. None of the igniters worked, and I could hear arcing under the cooktop, indicating one or more of the igniter HV wires had somehow grounded. After a fruitless search for instructions on raising the cooktop, I stumbled upon an envelope glued to the back of the range that told me to remove all four burners and igniters and to release the cooktop by inserting a thin screwdriver under the front edge about 3" from each end to release the spring clips. Several of the igniters were cemented in place with caramelized sugar and required some pretty vigorous prying to dislodge. If I had this to do again on a range that had been ridden hard, I wouldproactively order a full set of gaskets (they're fragile), the HV harness (even if it doesn't leak as mine did, the igniter connectors degrade from heat exposure), a set of electrode mounting clips (none of them were much use either), and enough igniters to replace any that don't work plus at least one. I pried out the recalcitrant igniters; in retrospect I should have crushed them because of the severe risk imposed by prying of breaking either a burner casting or the cooktop -- either of which are far more expensive than another igniter.
Read less
Was this instruction helpful to you?
Thank you for voting!
- Customer:
- Michael from Albuquerque, NM
- Parts Used:
- WB24T10147
- Difficulty Level:
- Really Easy
- Total Repair Time:
- 30 - 60 mins
- Tools:
- Nutdriver
Convection oven fan and door light not working
The first step was to determine whether the problem was with the fan itself or the switch. I did this by opening the back cover and using a Volt meter to verify that the fan was not getting power. (I could have skipped this step.)
Next, I unplugged the range, closed up the back cover and lifted the range hood by removing two he ... Read more x head screws that are just inside and on either side of the top of the opening in the range door. Propping the hood open, I removed the connector leading to the switch, then pushed the switch out the front. Inspection showed that the switch was damaged so I closed up the range and ordered the part from Part Select. Once the part arrived, it was a 15 minute job to unplug the range, lift the top, install the new switch, and close up the unit.
Caution. On starting to install the switch, I failed to unplug the range and my finger brushed one of the hot contacts leading to the switch. Thankfully, I was not injured. Do not repeat my mistake on this issue. Unplug the range even if you're only installing this simple switch.
Read less
Was this instruction helpful to you?
Thank you for voting!